Category: Warriors of Athena

Posts about the skirmish wargame, ‘Warriors of Athena’ by Joseph A McCullough.

Can I Kit-bash some centaurs for Warriors of Athena?

A cutting mat, sprue of miniatures and cutting tools.

In this post I look at how I kitbashed some centaurs for Warriors of Athena using some Wargames Atlantic horses.Victrix Greek Peltasts.Warlord Games ancient greek hoplites, Victrix Armoured Spartan Hoplites and some Victrix Dark Age archers.

It has been a while since I last posted but I have been managing to do the odd bit of hobbying here and there. Much of my focus has been getting stuff ready to play Warriors of Athena.

I’m not sure where I first saw someone online kit-bashing centaurs but it struck me as a great idea and I thought I’d give it a try. It felt a little ambitious with my limited kit-bash skills but I thought I’d have a go and see how it went, after all my Skeletal Hoplites weren’t a total disasster!

What I used

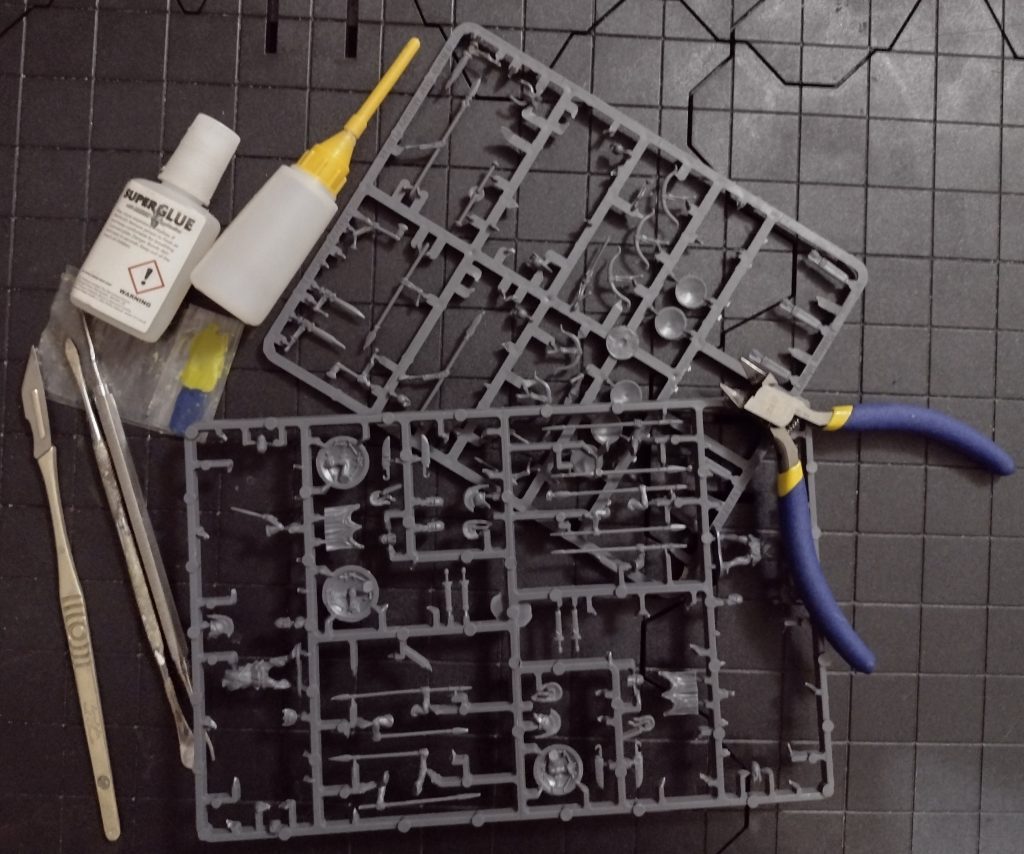
  • Milliput – two part epoxy putty. Sets reasonably hard and can be thinned with water while you work it.
  • Green Stuff – two part epoxy putty that sets with a little bit of plasticity (I think that is the right word – it is a bit bendy).
  • Bluestuff – a moldable thermoplastic.
  • Polystyrene cement – I’m currenly using humbrol, very old humbrol. I miscalculated on how much I actually use a few years ago and bought a bunch of it. It unfortunately doesn’t last for ever!
  • Sharp things – hobby knives and clippers.

For most of the above a quick search in the browser of your choice will give you loads of options of where to buy.

The Kitbash

Two parts of a horse body miniature and a greek peltast without head and right arm.
Two parts of the horse body and a greek javelin man

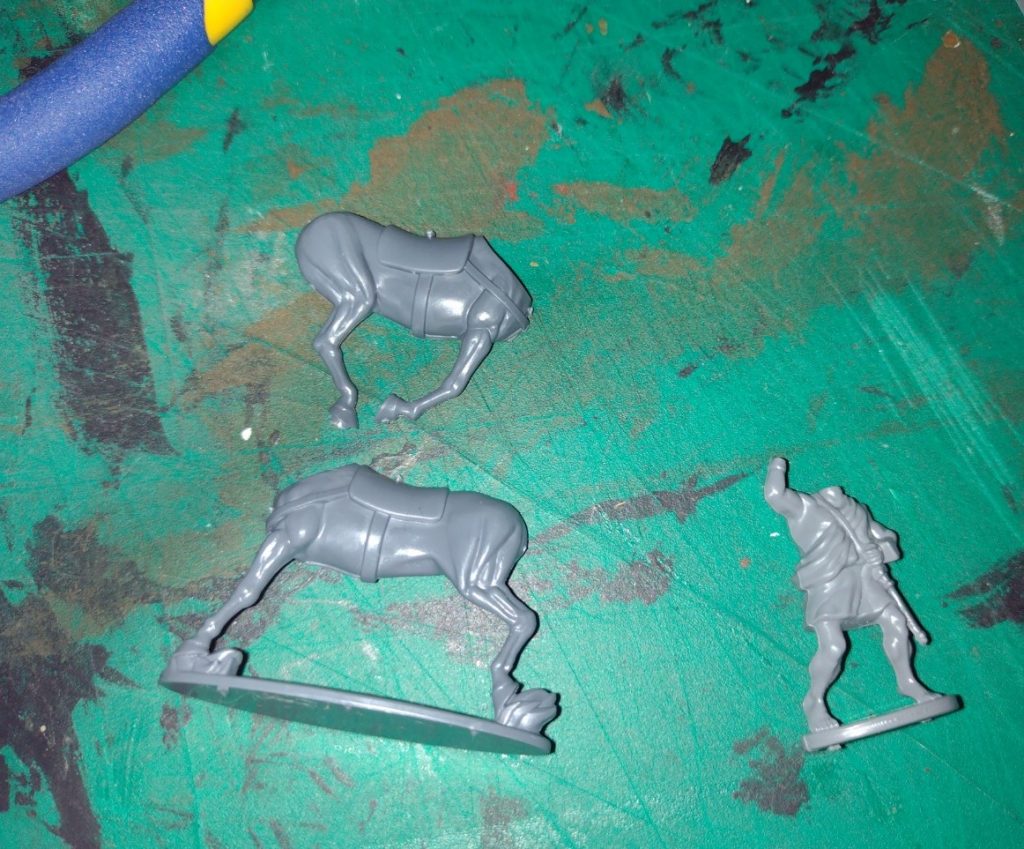
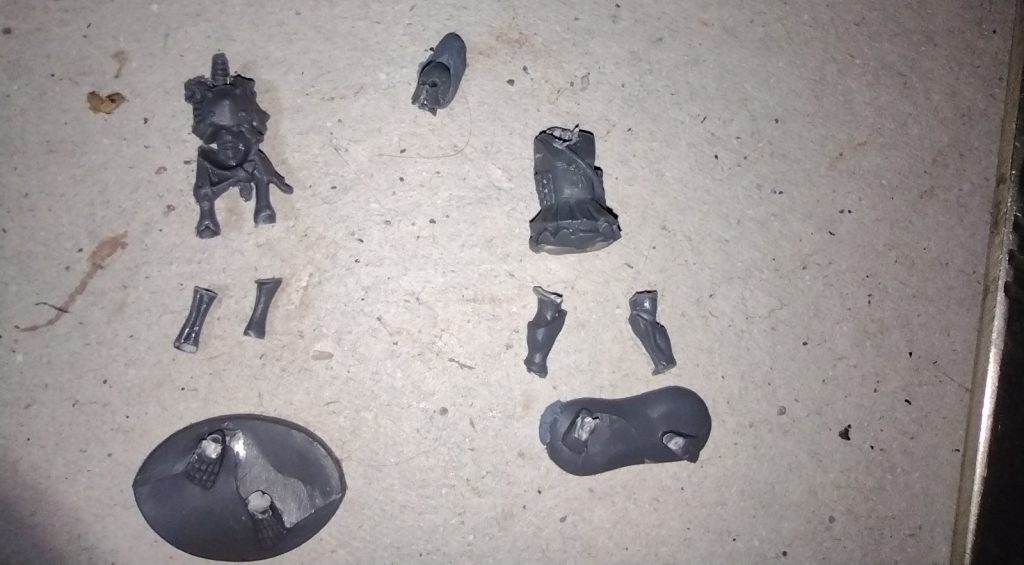
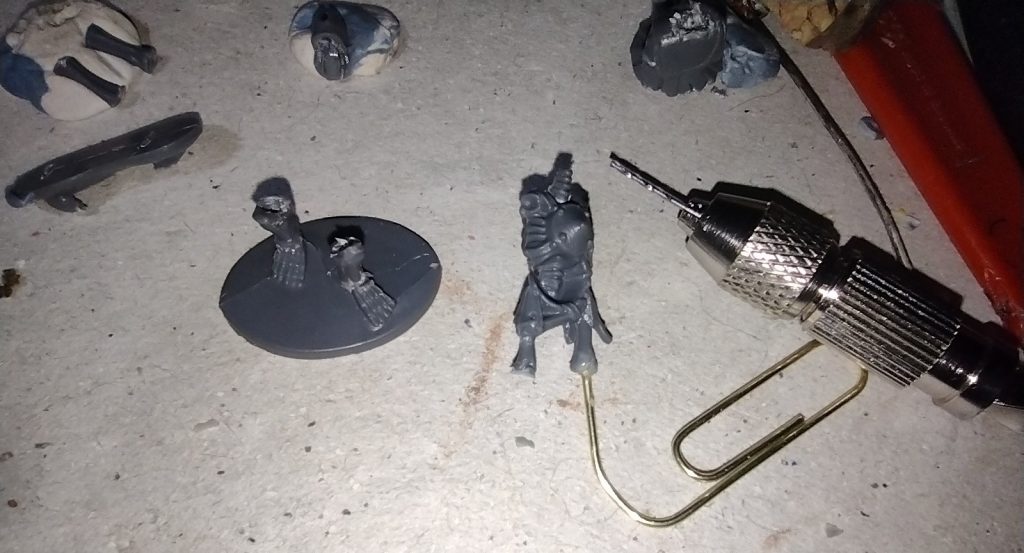
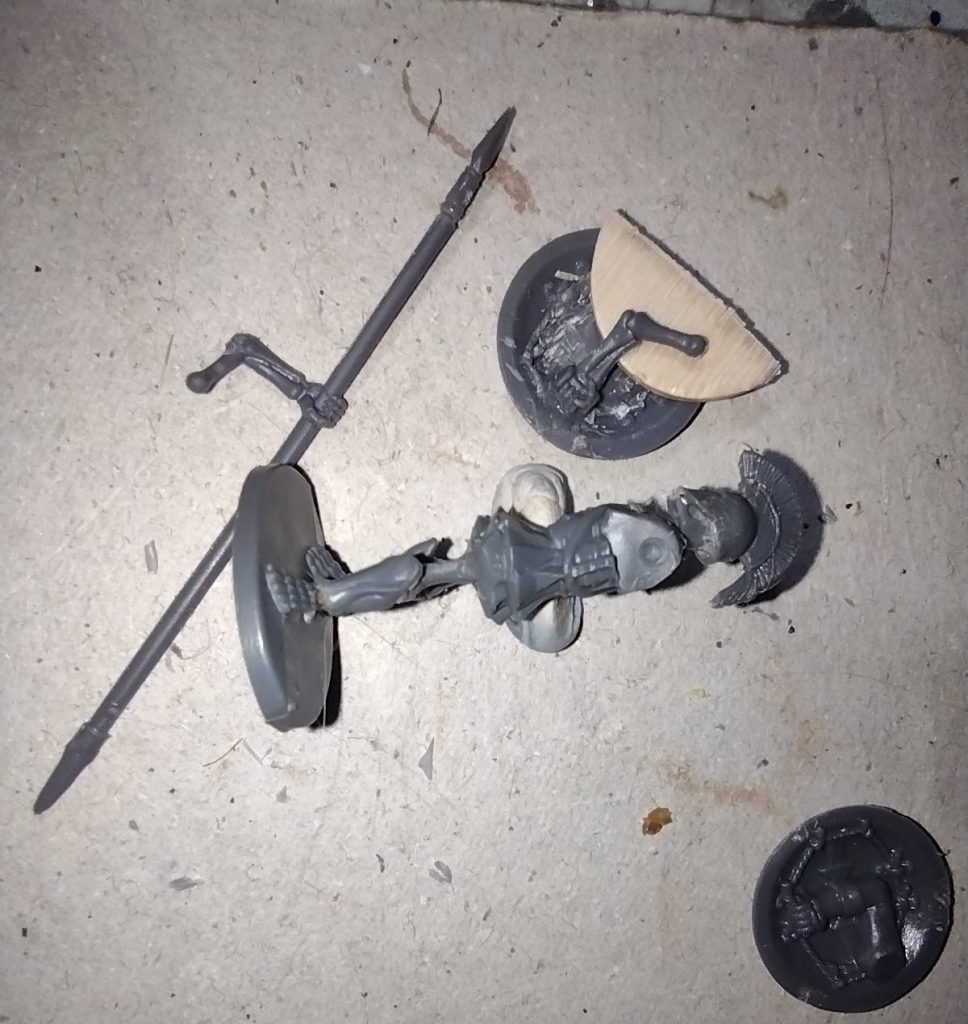
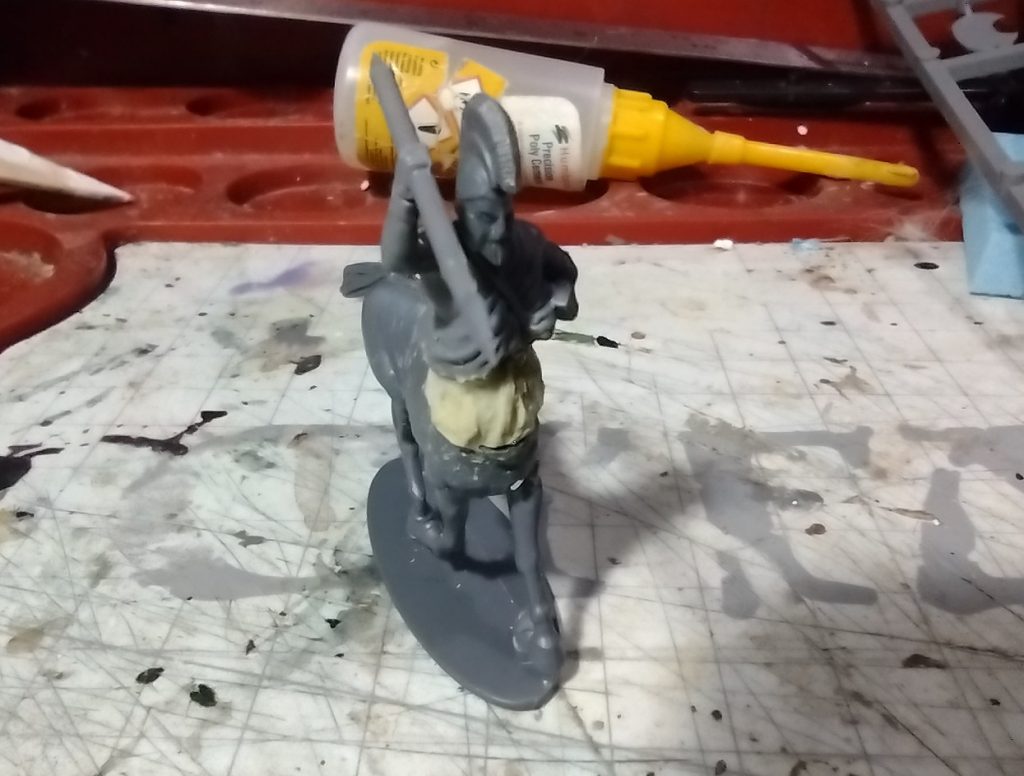
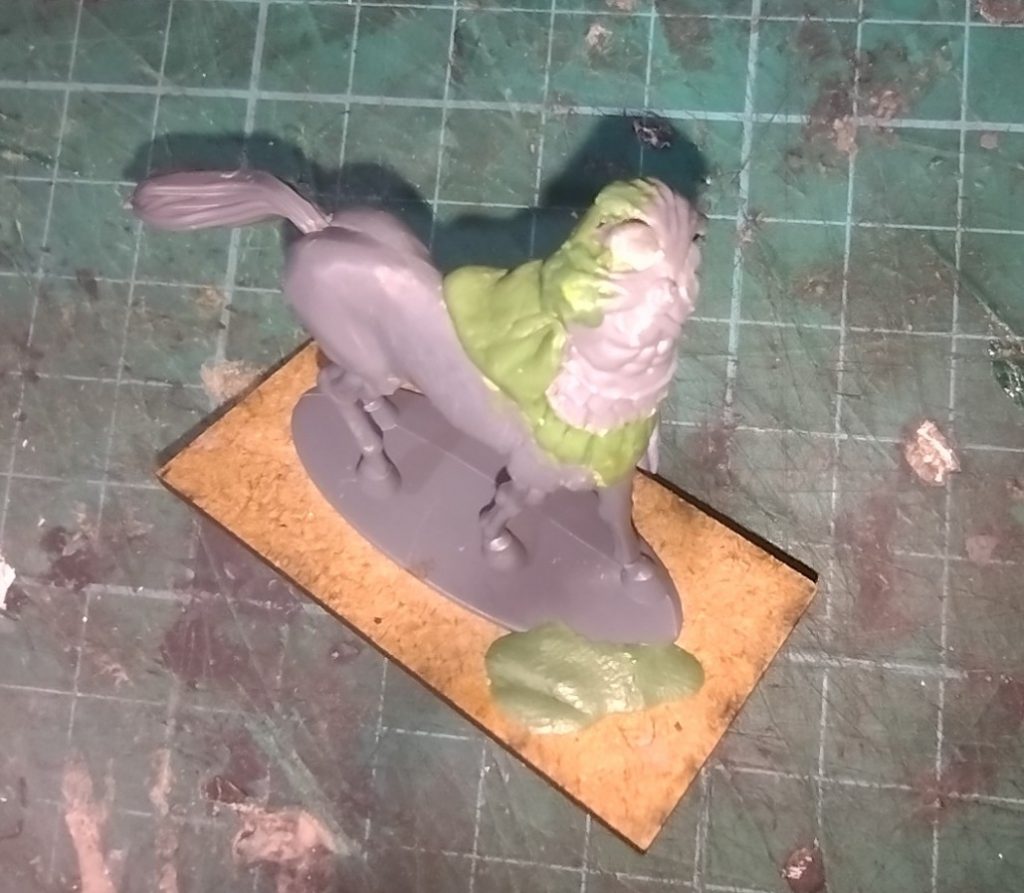
First step was to build the horse body and chop the bottom part of a greek javelin man and add the top to the horse body.

Top half of a greek javeling man glued to a horse body.

This left a sizeable gap underneath the waist of the javelin man so I filled this with trusty milliput.

The gap between the horse body and javelin man body is filled with milliput two part epoxy putty.

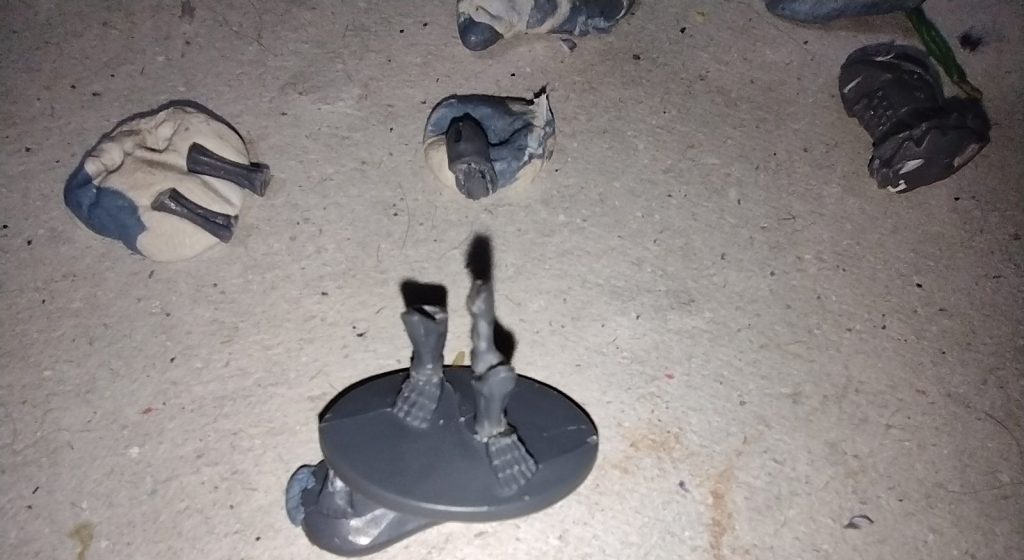
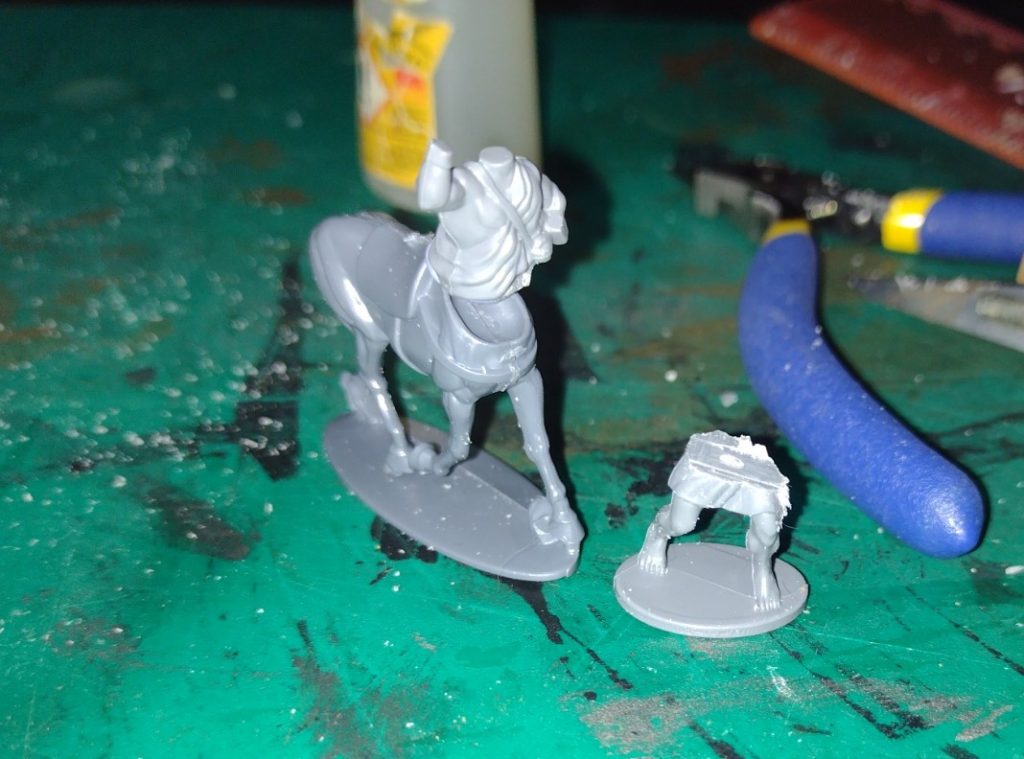
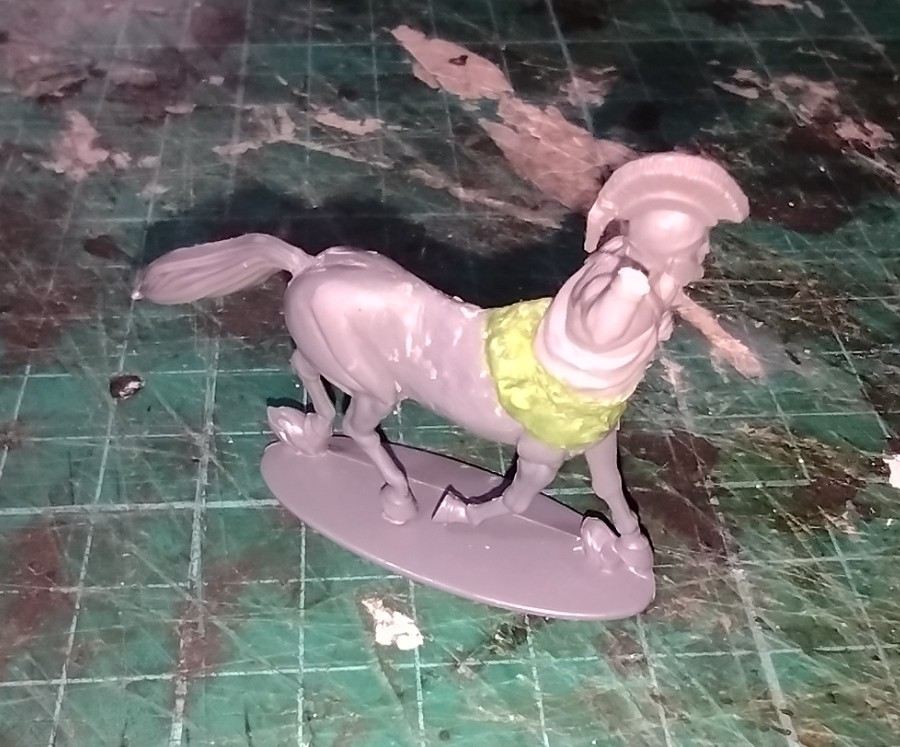
An earlier step I forgot about was cutting away the saddles and straps from the horse bodies and filling them smooth.

Three horse bodies one with the javelin man torso and the other two showing where the saddle and tack are being removed.

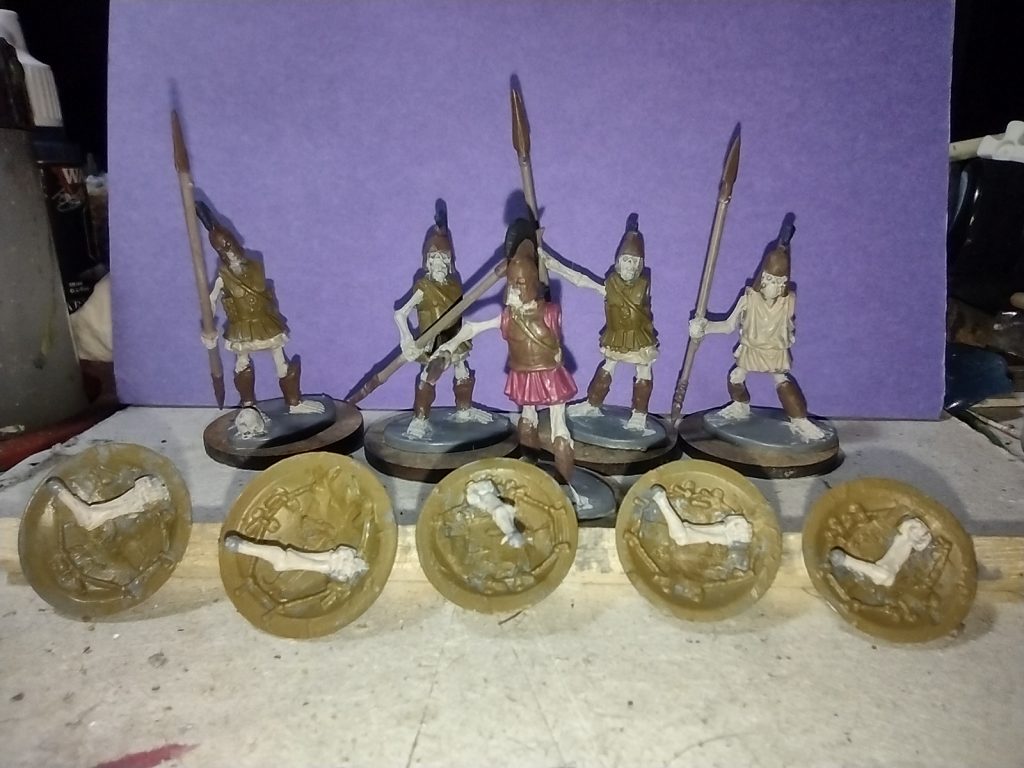
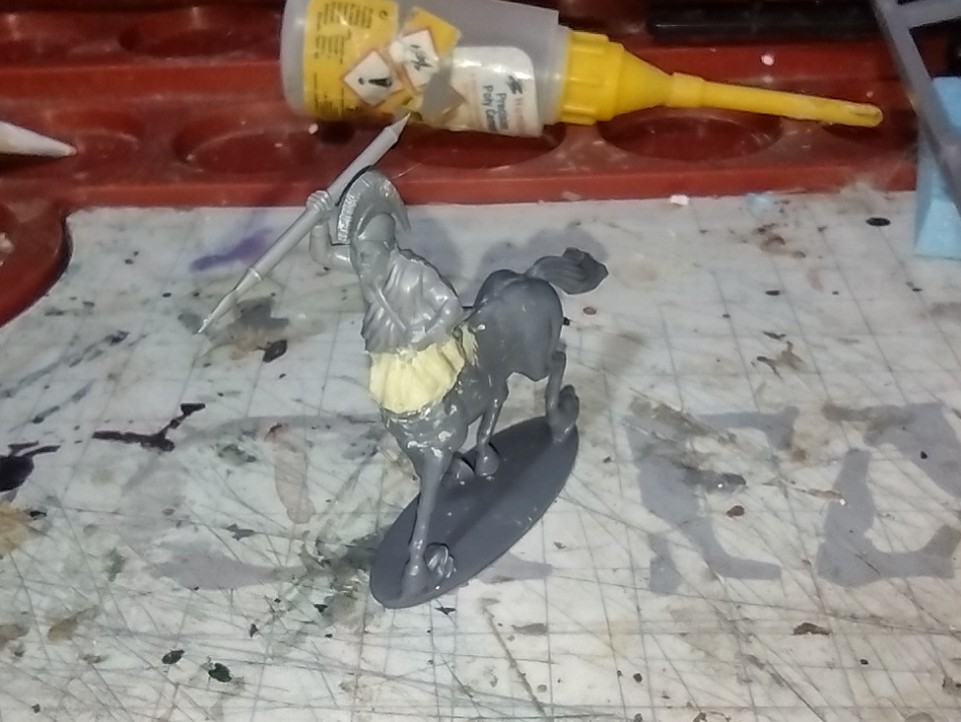
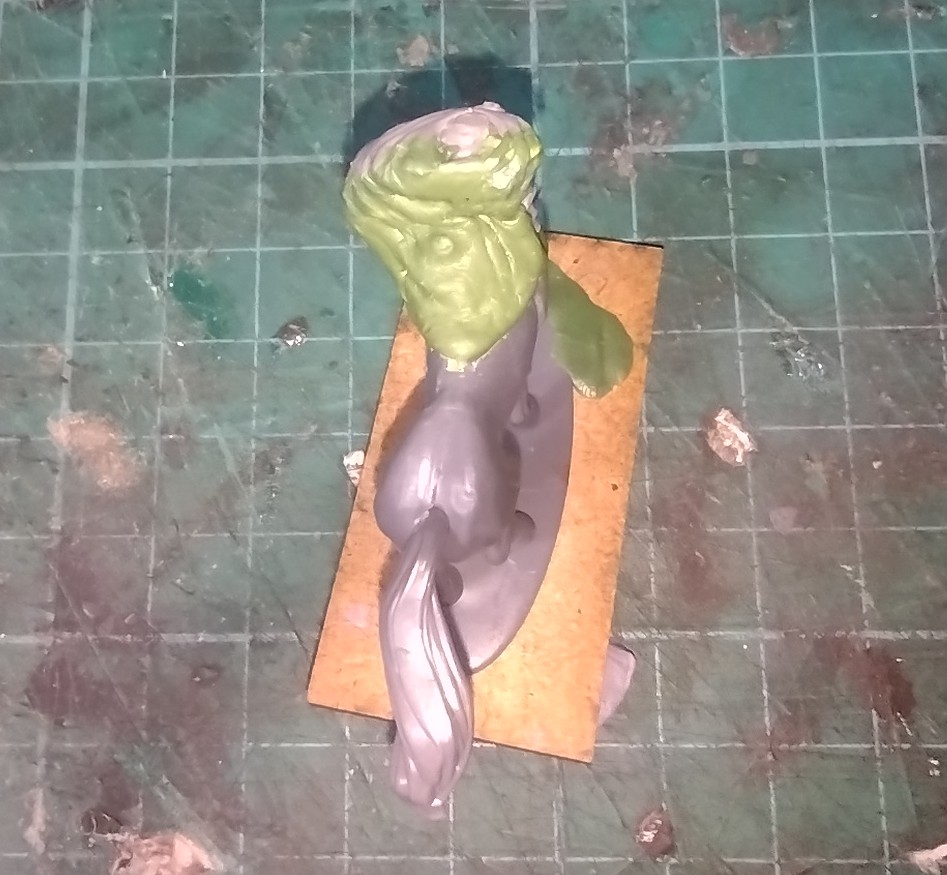
With the gap between filled, I used more milliput to sculpt the lower part of the javelin man’s tunic. I used a head from the ancient Greek hoplites and added a hand with a javelin. For on the table the Javelins can double as spears depending on the needs of the scenario.

Javelin man 'centaur' with head and hand weilding a javelin added.
This cutting mat isn’t much better. My excuse is that both of them are very old.
A different view of the finished centaur  miniature.
A different view of the finished ‘centaur’.

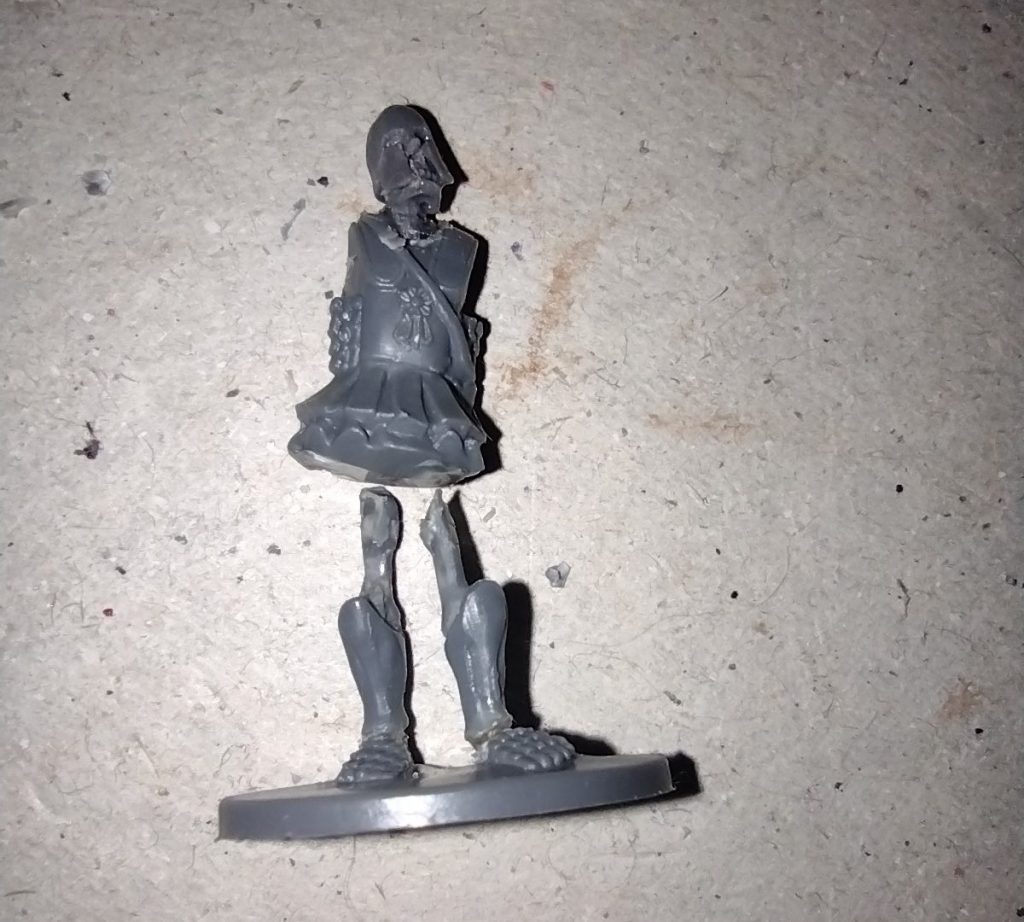
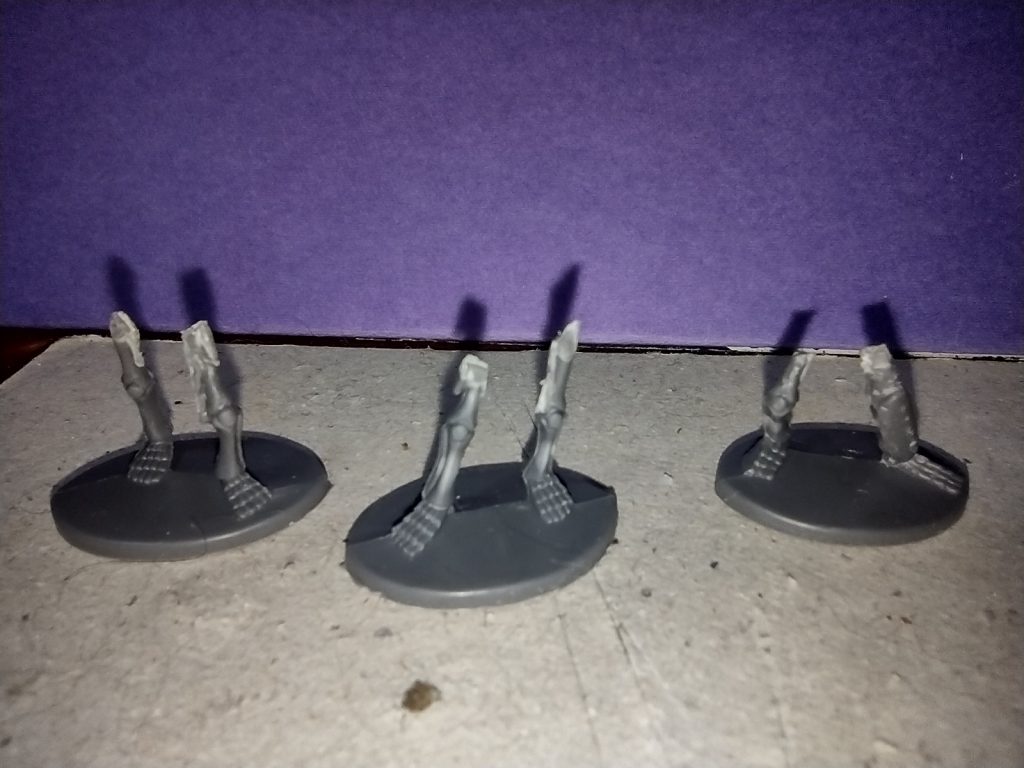
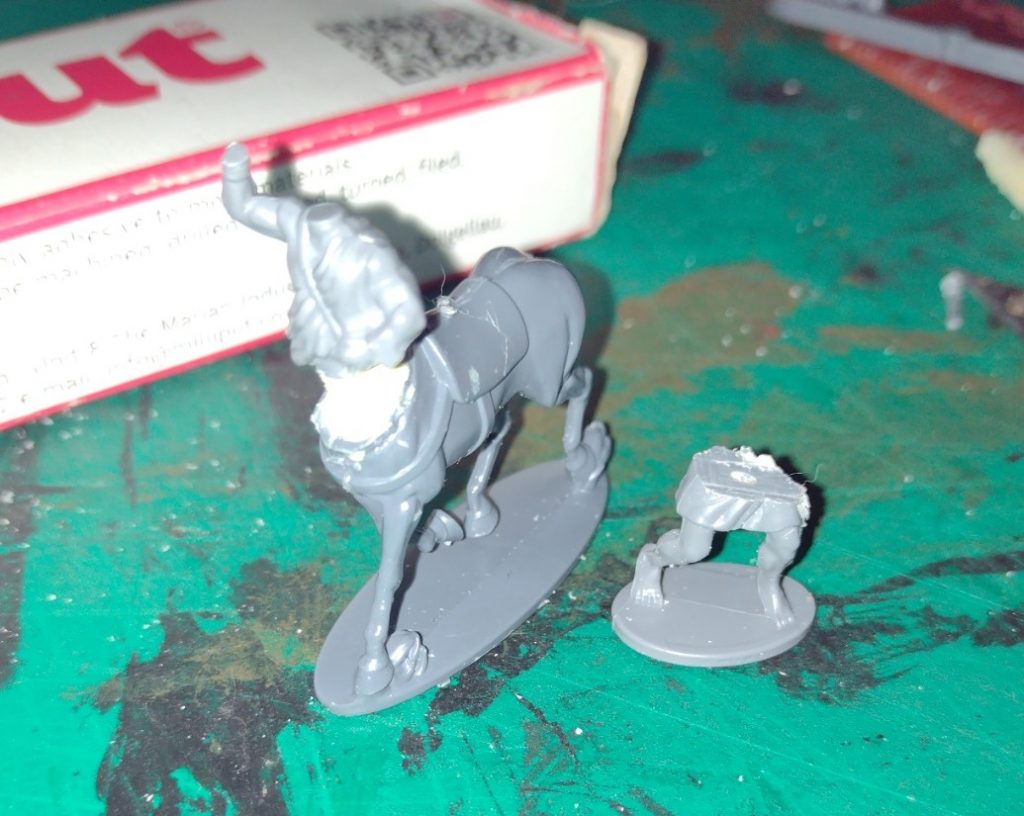
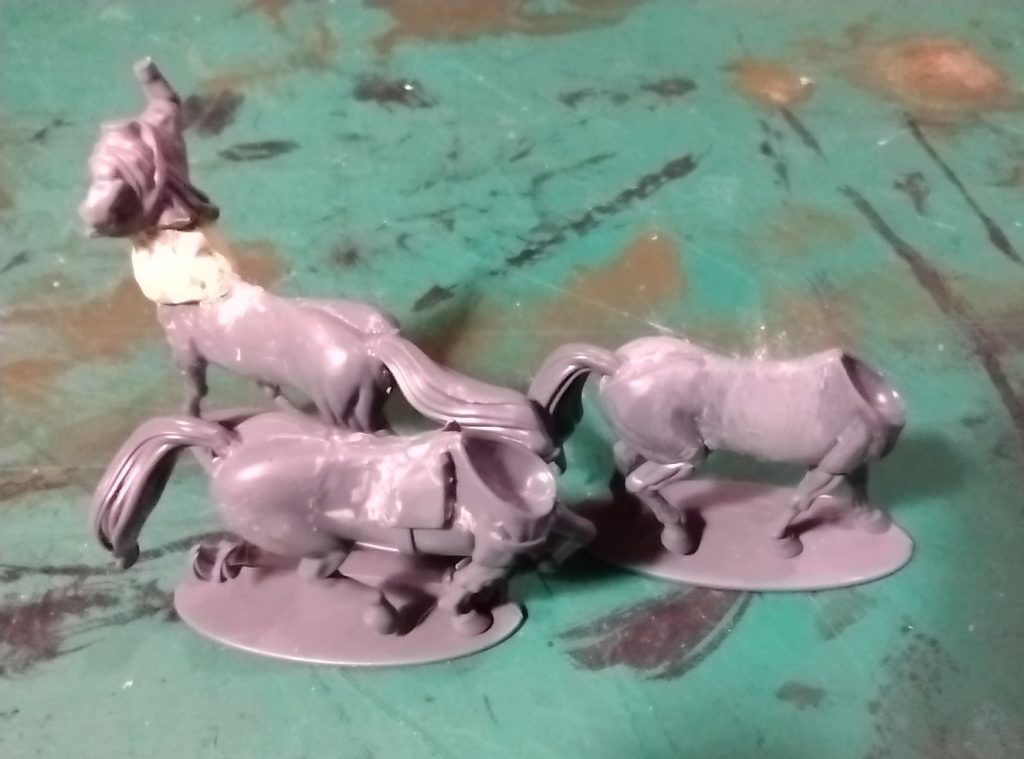
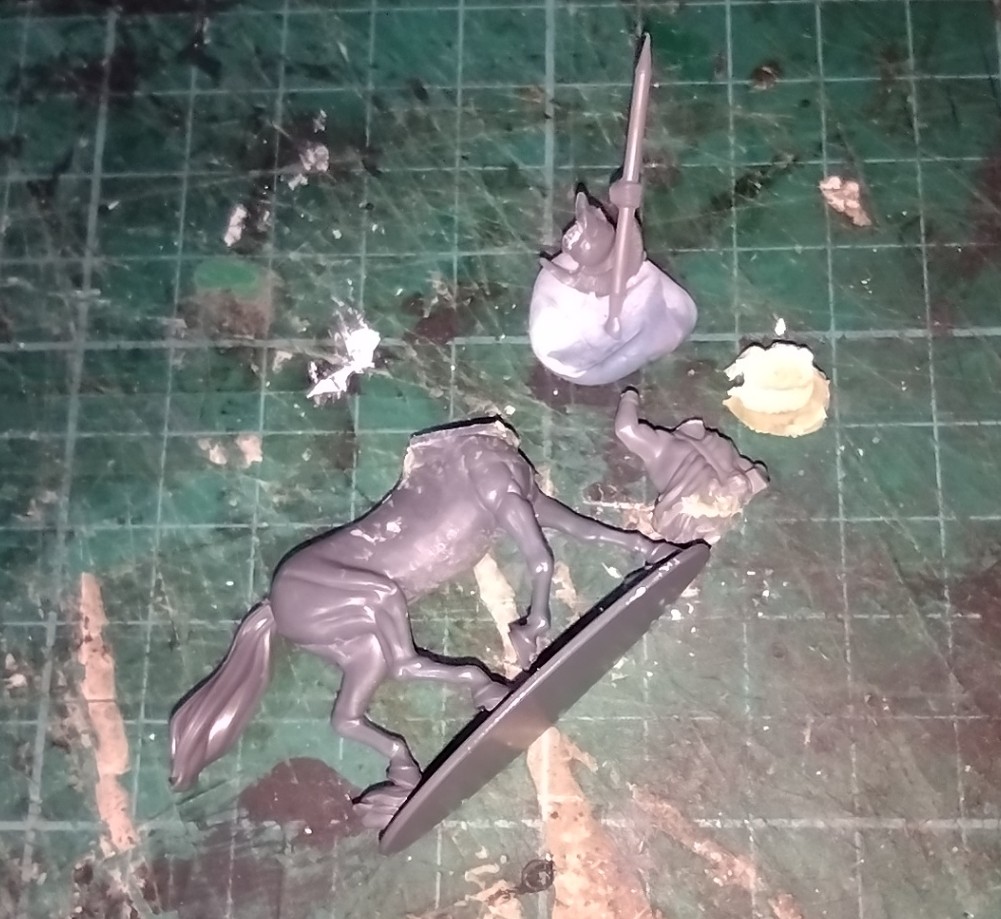
I wasn’t happy with the finished miniature (well two of them at that point actually). The body was too long and looked out of proportion so it was time to snap off the torso and start again. There was a part of the horse miniature that was added to the horse body between the head and neck, which wasn’t helping so I removed that as well.

The centaur miniature with the human torso broken off.

With those changes that was about it, apart from the paint. 

The re=built centaur miniature with lower tunic sculpted with a mix of greenstuff and milliput epoxy putties.
Another centaur but with greenstuff/milliput mix for the lower tunic.

I went with mainly speed paints over a white drybrush, there are hundreds of youtube videos of Slap Chop method (I really wish someone would come up with a better name but I suppose ‘white drybrushy over darker painty sort of thing’ isn’t as catchy), so I didn’t do a step by step of the painting.

I’m always in two minds about the finish I get with speed paints. I’m not sure where I go wrong but it often looks a bit bland compared to how I see the results of Youtubers paint jobs. There are extra steps you can do of course, double slap chop, selective highlighting and probably more, but this seems like defeating the object a bit for me. I just need to find my own work-flow I suppose. I do like the results Peachy gets so I might have to re-watch his videos closer to get some tips, peachy tips! Do you see what I did there?

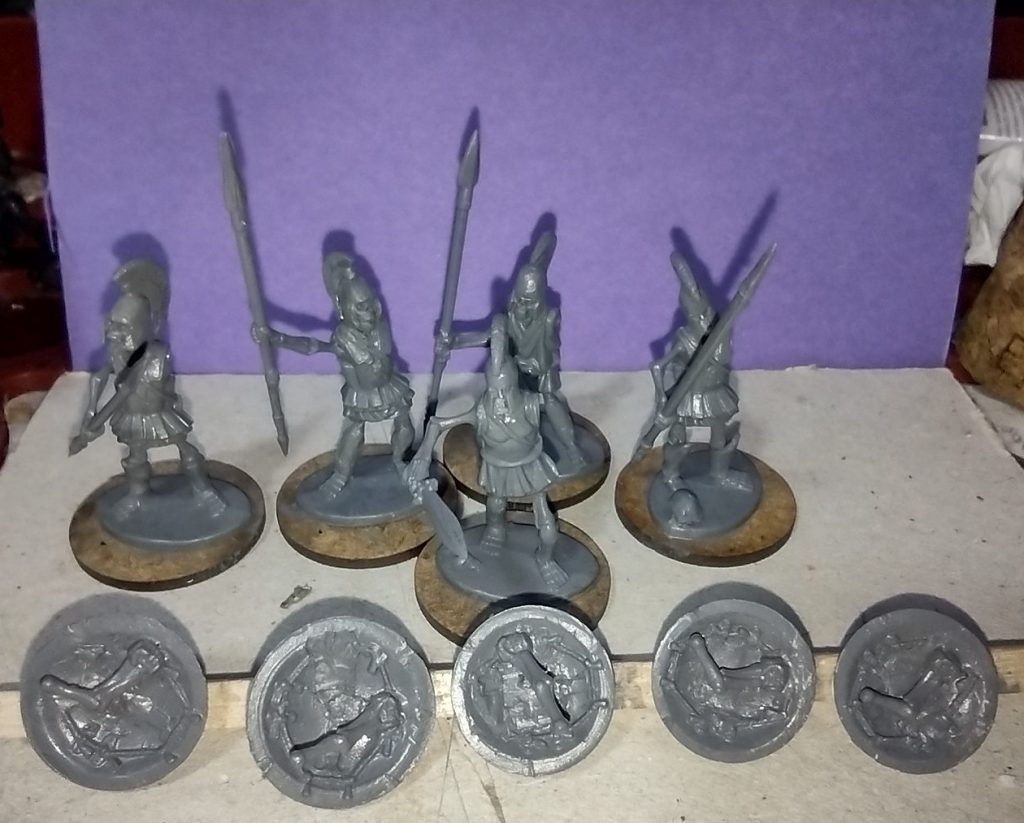
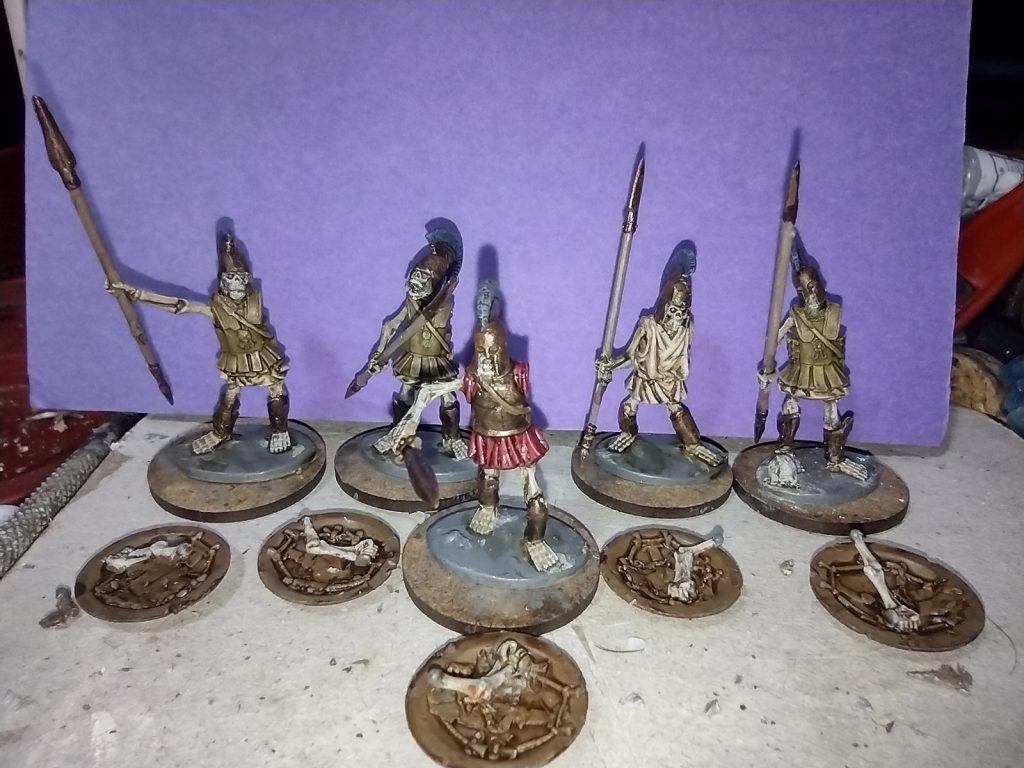
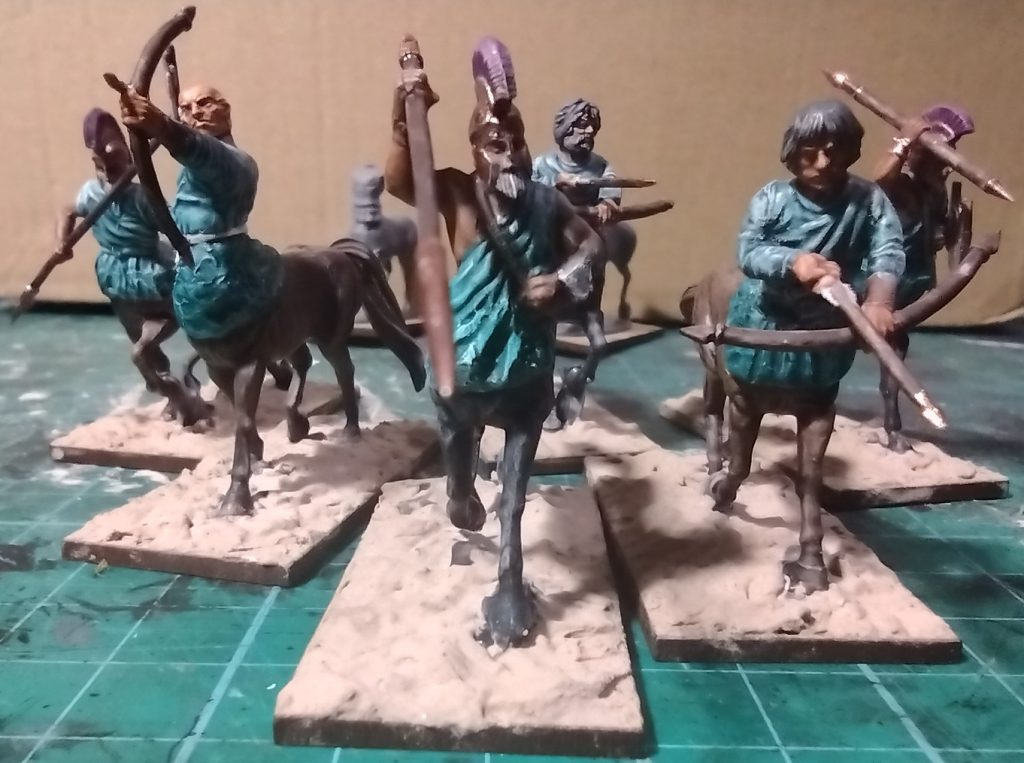
Anyway, after the three spearmen I built some archers. I went with giving them all similar colour schemes to unify them. Here is a group shot of the first six kit-bashed centaurs.

Six kitbashed centaur miniatures.

The Leaders

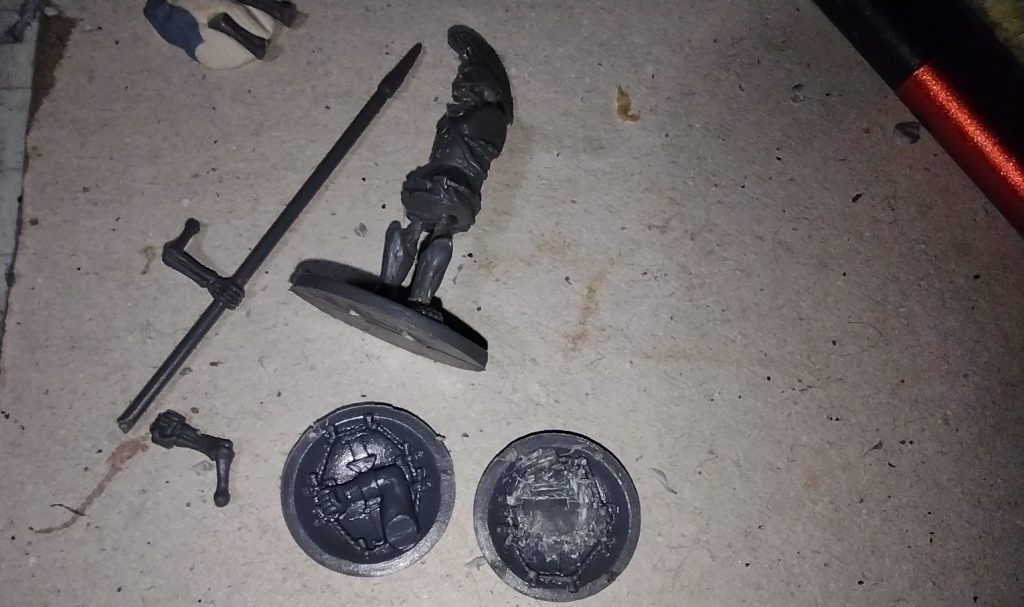
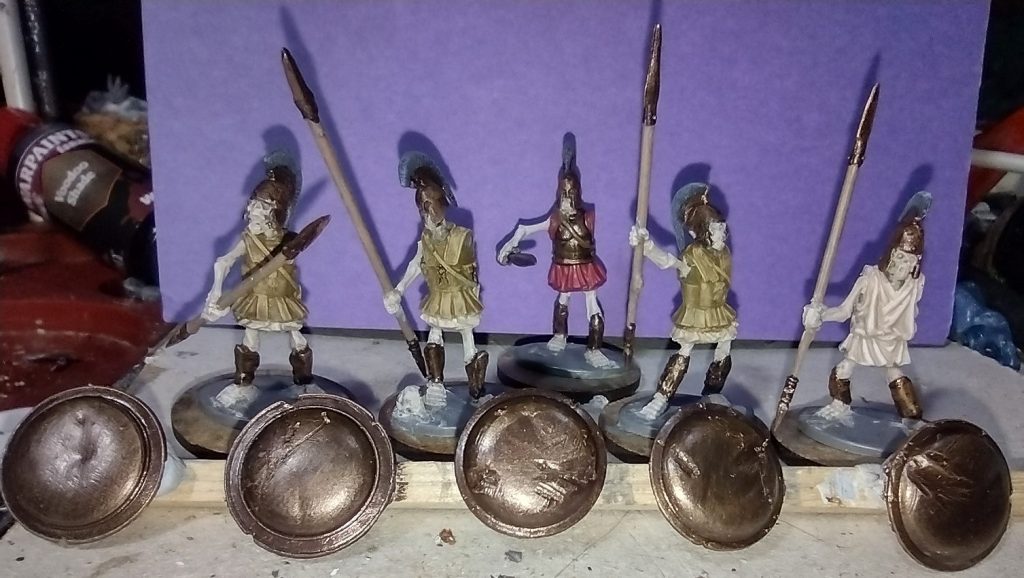
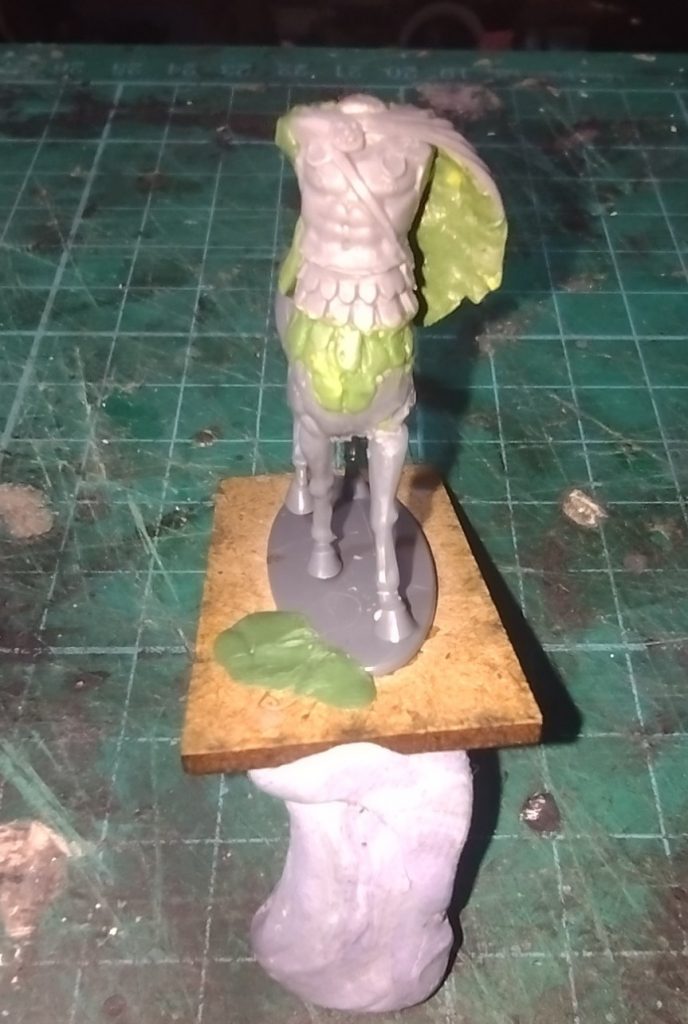
The Warriors of Athena Quest book also lists three leaders for the centaurs so I wanted these to look distinct from the three spearmen so used the armoured Spartan hoplites (not sure how this is pronounced. I always thought it was ’hop-lights’ but I noticed that Total War Rome goes with what sounds like ’hop-lee-tez’ – if you know, let me know in the comments).

These would require sculpting some extra layers for their armour to tie in with what they are wearing. I went with green stuff.

Kit-bashed centaur with armoured sparten hoplite for the human torso part and a row of green stuff  expoxy putty sculpted armour.

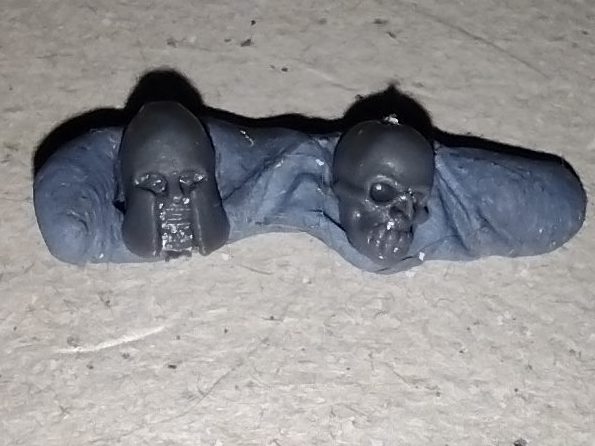
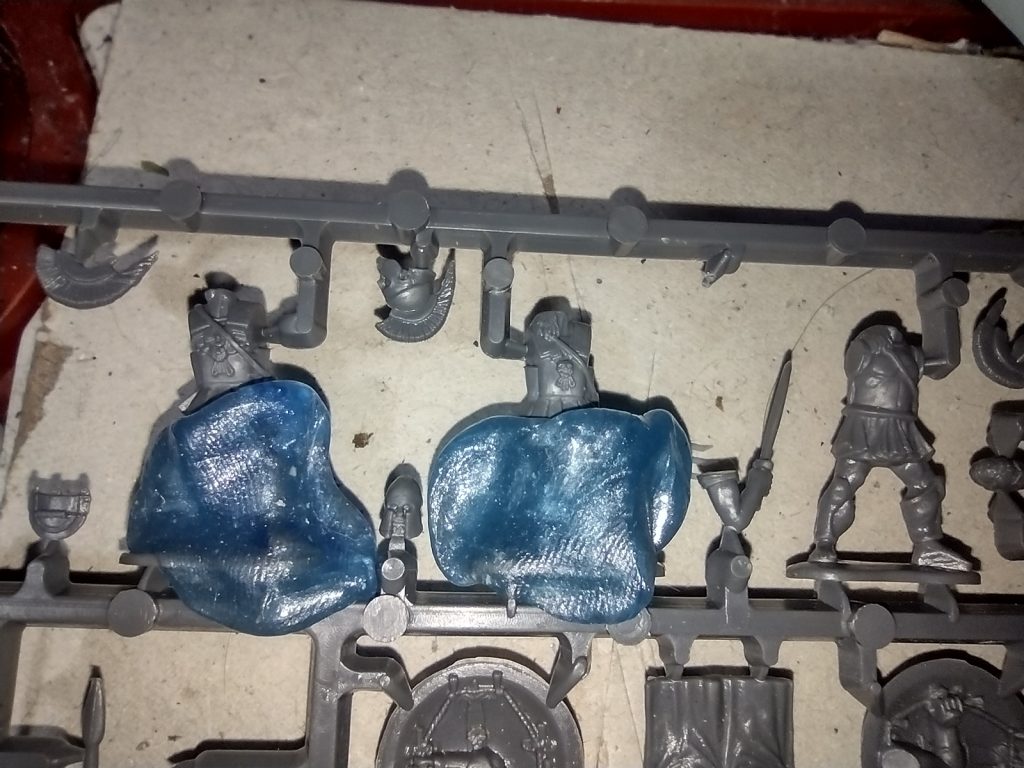
One of the Spartans had a cloak which presented a problem. The cloak was obvioulsy made for a standing human, not a half human, half horse. So I tried bending the cloak to lie correctly on the horse back.

First attempt was using boiling water. This was a total fail. The plastic didn’t bend at all. So, next, with fingers and toes crossed I put the cloak in a hot oven. This worked making the plastic pliable but it re-set hard more or less as soon as I got it out of the oven.
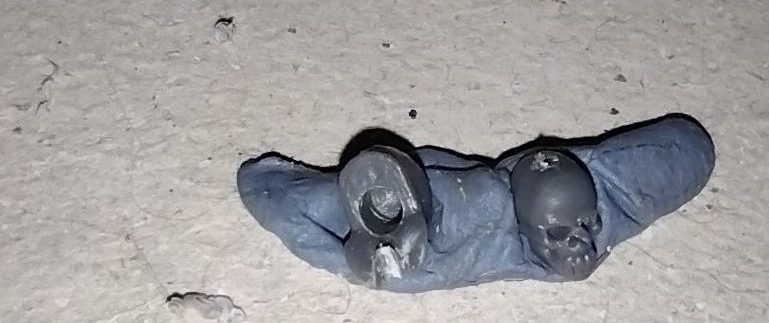
On to plan B!

I made an impression of the cloak in warmed blue stuff then, rolling out a thin sheet of green stuff and pressed this in the mould rubbed with a tiny bit of veseline. This worked perfectly it was then just a matter of carefully removing the green stuff from the mould and carefully addding it to the spartan torso and adding the front piece of the cloak from the sprue. I lost the plastic part that was to go at the back of the helmet for the models hair so I added some more greenstuff to the back of the head and sculpted some.

Kit-bashed centaur miniature with a greenstuff cloak added.
Another view of the kit-bashed centaur miniature with a greenstuff cloak added.
Front view of kit-bashed centaur miniature with a greenstuff cloak added.

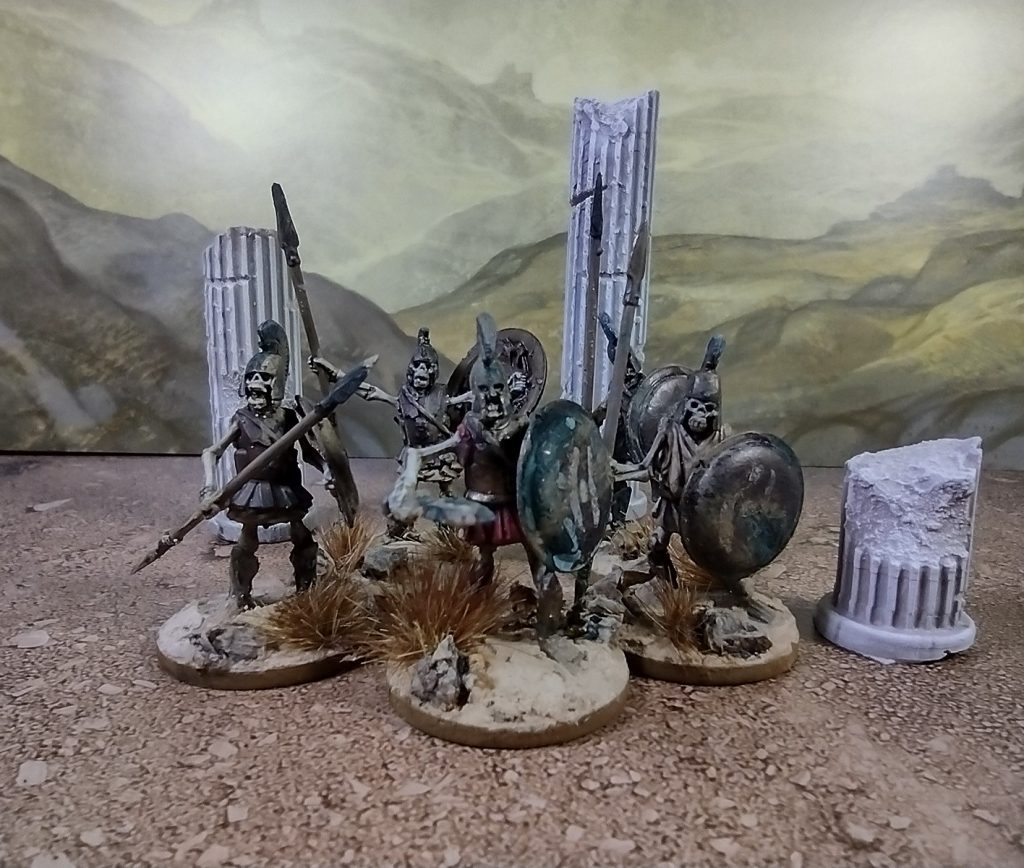
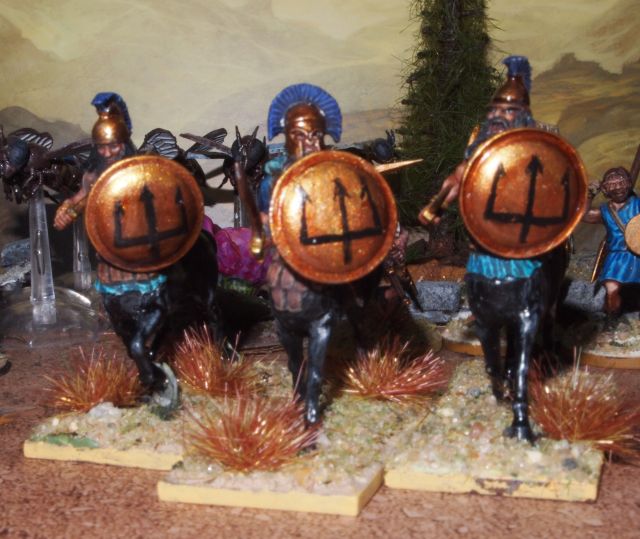
And here are the finished leaders. I used more regular paint on these but stuck with speed paints for the tunics and helmet crests. I am fairly happy with them. They are good as table-ready, which is, at the end of the day, what I need them for. I try and keep reminding myself that I don’t have to spend ages on paint jobs just for table use. O.k, maybe the odd character model can be a little more fancy but its not necessary to have competition quality miniatures for gaming (not that I think I can paint competition quality!). Still need to work on the freehand stuff for shields and the like,

Kit-bashed leader cantaurs painted and based.

Let me know in the comments if you have kitbashed anything for Warriors of Athena or maybe you have some tips on free hand painting?

Kit Bashing Skeletal Hoplites for Warriors of Athena

Plastic miniature sprues, modelling tools and glues

When Osprey Games announced Joseph A. McCullough’s upcoming game Warriors of Athena I was more than a bit exited.

The game promises to be a winner with two books in the initial release the Heroes book linked above, and Warriors of Athena: Quests. The game is set in the realms of Greek Myth and will allow solo, co-op and Oracle (a GM of sorts I’m guessing) led games to be played.

The game is set to be released on the 26th of February 2026 and is available for pre-order from Osprey Games. Also, Northstar Military Figures have been teasing new miniatures and have mentioned a pre-order bundle on their Facebook page.

The Heroes book will detail creating Heroes and their warbands as well as rules of play and the Quests book will contain a bestiary of monsters, adversaries and gods, advice for creating scenarios, four multi-scenario campaigns and rules for adventuring in the game world.

As a young chap growing up in the 70’s I was entranced by old films like Jason and the Argonauts with Ray Harryhausen’s incredible stop motion animated monsters and the memory of one scene in particular made me want to kit bash some monsters ready for playing the game, yeh the sowing of the hydra’s teeth. As I’d recently kitbashed some skeletal roman legionaires for The Silver Bayonet I thought that I’d try some skeletal Greek Hoplites. I also remember a schools tv (or possibly radio) retelling of the Odyssey with great fondness.

Start with the Head and the Body will follow – building the miniatures

Using more Oathmark Skeleton Infantry for the skeletal bits and some Early Greek Hoplites from Warlord Games, my first job was to find a way to get a skeletal head inside a hoplite helmet.

I started off by drilling out a chunk of the plastic to start hollowing out the helmet and starting to cut away the areas where the face would be. I’ve started using adhesive putty to hold parts in place when I cut them. It helps minimise bits pinging off to disappear behind the sofa!

This sort of worked but not very well as when it came to cutting the part from the skull to fit in the helmet, there was only a tiny bit of plastic which isn’t very visible when glued in place.

Next I cut up both minis to separate out the parts of the legs I was going to use and the hoplites torso.

Then I stuck the greaves from the hoplite to the skeletons feet and the thigh bones to the top of the greaves.

The leg assembly was aided by the addition of bits of paperclip to give some strength to the re assembled legs.

I then drilled holes in the bottom of the hoplite torso for the top of the legs to fit in and stuck the skeleton neck, then the head on top. The hoplite helmet crest was also added to the helmet.

The skeletons come with a spear carrying arm and a shield carrying arm but as can be seen on the left shield the hoplite shields needed the arms removed.

Next I added the bottom spike from the hoplite spear to the bottom of the skeleton’s spear and glued the skeleton’s left arm to the hoplite shield, using a bit of card as a spacer so that the skeleton’s arm wasn’t flush with the shield. I also drilled a small indentation on both sides of the hoplite torso to fit the skeleton’s shoulders.

For the remaining kit bashes I decided that I would use skeleton heads that already had helmets and make them look more like those of the hoplites. So I used some blue stuff to make a moulds of the sides of the hoplite helmets. Then adding green stuff in the mould and cutting it when set to add to the skeleton helmets. This together with a little re-modelling of the helmet with a scalpel looked better than the previous method.

For the remaining miniatures I didn’t want to have the faff of all the pinning and glueing leg parts together so I went with the plain skeleton legs.

The plan was to use a blue stuff mould of the hoplite greaves but the results were not very good so I went with just adding greenstuff directly to the skeleton legs and model it to look similar to the greaves.

Painting the miniatures

Starting with a grey undercoat using Vallejo Mecha grey primer. This works well either through an airbrush or with a paint brush which is great as I am a little impatient and don’t always want to set up the airbrush.

This is the step where the minis start looking better. Up to this point they do look a bit bodged together, which I suppose they are but the primer pulls it all together.

Adding the base coats. For the bones – Army Painter Warpaints Fanatic Ivory White with a little Army Painter Warpaints Oak Brown. The Ivory White is from the John Blance Masterclass set 1

For the Cloth I went with Army Painter Brainmatter Beige and a little Oak Brown, and Army Painter Warpaints Fanatic Basilisk Red. All areas that are going to be metal or leather I used a base coat of Army Painter Warpaints Dirt Splatter.

Next was adding some highlights and metallic colour. Highlights for the bones was Ivory white and the cloth Brainmatter Beige or Army Painter Warpaints Fanatic Pure Red. For the metallic areas I used Army Painter Warpaints Fanatic Rough Iron with highlights of Weapon Bronze.

Next I added a wash of Army Painter Warpaint Fanatic Voodoo Shade and for the red cloth Citadel Colour Shade Carroburg Crimson.

I wasn’t happy with how the leather looked and wanted to darken it so used some Army Painter Speed Paint Fire Drake.

Not shown in the photo above, I did a very basic shield design inspired by the eye on the front of the Argo in the Jason and the Argonauts film and I remember seeing them on Maltese fishing boats, and they are probably used all over the Mediterranean. I am not very confident with freehand stuff but this design was fairly simple and used one colour, Army Painter Warpaints Stone Golem. Then I added some chipping with a sponged on mix of Weapon Bronze and Rough Iron.

Finally I mixed Kromlech Light Mud Weathering Powder with Monument Hobbies Pro Acryl Newsh to grunge the mini’s up a bit. For the bases I used some filler and some dead grass tufts.

kit bashed skeletal hoplite miniatures

Overall I think the mini’s are ok. They don’t look as good as the Roman Legionnaires to my eye but that is ok. They do look wonderfully grubby though so that is a win! I enjoyed making and painting them and they will look good on table.

Are you looking forwards to the Warriors of Athena game? Have you done a similar kitbash project? Let me know in the comments.

#warriorsofathena #miniaturepainting #kitbashingminiatures #wargaming #skirmishwargaming #solowargaming

© 2026 Miniature Battles

Theme by Anders NorénUp ↑