Author: Miniature Battles (Page 3 of 3)

Making a table top terrain Cottage from corrugated Cardboard

Recently while hunting for hobby related videos on YouTube I found
Selrahc Games
and some great videos about making terrain with corrugated cardboard.

I have a terrible habit of holding onto cardboard packaging, after all, its bound to be useful for something someday, right? I’m still fairly new at terrain building so I’m still learning and trying out new techniques is very useful.

Making terrain from something that was likely going to end up in the recycling bin is a very appealing. I’ve mostly been using XPS foam which I really like, but, while you can get good deals on it, is not cheap. You also end up with a lot of off cuts, which I tend to hang on to rather put in the bin. I have some plans to make some terrain pieces from off cuts at some point so will write about that when I do.

I wanted to try out the method seen on Selrahc Games and decided to make a small cottage which would be useful for Silver Bayonet, D&D or a other games.

To start off I made a rough template for the ends of the cottage. This will be a guide for getting the height of the walls and the pitch angle and rise of the roof.
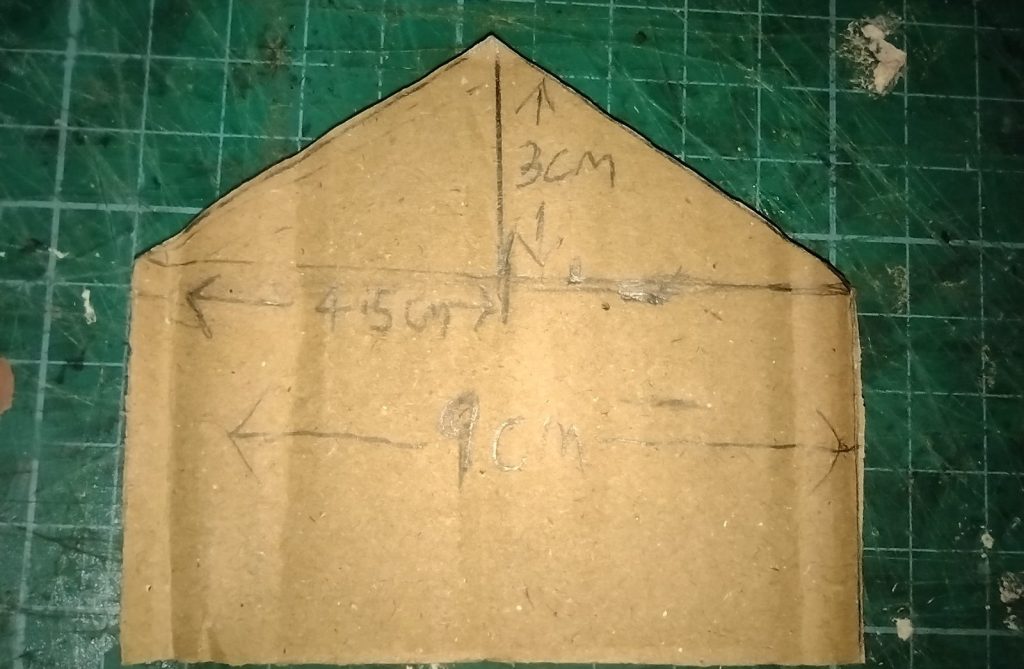
corrugated cardboard template for cottage end
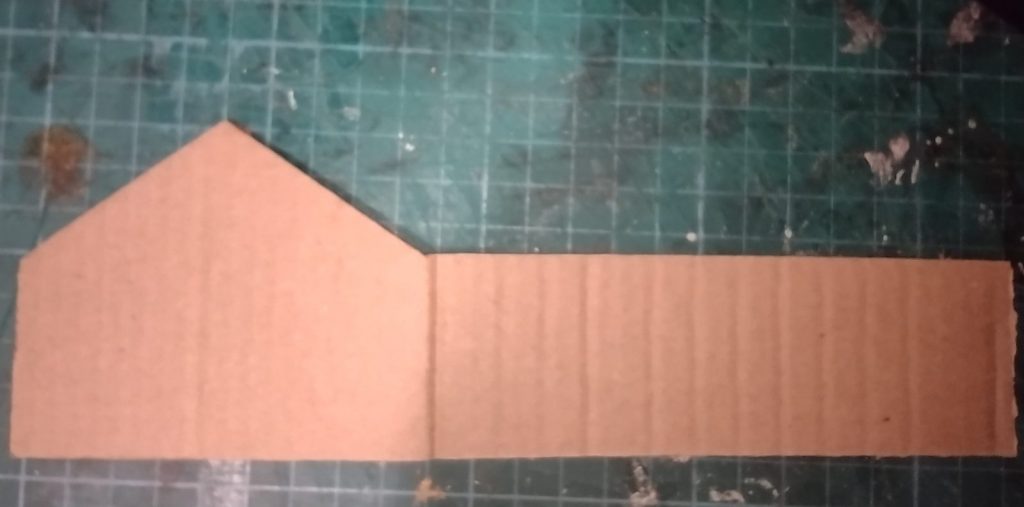
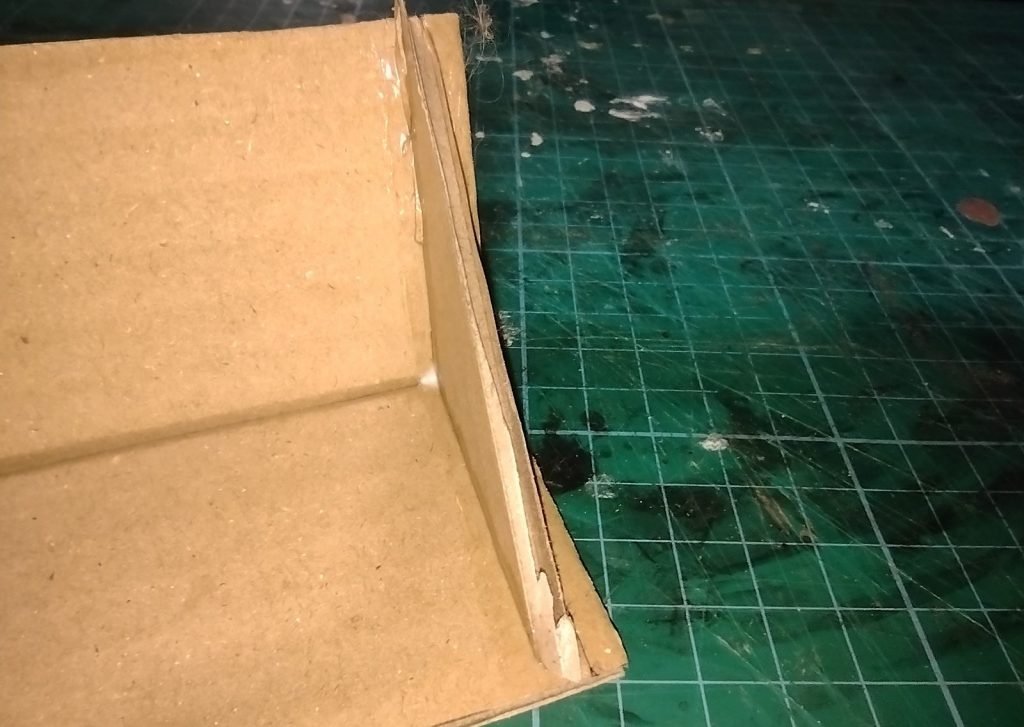
cardboard end and side wall for model cottage

Next, using the template I drew out then cut out two pieces of card, one for each side and end of the cottage.

The cottage will of course need a doorway and windows so these were added to one of the pieces.
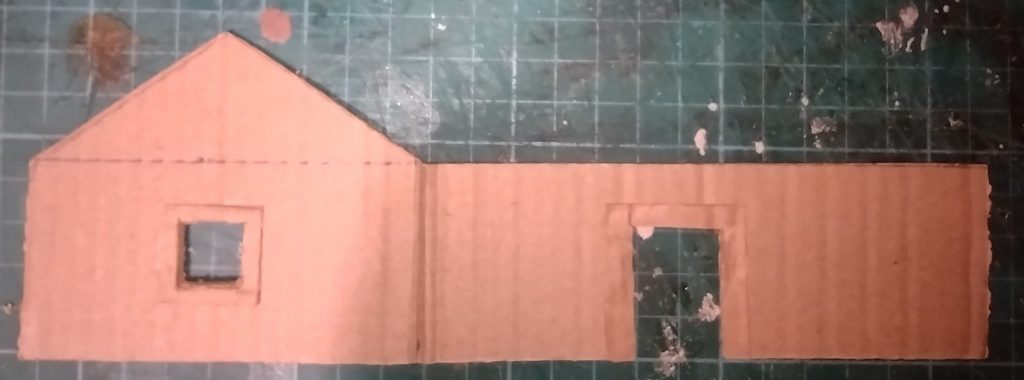
cardboard model cottage end and side with doorway and window cut out
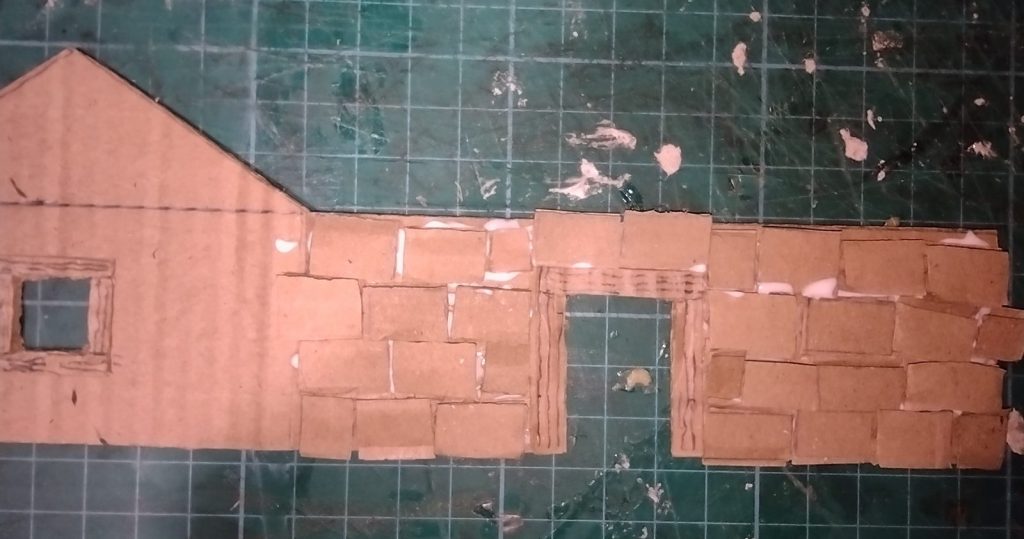
cardboard cottage with bricks added

After cutting cardboard strips and cutting these again to the size I wanted for the bricks, the individual bricks can be added to the wall of the cottage. I use a quick setting wood glue, in preference to standard ‘school glue’ PVA, but either will work. PVA has one of those smells that always takes me back to primary school and making stuff with ‘sugar paper’. Actually why is it called that, I’ll look it up, the hive brain is sure to know.

This next step is the bit that I think really makes this method work. Over the bricks covered with glue, you add a layer of tissue paper, bog roll works really well. As the tissue develops small wrinkles as you add it it will give the bricks texture.
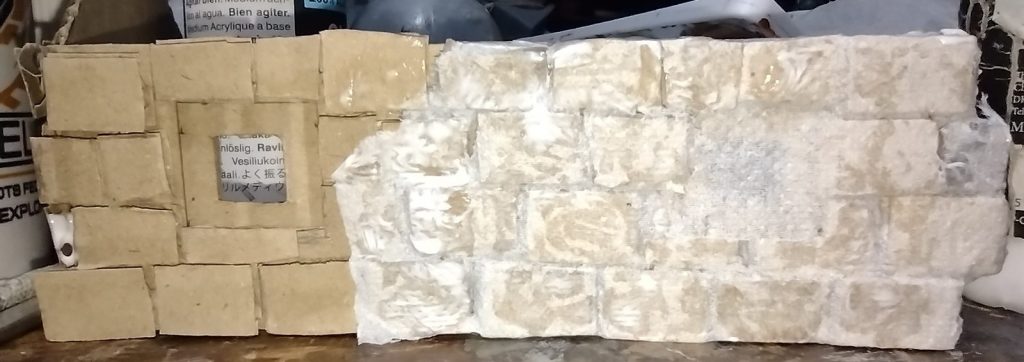
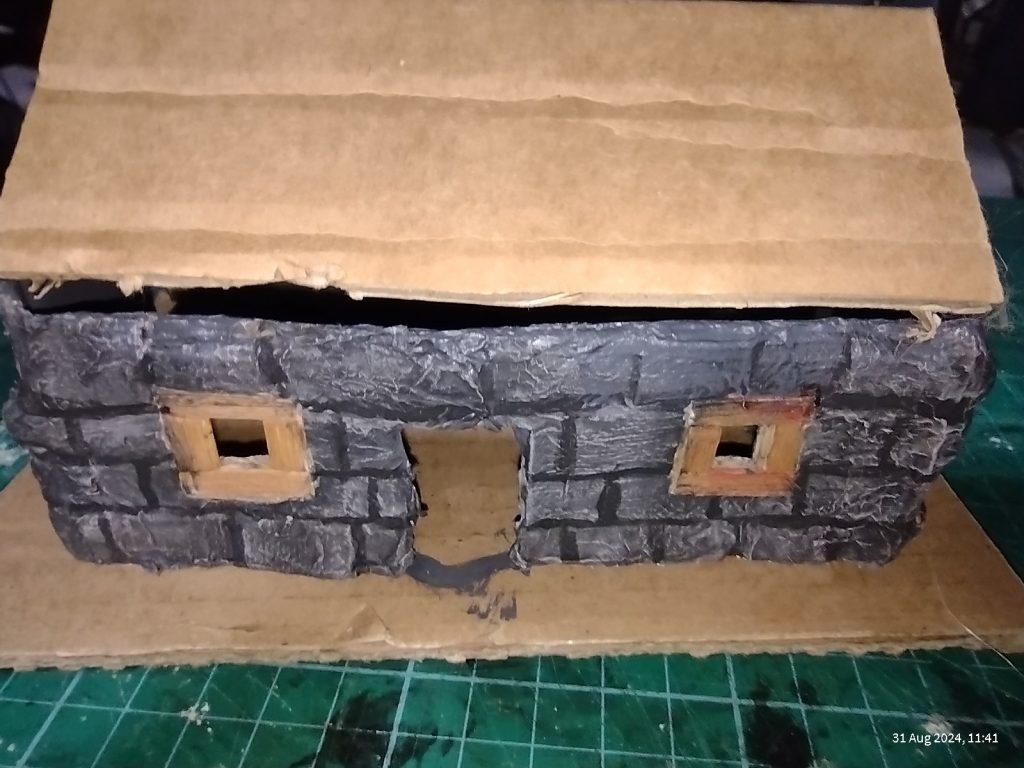
cardboard cottage brick wall covered with a layer of tissue paper
cardboard model cottage roof

For the roof I added pieces to get the shape and help keep the roof in place. My plan is to have the roof be removeable so that miniatures can be easily placed inside.

With both the pieces added and the glue dry the roof is ready for the next stage.
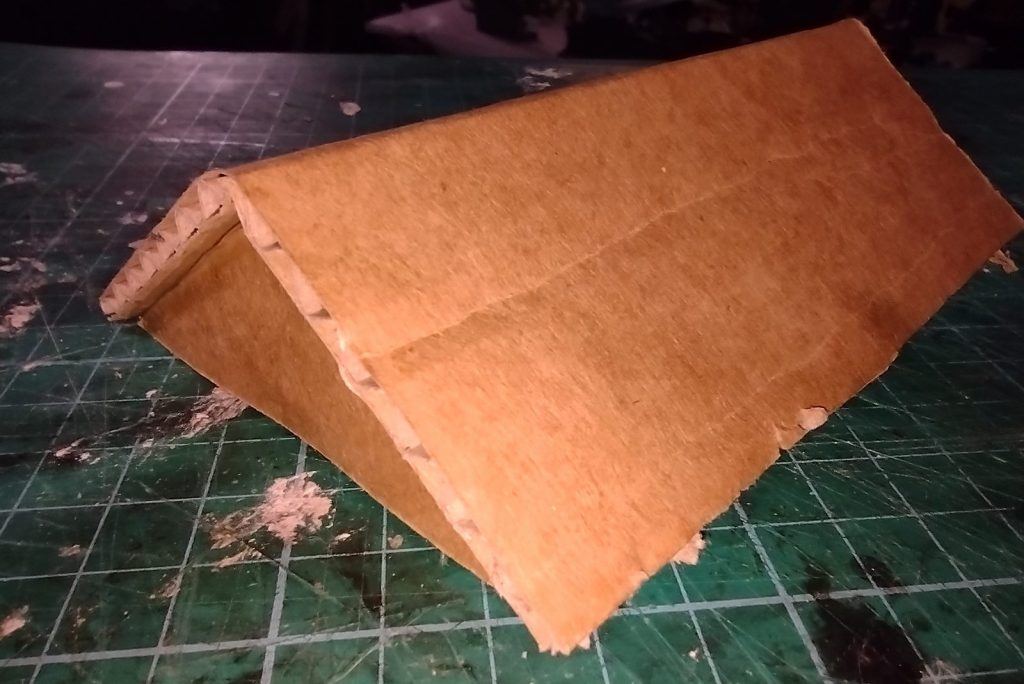
cardboard model roof

I then painted the walls dark grey, the dry brushed a lighter grey and then added some bits of wooden coffee stirrer for the window frames.

For the roof I was planning to add roof tiles made from thinner card but I had a change of mind.
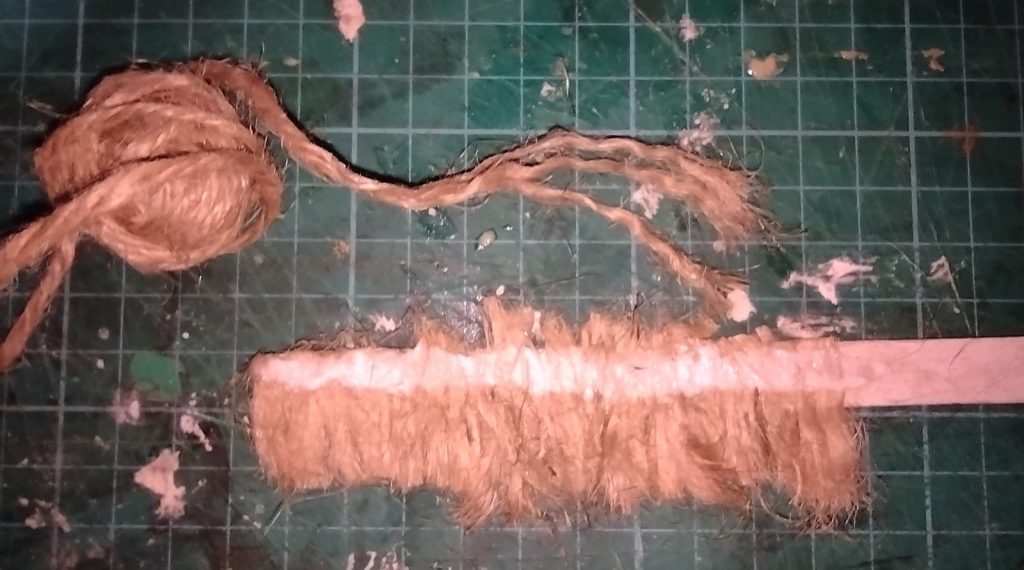
unravelled twine used to make model cottage thatch

What I wanted was to model thatch. I considered making it from cardboard but found a couple of great videos on YouTube one from The Crafting Muse and one from Miniature Wizardry about using jute twine or as I’ve always called it hairy string, to make the thatch.

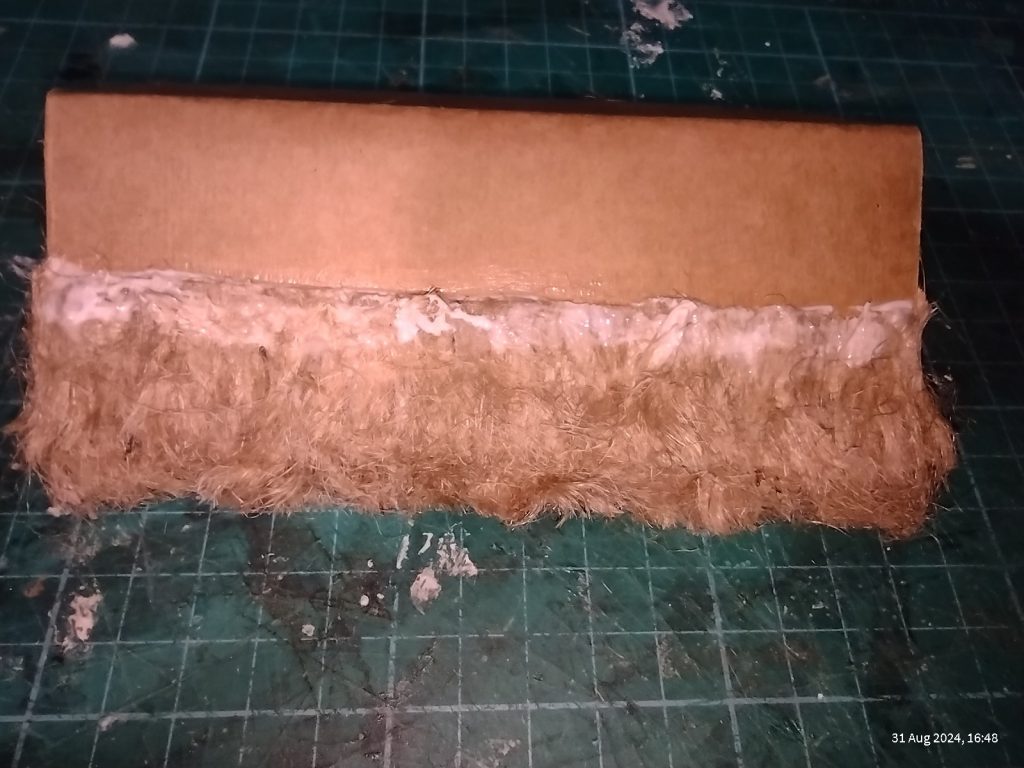
The twine is unravelled and then glued to strips of cardboard with more wood glue. You want the cardboard strips to be about half the length of thatch.

Starting with the bottom most part of the roof the thatch strips are added. You want the thatch to extend below the roof a little.

This part of the build is messy and time consuming, but sort of satisfying.
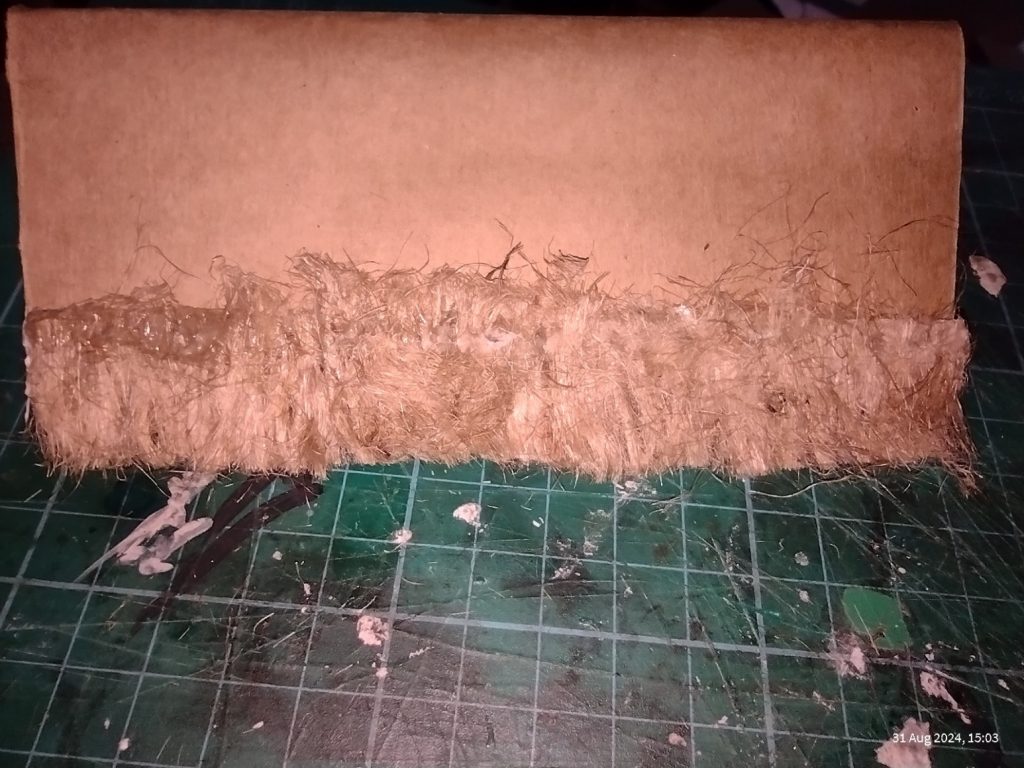
Strip of twine 'thatch' added to model roof
two layers of thatch added to model roof

More strips are added until the roof is covered. The last strip is twice the width of the others so that it can be folded to fit on the roofs peak.

For the ends of the roof I just dabbed on some glue and added small bunches of twine to cover the corrugations.

It was also about this point that I found out about plumbers hemp from another video about making model thatch roofs from LNR Models
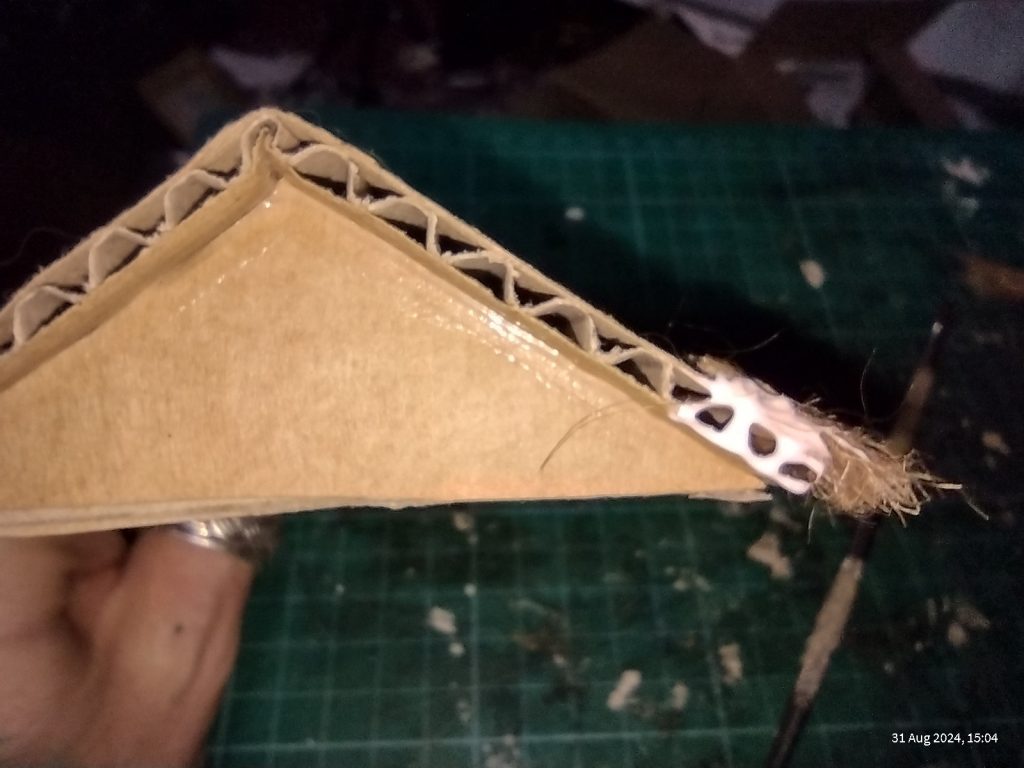
model roof end
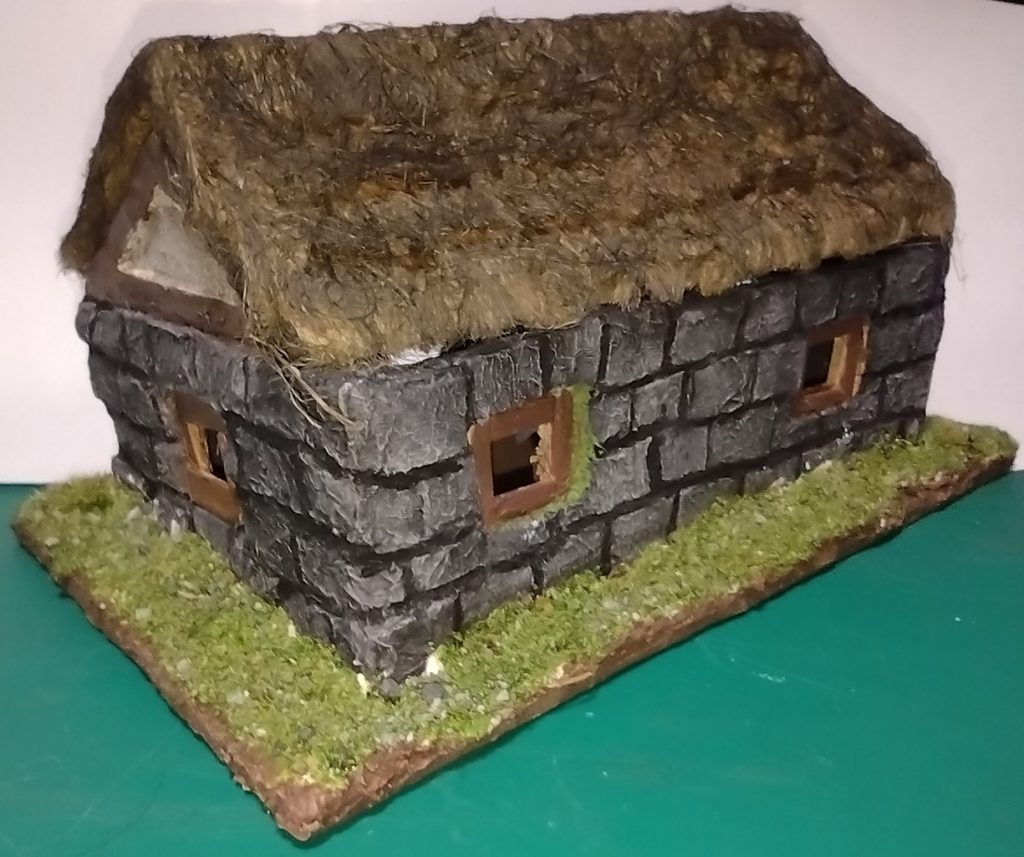
miniature model cottage

And that was more or less it. I gave the thatch a brush over with some black acrylic ink to age it and added some of my basing mix, a melange of Games workshop static grass, Geek Gaming Scenics Foam scatter – Mid green I think, Some old GW gravel, ‘play pit’ sand and some tarragon.

Overall I am quite pleased with the result. The thing I would change for the next time I use this method, is the size of the bricks and to use cardboard with smaller corrugations as the cardboard I used had quiet large ones and this made some of the bricks a little weak.

What do you think? Is this something you would try for your own gaming table? Do you prefer xps foam for terrain building? Let me know in the comments.
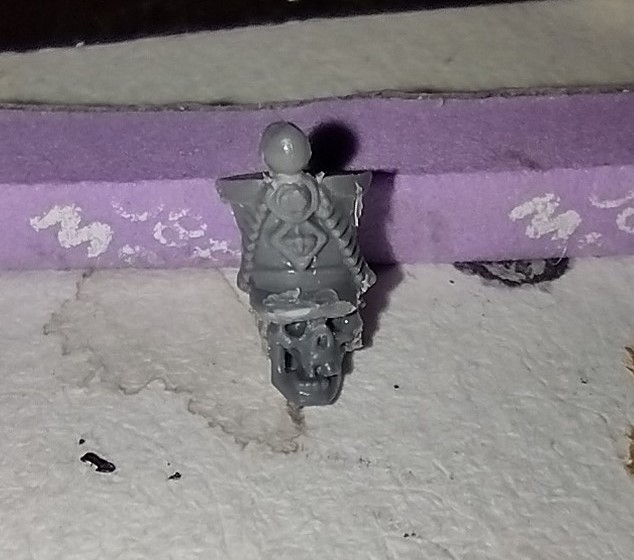
Zombie Kit Bash For Silver Bayonet

This post is a bit out of sequence as I haven’t finished writing my review of Silver Bayonet. This was a fairly quick and basic kit bash but I am very pleased with the result.

The Zombie Head

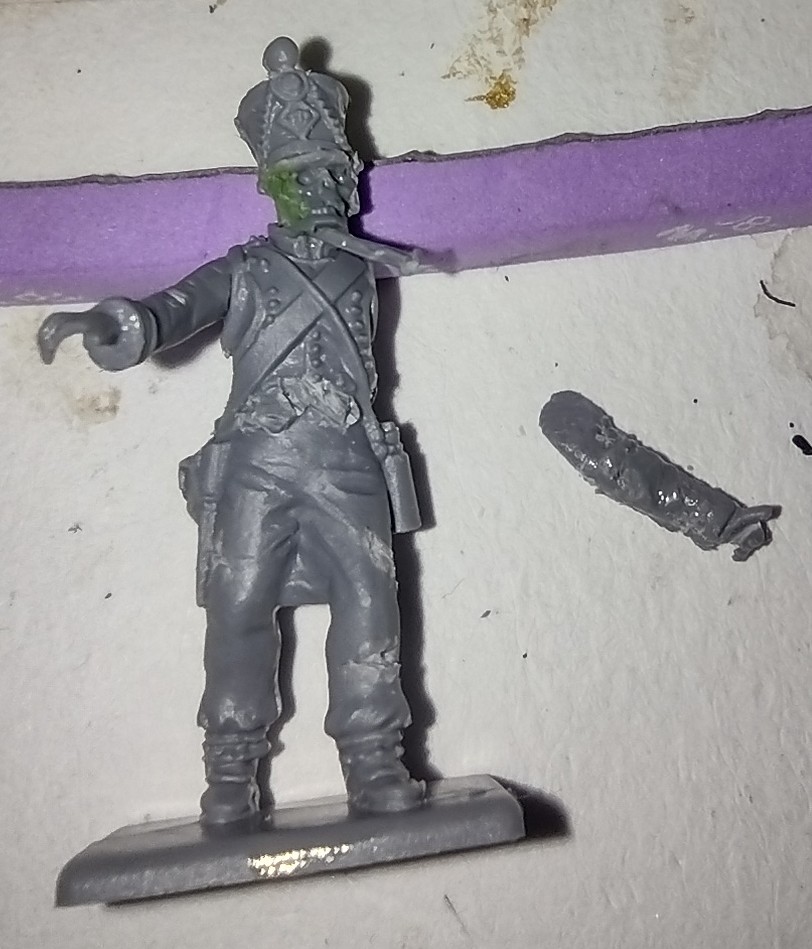
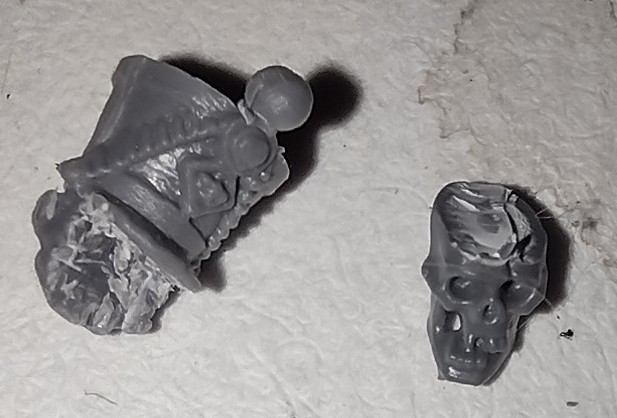
First I took a head from the Victrix French Napoleonic Infantry 1807 – 1812 box and cut away the majority of the face. Then I took a skull from the Citadel Skulls box, a worthwhile purchase that is incredibly useful.

miniature french infantry head and citadel skull cut to fit together

It took a couple of tries to get them to fit together well and it pays to be cautious with the removal of plastic, a little at a time.

French infantry shako with skull face miniature

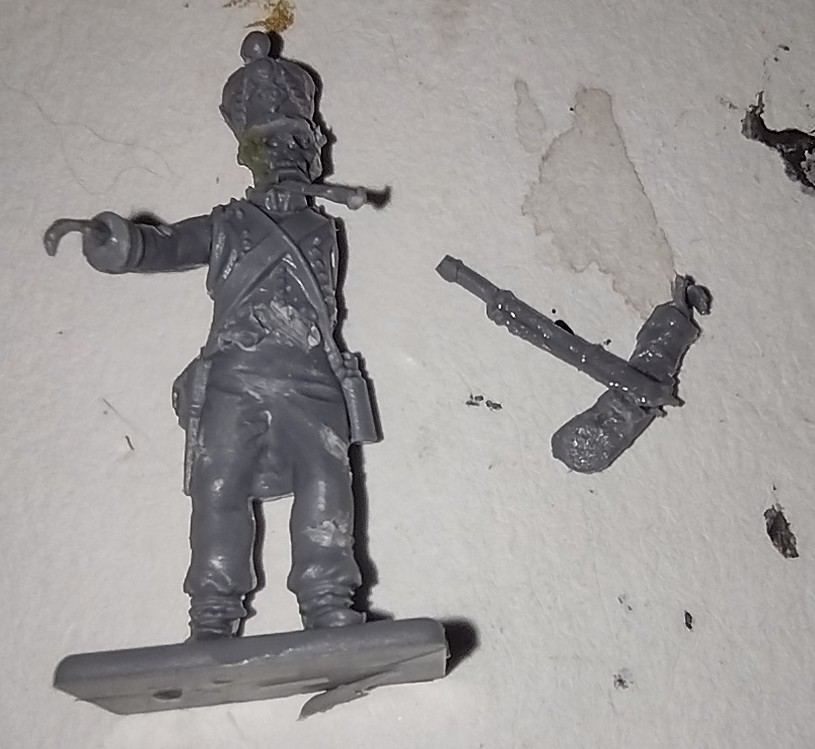
Next I added the head to a body and gouged some rips in the trousers, first making a shallow cut and then using the tip of the scalpel blade to lever the plastic out a little, then cutting some nicks into the edge of the ‘rip’. I also added some more ‘rips’ to the waistcoat. I added a right arm that had an open hand and for the left arm cut away a rifle that was held in the hand. The bayonet from the rifle I cut off and stuck in the neck under the skull. The left arm was crooked so I cut in at the elbow joint and opened it up, using the rifle to partly fill in and support the gap.

I then trimmed off the excess bits of rifle and used some sprue goo to smooth out the join in the arm. I also used some Green Stuff World Green Putty – Acrylic Modelling Filler to tidy up the join between the skull and infantry head. I prefer this putty for gap filling and small jobs. I’ve not had much luck with liquid green stuff from GW as the pots dry out really quickly and I end up throwing away about 90% of the pot.

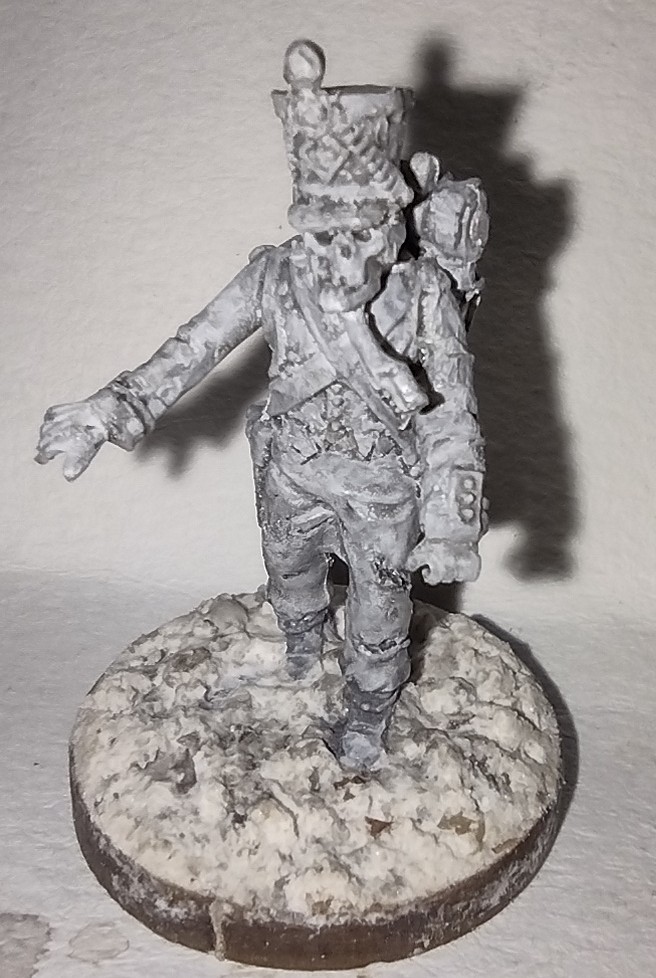
When the sprue goo had set I attached the arm and when the glue had set primed the mini and added a thinned down black wash. I then added a base and my go to basing mix of sand, all purpose filler (known as spackle in the US) and basing gravel. I also cut the right foot from the base and give it a twist to look like the classic zombie foot drag inspired by Peachy’s The Silver Bayonet review which has an excellent kitbash idea for making some zombies similar to this (round about the 23:49 mark).

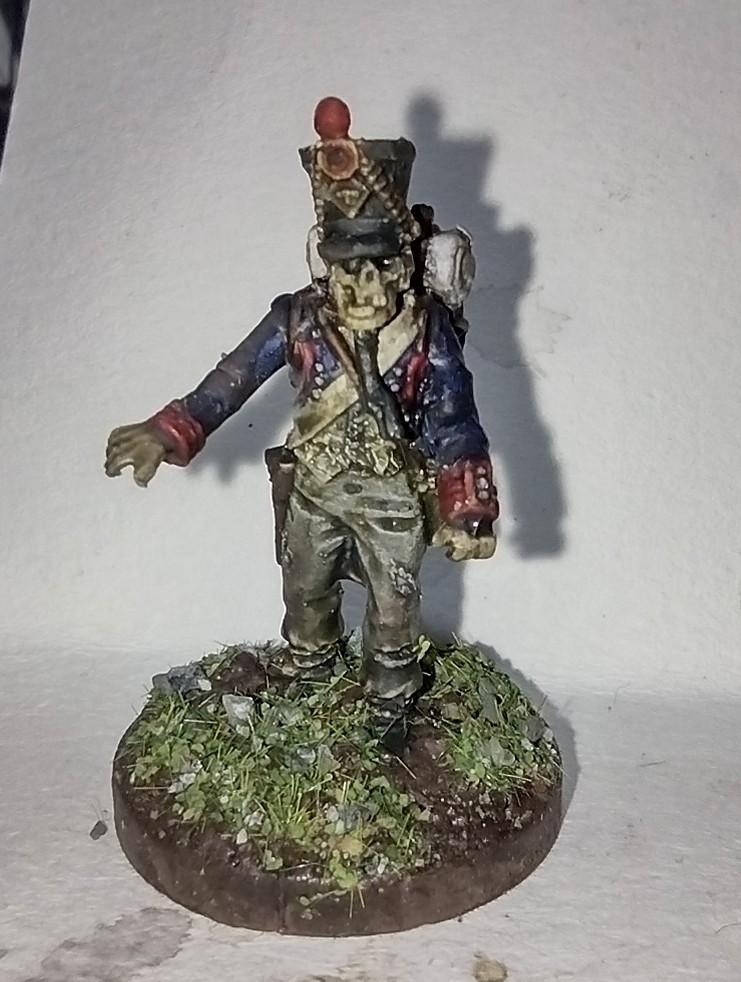
Finished miniature of a zombie Napoleonic french infantryman

With all that dried I gave the mini a final drybrush of grey all over then a zenithal white dry brush before painting with Army Painter Speed Paint 2.0. Then an all over wash with a mixture of Two Thin Coats Necrosis Green and black Vallejo Game Wash Dipping formula, which I think has been discontinued but you may be able to find it. I bought it as it was a big 200ml pot for a reasonable price. I go through so much black wash that buying in the small bottles is expensive. Then added my basing mix; Games workshop static grass, Geek Gaming Scenics Foam scatter – Mid green I think, Some old GW gravel, sand (I bought a bag of ‘play pit’ sand years ago for topping off cactus pots – more sand than I will ever possible use) and some tarragon, it was Greig Johnson in one of his marvellous make videos who mentioned using dried herbs and I have had a jar of tarragon for possibly over 25 years and I don’t like tarragon for some reason. It won’t win a Golden Demon but I hope that if there was a ‘Manky Demon Award’ that I’d at least get into the second round. Looking at it now I might add a bit of gloss varnish in places on the muddy bits of the base to make it look sticky.

Napoleonic French zombie miniature

Miniature Painting: Glazing – driving me crazy!

(or Miniature painting: the awful truth of glazing)

One of my weak areas with miniature painting is getting the smooth transitions between shade, mid-tone and highlight.

I started painting miniatures back in the 80’s. My first attempts were awful. I had a set of AD&D Grenadier miniatures Halflings and left over enamel paints from painting model aeroplanes. So the results of some very garishly painted halflings with just basic flat colour. It wasn’t until a few years later when I started buying Citadel Miniatures and reading White Dwarf that I developed a better style of painting which essentially was prime, base coat and dry brushed highlights. This changed little apart from the addition of adding washes when Citadel/Games Workshop released their first line of acrylic inks.

Over the years I’ve tried to blend paint on the miniature with a small amount of success but it was only a couple of years ago when I picked up the miniature painting hobby again after a long break that I started looking online for painting guides.

The beginner painter of today has such a huge resource of tutorials out there on the internet which is incredible.

One technique that people use to smooth the transition between shade, mid tone and highlight is glazing.

With glazing the basic idea is to paint the mini with shade, mid tone and highlight and then thin the mid tone so that it has less opacity and paint layers of this over the top. This has the effect of evening out transition.

A practical demonstration

I haven’t had a lot of luck getting it to work so I thought of a little experiment that might give me a clue of where I was going wrong.

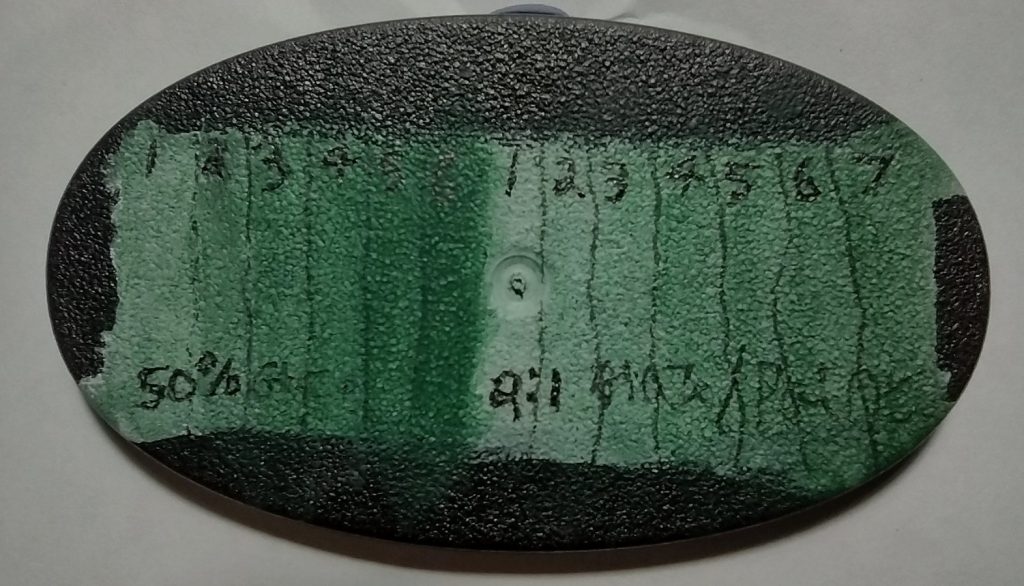
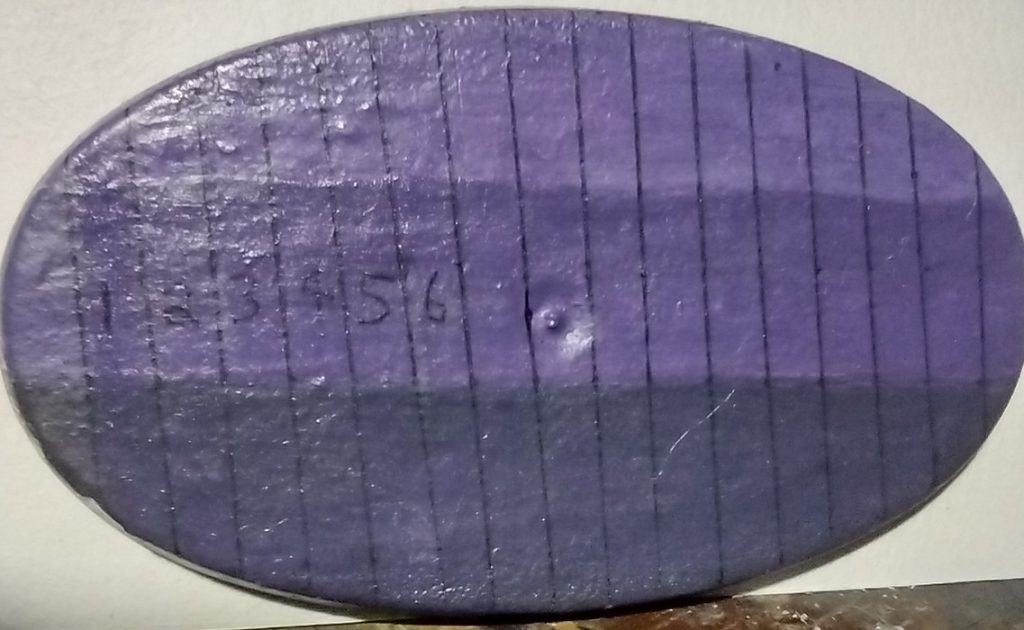
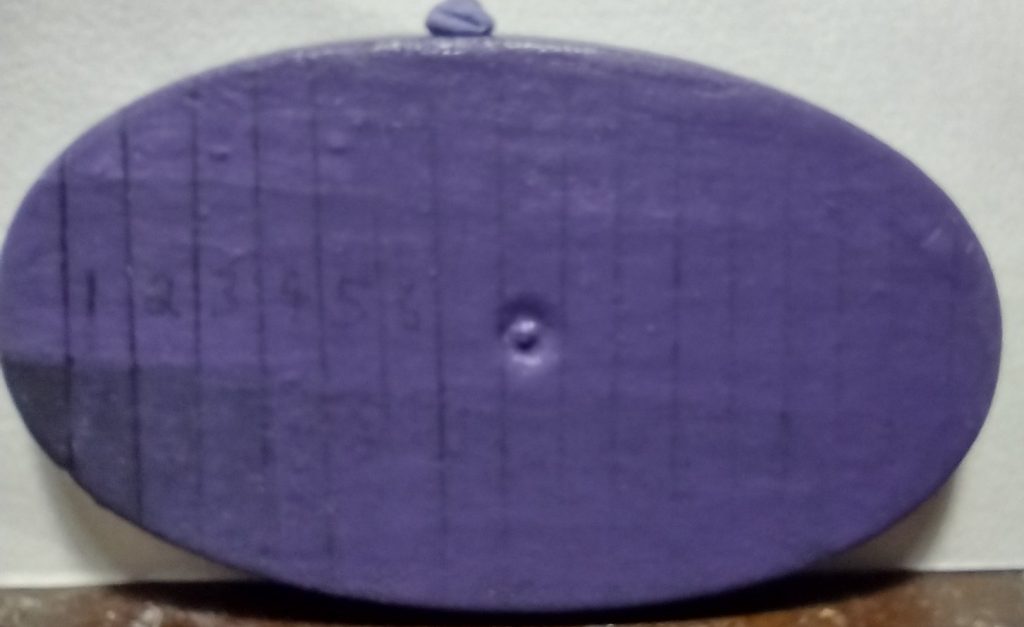
I painted a block of primer onto a spare miniature base divided up the base and painted layers progressively over the primer.

The first section I went with a 50/50 mix of paint and Vallejo glaze medium as advised by the bottle. Some people are champions of dilution with water but I wanted to use the glaze medium.

Then I repeated the process with a 2:1 glaze medium to paint mix on the other side of the miniature base to see how a greater dilution would look.

The results

a  miniature base with successive layers of thinned paint

This rather inelegantly does shows how the process works, and unsurprisingly that you need far more layers with the greater dilution. It also gives me a bit of a hint as to how many layers of glaze are needed.

I think that that was where I was going wrong, being far to impatient and expecting to see a big difference with two or three layers of glaze.

I also did a similar test using Monument Hobbies Newsh to see how that would work and it was more or less the same although Newsh is a little more viscous than the glaze medium.

The big drawback is the time you need to wait for the layer of glaze to dry before adding the next layer, the glaze/paint mix does stay useable on the palette for a fairly long time but still is going to be drying out as you are waiting for the layers to dry. You can use a wet palette, but I find that the drawback of wet palettes is that they dilute the paint and taking the control over the dilution out of your hands.

The second test

The above example is all well and good but what I’m aiming to achieve is a smoother transition. So I set up another spare miniature base with a shade tone (in this case the mid tone with a little black), a mid tone Army Painter Alien purple (because purple is the best colour and you can make all colours from purple*), a highlight (mid tone with a little white).

This was taken after one layer of glaze (Mid tone and glaze medium 50/50) had been added.

Bit of a blurry photo but I think you can see that it wasn’t a total success. All that I seemed to be achieving was making the whole strip the same colour as the mid tone, which is I suppose inevitable given the technique.

I went online and watched some more tutorials and I think where I was going wrong here was firstly, the shade to mid-tone, mid-tone to highlight jumps were too large. Also, and I don’t know where I saw the advice to use just one glaze of the mid-tone for both the transitions, you probably need to use a separate glaze for each transition.

Check back for part 2 of this series “Miniature painting: the awful truth of glazing”.

Some of good tutorials on glazing (there are hundreds though and you really are spoiled for choice).

Lyla Melv – The mini witch – Layering and Glazing made Easy

JuanHildago Miniatures – The GLAZING TRICK eBay pro-painters don’t want you to know about!

Vince Ventruella – Ultimate Guide to Glazing – HC 391

*Ok that isn’t true but I feel that purple is such a great colour that it should be true!

All alone in Felstad part 2 – The Warband

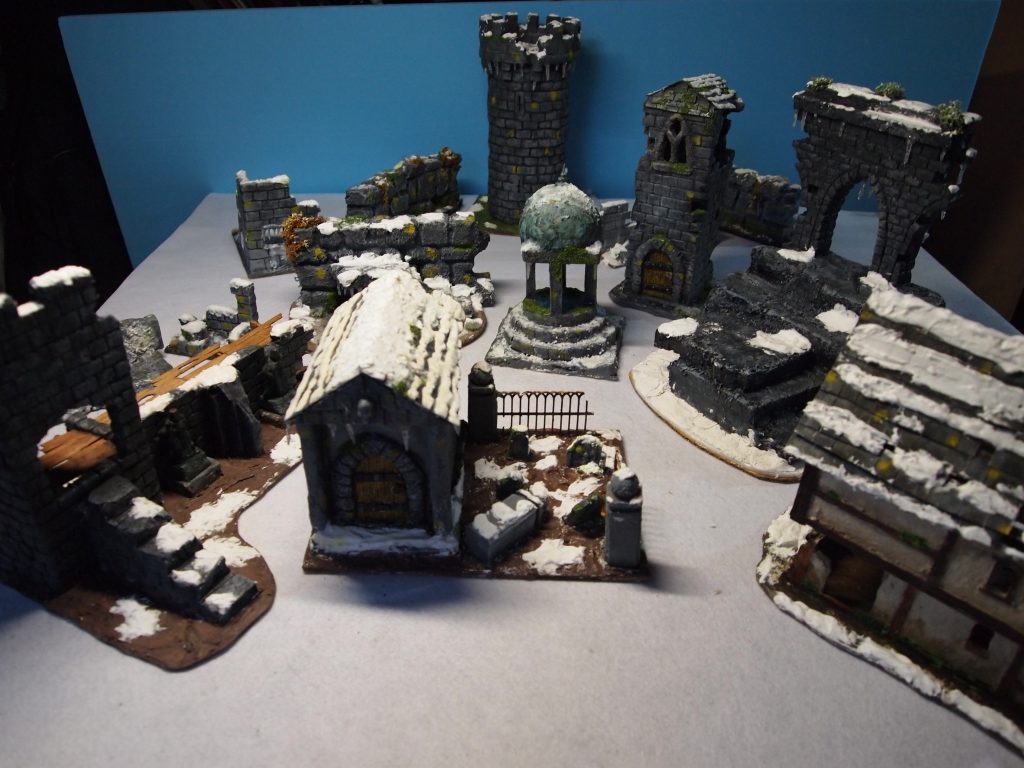
Model ruined buildings dusted with snow for Frostgrave skirmish wargame

Almost ready to play!

Definitely needed a wider angled lens but hey ho, just have to be more selective with my shots.

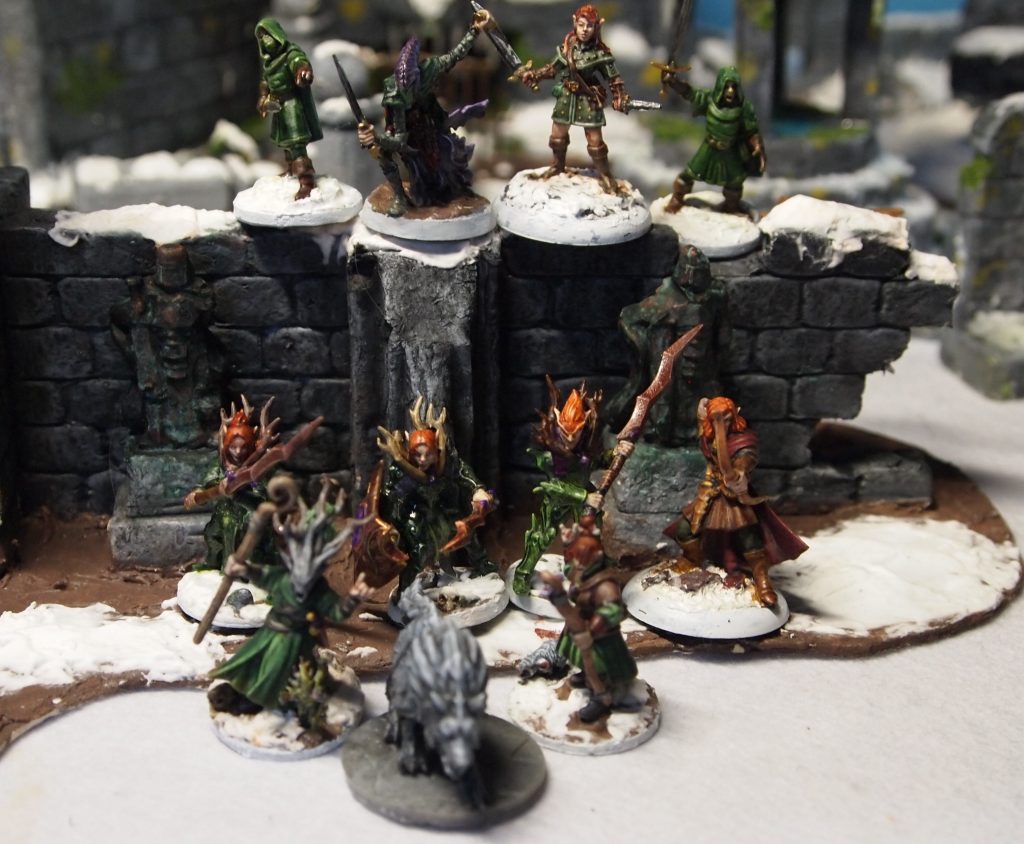
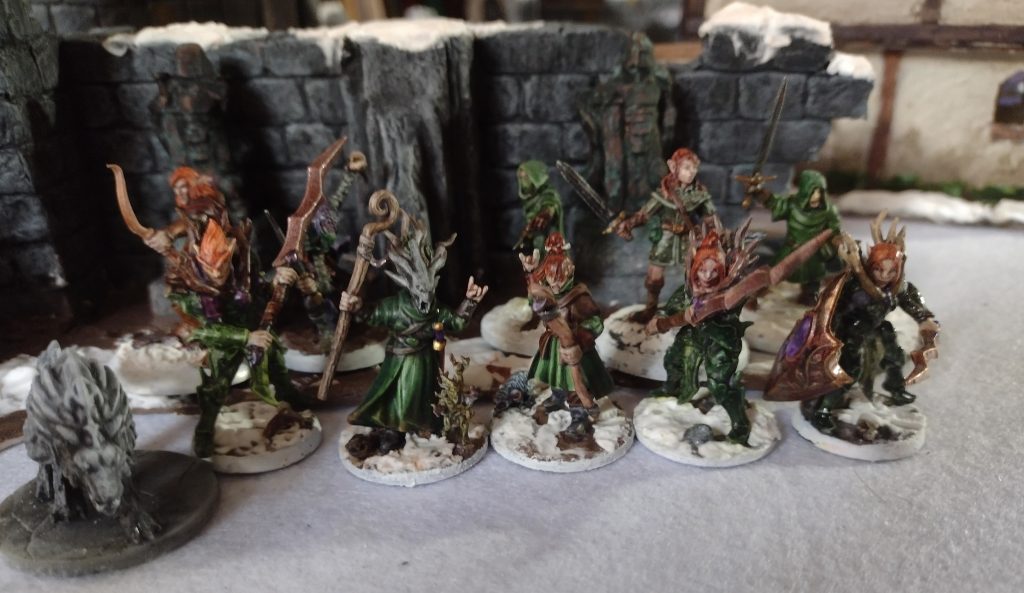
Terrain is now ready and the war band is assembled.

Miniatures - Frostgrave warband.

Miniatures are a mixture of Reaper, 3d printed and a couple of “tweaked” minis from the Frostgrave Wizards II box and a couple of Oathmark Elves Light Infantry.

It is one of the things that I like about Frostgrave is that it is miniature agnostic and you can use whatever minis you want. I’ve even seen people playing with Lego minifigs, for example.

There aren’t any elves in Frostgrave but that doesn’t stop me from using elf miniatures. The “Official” miniatures for the game by North Star Military figures are great value as, for example in the Wizards II box, you get eight bodies and a whole range of heads, arms and extras to customise your minis. North Star is a great site and they make and or stock a great range of games and miniatures.

The Warband

As I’ve already mentioned you can use any miniatures for your warband. I started off with using minis I’d printed from Artisans guild – Sylvan Knights collection. They are gorgeous sculpts but I had some problems. I think they are designed to be printed at 32mm scale which meant they would tower over any 28mm minis I used. I did end up resizing a couple of them and adding them to my warband but another problem I have with 3d printed miniatures is that the often lack the detail of white metal, resin or plastic minis, at least with my printer, and this was exacerbated by rescaling. Don’t get me wrong this is not a problem with the sculpts, they are awesome.

I originally bought the collection to pad out my old Warhammer Wood Elf army and they are perfect for that. Some of them just didn’t “fit” for my warband.

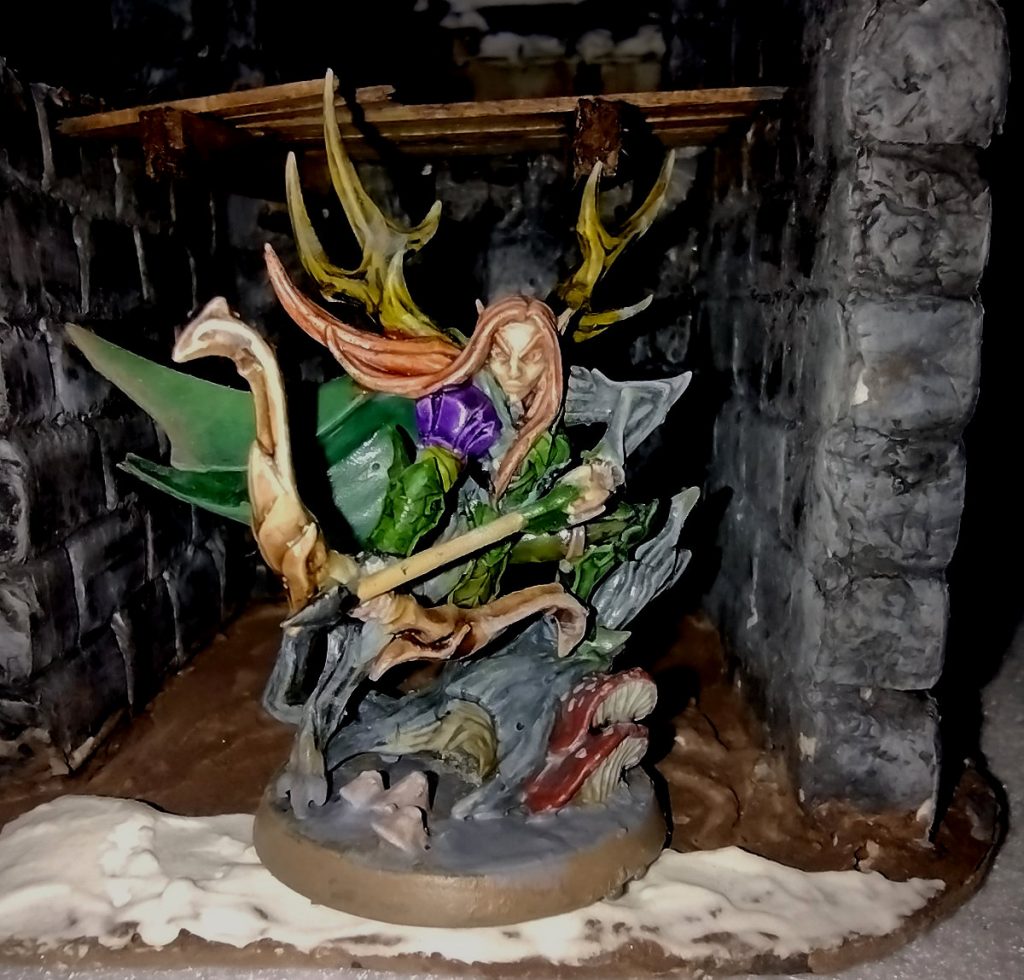
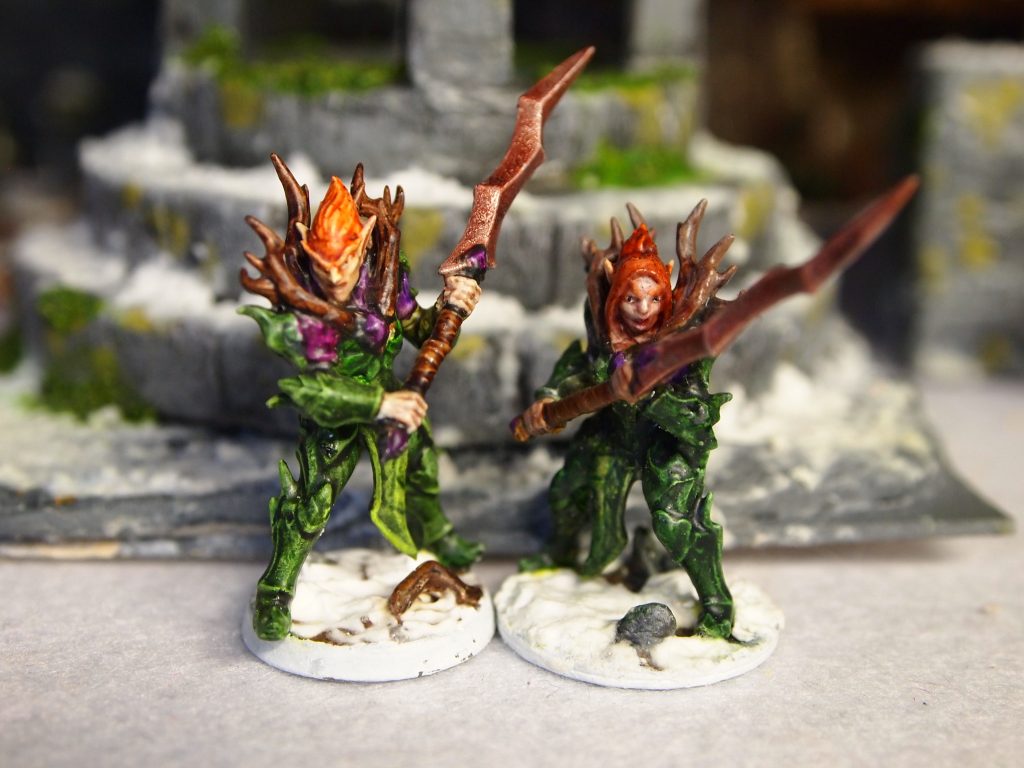
Elven sorcerer miniature
Elven archer miniature

The wizard as you can see is levitating surrounded by spell energy and the archer’s base just seemed a bit out of place for the Frostgrave setting. So, I looked around for some other minis.

The Wizard

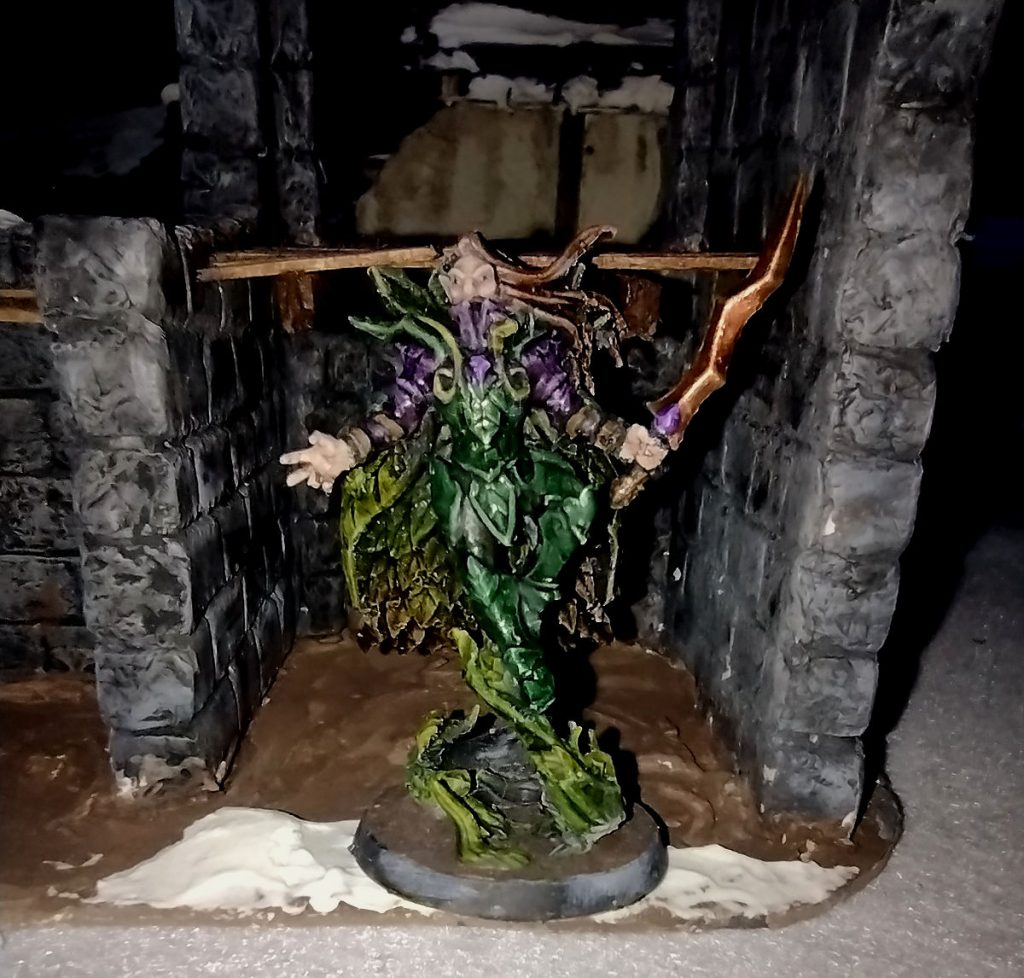
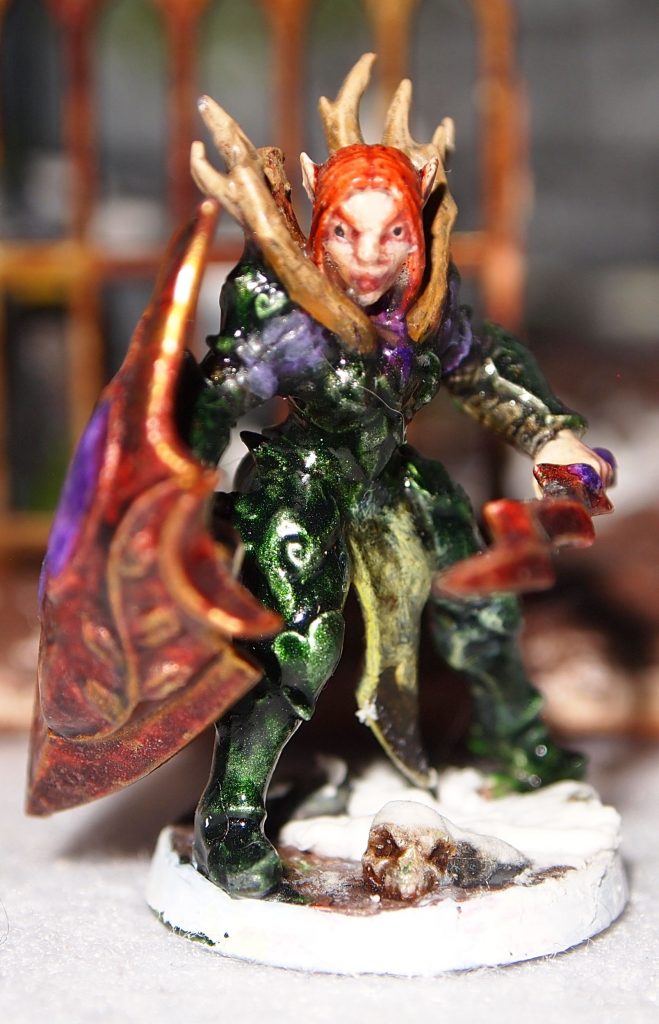
Starting with the wizard. Keeping with my elven theme I thought the nature based magic, Witch was a great fit. As I was building the mini, one from the Frostgrave Wizards II box from North Star Military Figures, I had a thought, that I had a load of old Warhammer Dryad/branchwraith heads left over in my bits box. So a little dab of polystyrene cement and Durnimlath Gul was born.

Durnimlath Gul, witch miniature for the Fostgrave 2e table top skirmish wargame.
Durnimlath Gul the Witch

The Apprentice

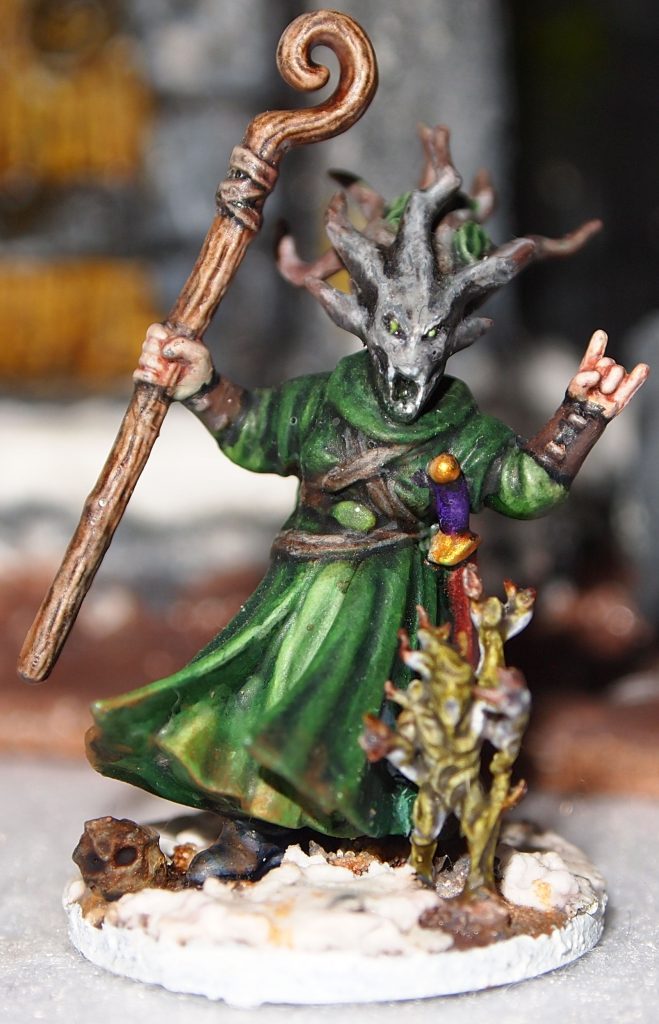
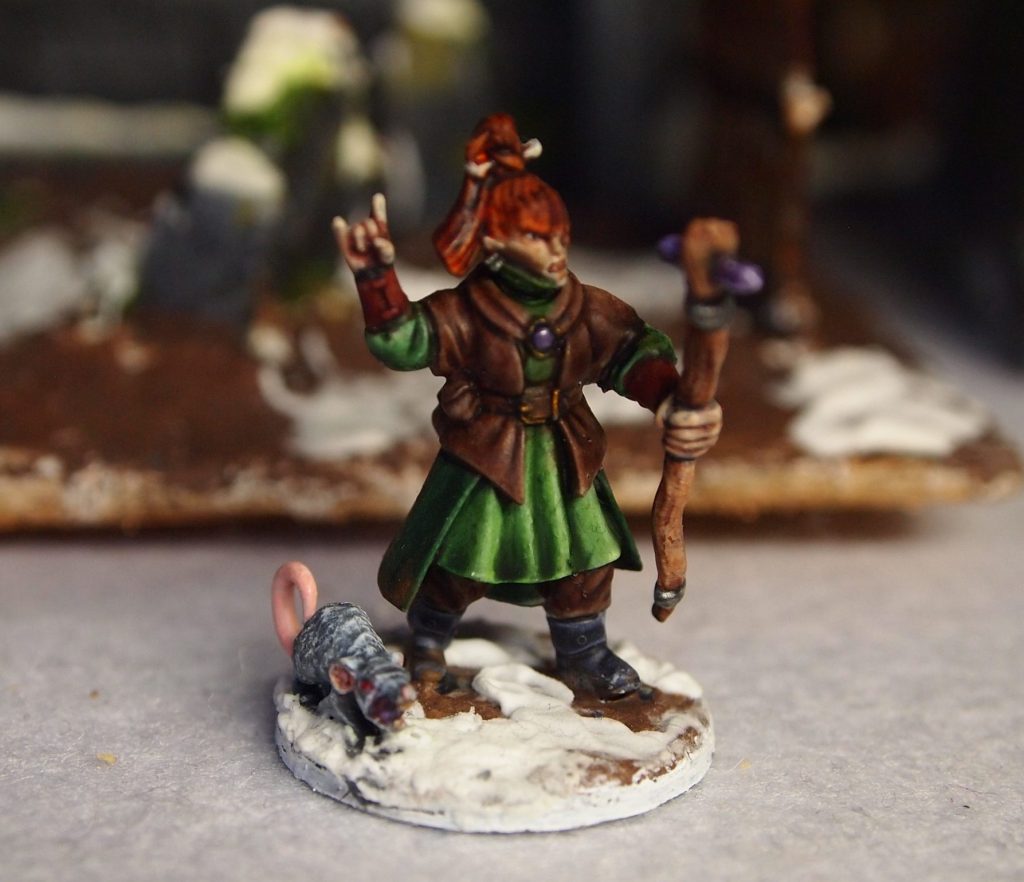
For the apprentice I continued with a figure from the Frostgrave Wizards II box with a Warhammer 40,000 Dark Eldar/Drukhari head because I love Drukhari.

Mirhen the Apprentice miniature for the Fostgrave 2e table top skirmish wargame.
Mirhen the Apprentice

The Archer

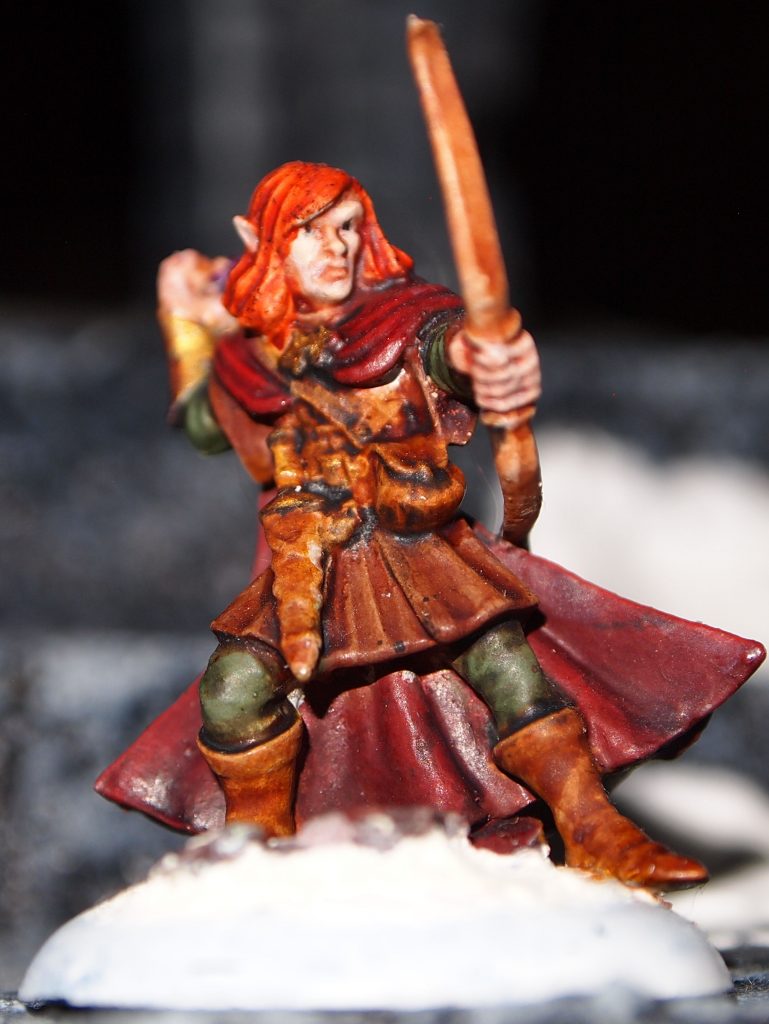
For the Archer, Brikolad, I went for a model from Reaper Miniatures and decided to mix things up a bit with the colour scheme and went for a sort of autumnal feel.

Brikolad the Archer miniature for the Fostgrave 2e table top skirmish wargame.
Brikolad the Archer

The Knight

Next Naru Magol, Knight. This is one of the Arisan’s guild minis. Too many layers on the face but I’m planning on re-printing the mini and trying to use thinner paint in general.

Naru Magol, Knight, miniature for the Fostgrave 2e table top skirmish wargame.
Naru Magol, Knight

The Infantrymen

Galenglim Infantryman and Gurth Bor Infantryman both Artisan’s Guild minis. Happier with the paint job on these two.

Galenglim and Gurthbor infantrymen miniature for the Fostgrave 2e table top skirmish wargame.
Galenglim and Gurthbor infantrymen

The Thieves

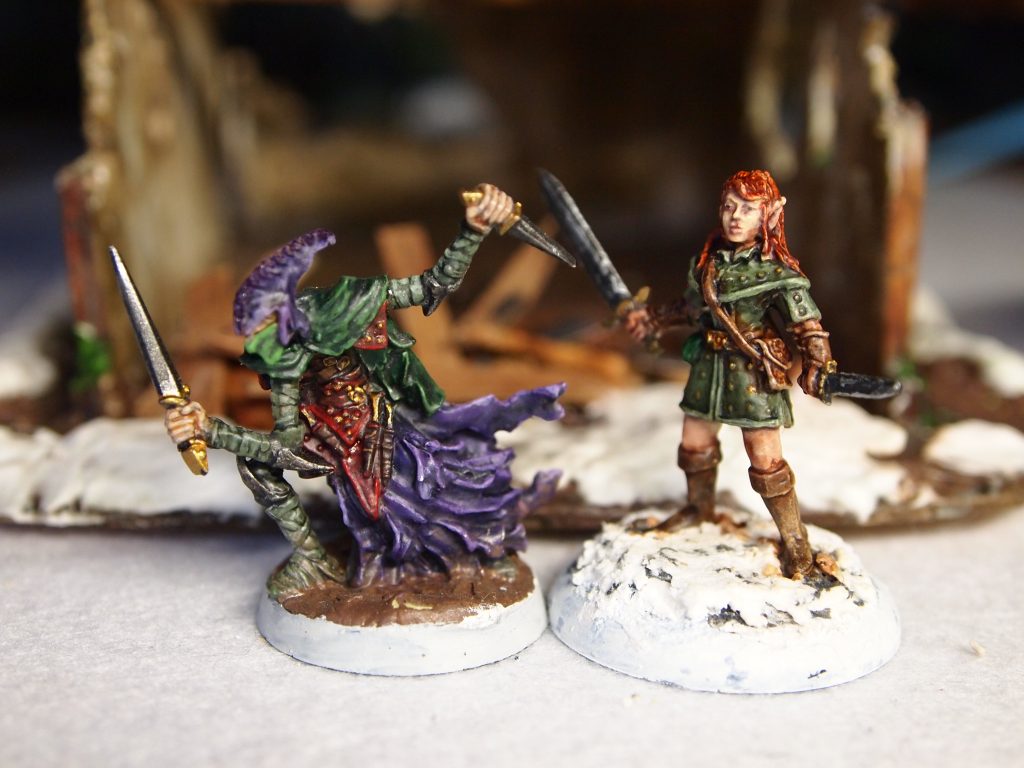
Daetir Thief and Kirgwaith Thief are both from Reaper where they are called Kalash Dark Elf Assassin and Merryn, Elf Thief. The Daetir mini has been sat in my pile of shame for about 12 years, which is vindication for those of us who find it hard to throw away our old unpainted miniatures. “Its not a pile of shame, its a pile of possibilities!”.

Daetir and Kirgwaith, Thieves miniatures for the Fostgrave 2e table top skirmish wargame.
Daetir and Kirgwaith, Thieves

The Thugs

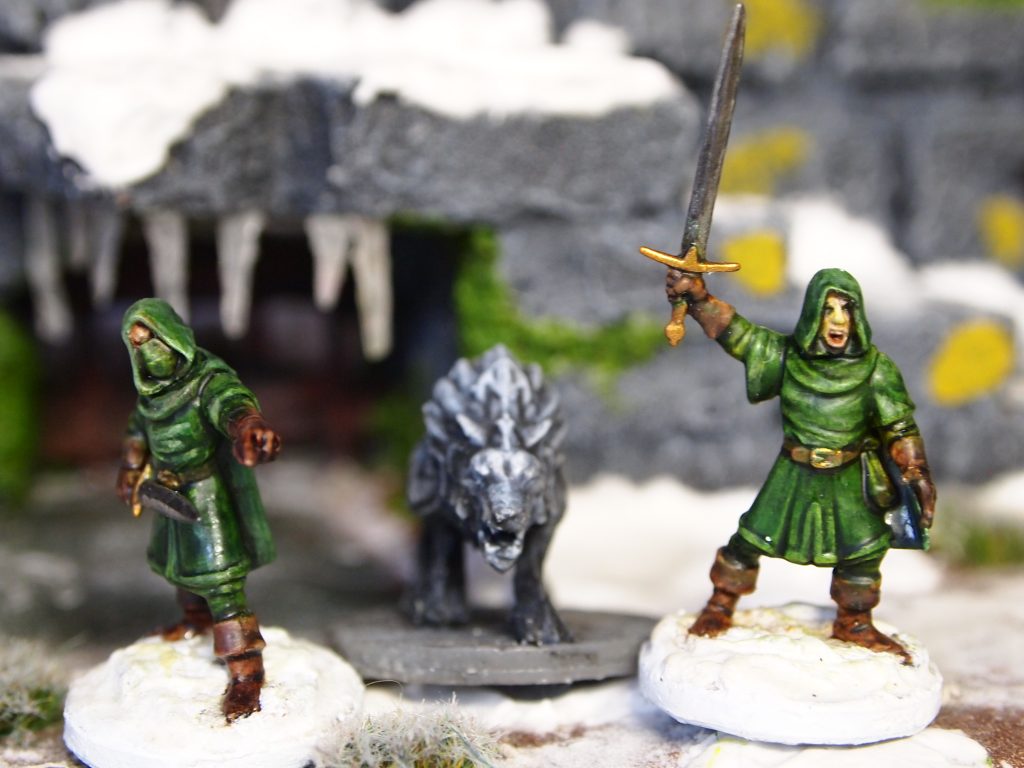
The Thugs, Seregthaur and Mothorm are both from the Oathmark Elf Light Infantry box by North Star Military Figures. The wolf is a sculpt by Gloomykid available from Thingiverse.

Seregthaur and Mothorm, Thugs with Draug the Wolf miniatures for the Fostgrave 2e table top skirmish wargame.
Seregthaur and Mothorm, Thugs with Draug the Wolf

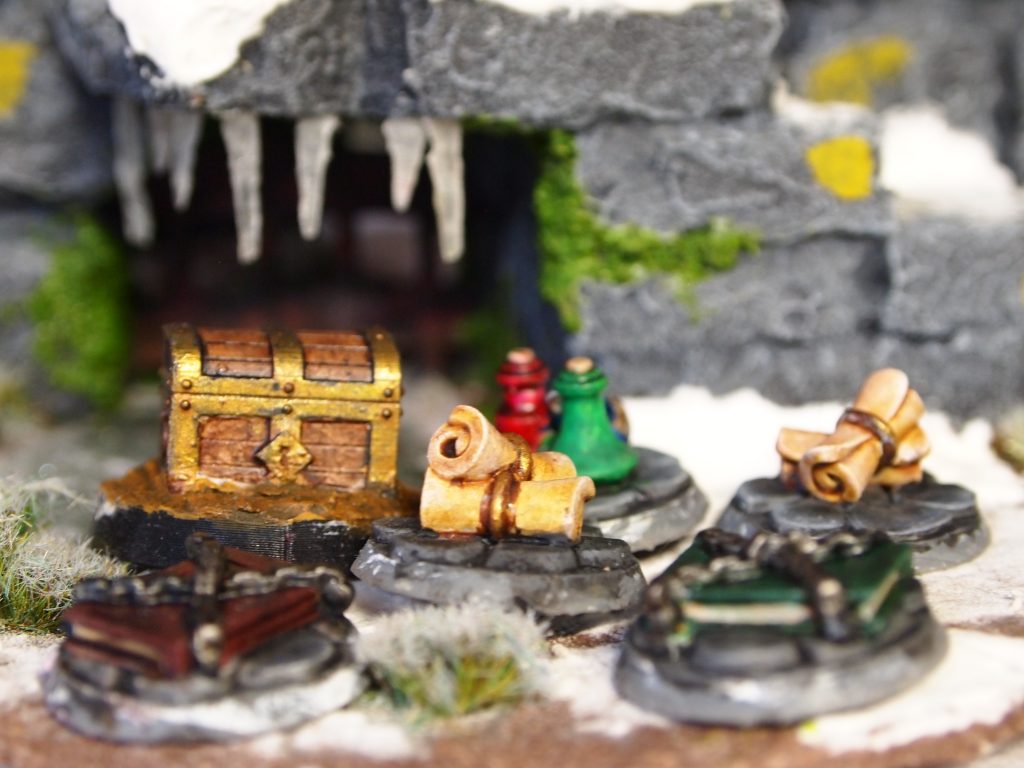
Treasure Tokens

And some treasure tokens are useful. These are all 3d printed. The books, potions and scrolls are from a set “FREE FROSTGRAVE TREASURE TOKEN 25MM BASE” by Ultraviolence and the Treasure Chest is by Kimskell

Treasure markers miniatures for the Fostgrave 2e table top skirmish wargame.
Treasure markers

…They are all perfect. Painting Warhammer Old World: Tomb Kings Skeles

Somewhat against my better judgement I bought a copy of Warhammer Old World: Tomb Kings of Khemri. I will probably not play the game itself but who doesn’t love a huge box of minis all shiny and bursting with possibilities on their little sprues? The minis will also be useful for many other games so I didn’t feel too bad about spending a large chunk of my gaming funds.

My go to method with skeletons has been, since the days of the first Warhammer PBS1 Skeleton Horde box , prime black, drybrush white and chuck on some brown wash of some sort to give them that aged bone look. Its quick and on the table doesn’t look too bad.

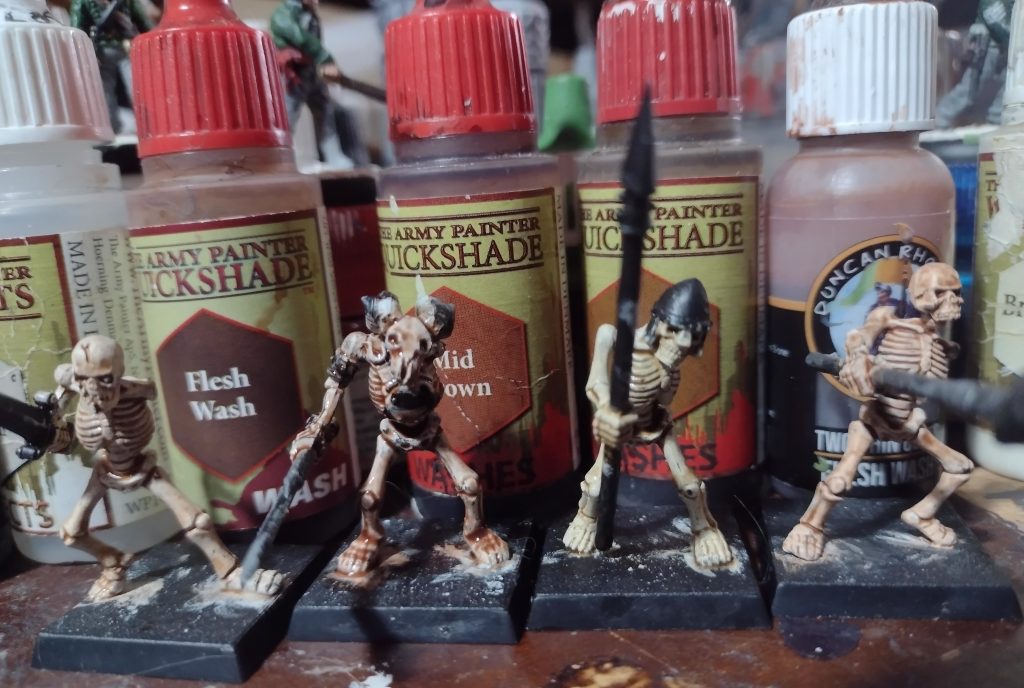
This time though I opted for a slightly different method. Prime then base coat with Army Painter Brainmatter Beige which is a great off white which I’ve been using for teeth and bones and as a base for anything white.

For the next step I couldn’t decide which version of brown wash I would use. I seem to have accumulated a few. Army Painter Quick Shade – flesh wash, mid brown wash and soft tone wash, plus some Two Thin Coats flesh wash. So in the interests of, well possibly not science I did a test of all four.

And I liked them all! So it might also look quite cool to have some variation and use them all. In case you were wondering the shield arms I left off to make them a little easier to paint. So it is sort of slap chop without the contrast/ speed paints. I might paint a couple of skeletons one with speed paints one with my “old school” method for comparison. Do you have a quick method for skeletons? Let me know in the comments.
All alone in Felstad Part 1.5 – Frostgrave 2nd Edition Review

(I probably should have written  this before my previous post, but better late than never.)

Frostgrave is a mini agnostic skirmish wargame set in the frozen ruins of the city of Felstad by Joseph A. McCullough. Felstad was once a great city in a magic empire, its inhabitants producing objects of wondrous magic. But, the city was doomed by the actions of a wizard who lost control of some working and a great storm was unleashed  shrouding the city in a cataclysmic blizzard that left behind only a frozen wasteland. The empire failed and its magic also.

After many centuries Felstad was almost forgotten but as the magical winter began to abate, those who remembered the tales of the city began to turn their thoughts to the ruins and the treasures that lie there hidden.

What you need to play.

Some miniatures to represent your warband and any of the dwellers of Felstad, some scenery, dice, Wizard sheet and the rule book.

Ideally your miniatures should be chosen to represent your warband, having the same equipment etc, but this isn’t a hard rule. You could play the game with tokens or anything you like, as long as you are having fun no one is going to tell you you are not following the rules. 

The dice needed are d20s and the wizard sheet is included to photocopy/ scan in the rulebook, but it can also be downloaded from the Osprey website.

To represent the ruins of Felstad you’ll need some terrain and this can be as simple as some blocks or as elaborate as you want. The important thing is to have a lot of scenery as the game is designed to be played with a fairly crowded table.

The rulebook is nicely presented with some great illustrations and photos that will give you plenty of inspiration for your terrain pieces and your warband. The one thing that is a great incentive to try Frostgrave is that the rule book is relatively cheap round about the £20 to £25 mark at the time of writing for the 2nd edition. A PDF and Epub versions are also available from the Osprey website for £17.50,

The Warband

You create a small warband of up to 10 (although this number can be increased by some spells), the principal member of which is your wizard (or in some cases a witch – see what I did there?). It is the wizard who recruits the warband from their own funds.  

Each wizard follows one of the 10 schools of magic available in the rulebook. There is a good range of schools to choose from and your wizard can be any one of the following; Chronomancer, Elementalist, Enchanter, Illusionist, Necromancer, Sigilist, Soothsayer, Summoner, Thaumaturge and Witch.  The school determines which spells you can learn. Each school has allies, neutrals and enemies among the other schools and this determines which spells you can use and how difficult they are to cast.      

To aid the wizard you can also recruit an apprentice whose stats are generated from the wizards, with a few adjustments. The apprentice is after all not as skilful as their tutor. They also share the same list of spells that their tutor has. It isn’t compulsory to have an apprentice but it is probably a wise move.

As well as the apprentice, the wizard can recruit another eight members for the warband.  The wizard has 400 gold crowns with which to hire their followers. There are 9 specialists detailed in the rulebook and a wizard can have up to four of these in a warband. Standard soldiers are less expensive, which there are 6 to choose from including thugs and thieves who will join a warband for no fee.  I get the feeling that the thugs and thieves probably all wear red shirts, but maybe I am just an old cynic.

With warbands created you are ready to play one of the 20 scenarios included in the rulebook. You can play these as one offs or as a campaign. 

Campaign Play

The campaign rules cover a lot of ground. There are rules for permanent injuries, in campaign play being reduced to 0 health isn’t always the end and there is a chance that your soldiers who are on 0 health might survive, missing the next game if they don’t make a full recovery. For Wizards and apprentices there are a greater range of possible outcomes if they’ve hit 0 health including the possibility of a permanent injury.

Wizards in campaign play gain experience that increases their level and allows choosing, to improve either a stat, a known spell or learn a new spell.

In campaign play treasure is also dealt with differently from just determining the winner as in the one off game. Treasure in campaign play is rolled for on a table with results for gold, potions, magic items, magic weapons and armour, spell scrolls and grimoires. The rules include tables and descriptions for all of the list except gold which is worked out on the initial treasure table.

Campaign play also has the option of buying and selling loot, hiring replacement soldiers (although you are still limited to four specialists and a maximum warband size of 10) and equipping the wizard’s base of operations which is another aspect that gives campaign play some depth.

I can’t help kicking myself for not grabbing a copy of the rules a lot earlier. But there is some consolation that the game is “tried and tested” and has a good number of supplements as well as a dedicated magazine “Spellcaster” that includes loads of content to give your game some extra tweaks. Its available from Osprey, Drive-through rpg/ wargames vault and probably your local gaming shop. The supplements include a lot of extra content to make your games even more fun and helpfully the 2nd Edition also includes an appendix detailing how the changes from 1st Edition affect the supplements that have been released before 2nd Edition.

Miniature Battles Score

I give Frostgrave a solid D20 in my scoring scheme. I think I am going to be getting a lot of mileage out of the Frostgrave game.

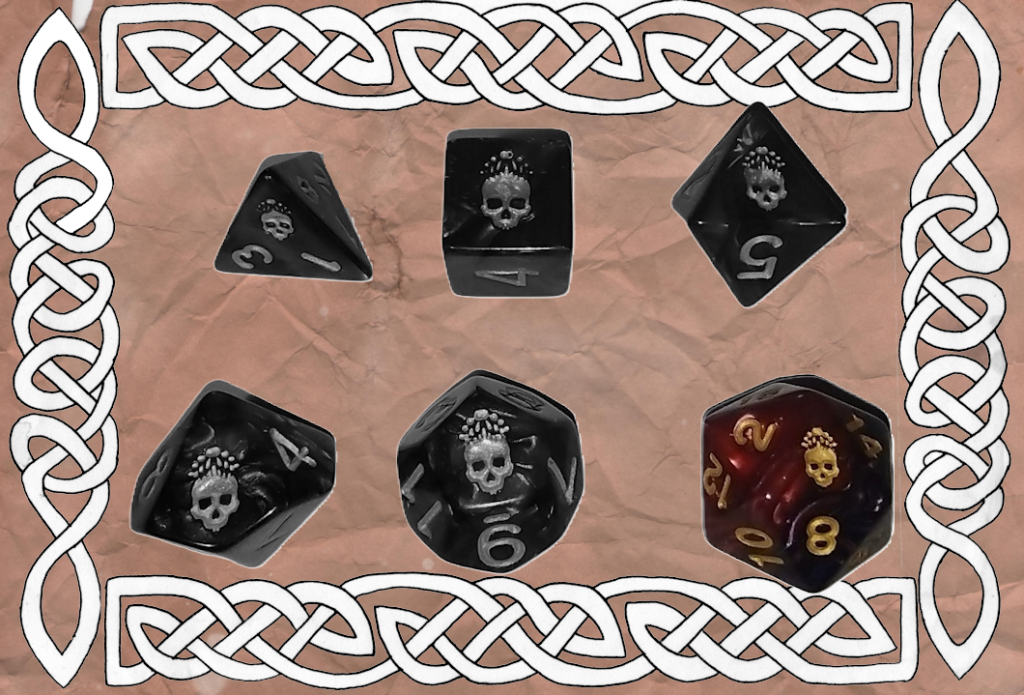
A set of polyhedral dice in grey scale with d20 in colour.

You can find out more about Frostgrave and Joseph A. McCullough at his blog The Renaissance Troll

All alone in Felstad

For my first “series” I’m going to be looking at Solo skirmish gaming with Frostgrave.

Roughly, November 2023, I took the plunge and bought a copy of Frostgrave 2nd Edition by Joseph A. McCullough, and was hooked!

Table top scenery/terrain is not something I have really done before, not unless you count the “pill box” I made for Rogue Trader era W40k. Back then I was inspired by an issue of White Dwarf and set about looking around the house for things that looked like they might work as sci-fi buildings and decided that an empty yogurt pot would be great. A coat of primer and a coat of grey paint later I had a pill box/habitation unit. I decided it didn’t look as stone/concrete like as I wanted so I struck on the idea of covering it in something gritty, and not finding anything used some cat litter, fresh, I hasten to add, and another coat of grey paint.

Of course what I ended up with was a thing that looked like a yogurt covered in cat litter as a gaming buddy at the time quite rightly pointed out! So apart from miniature bases I didn’t really bother much more with terrain.

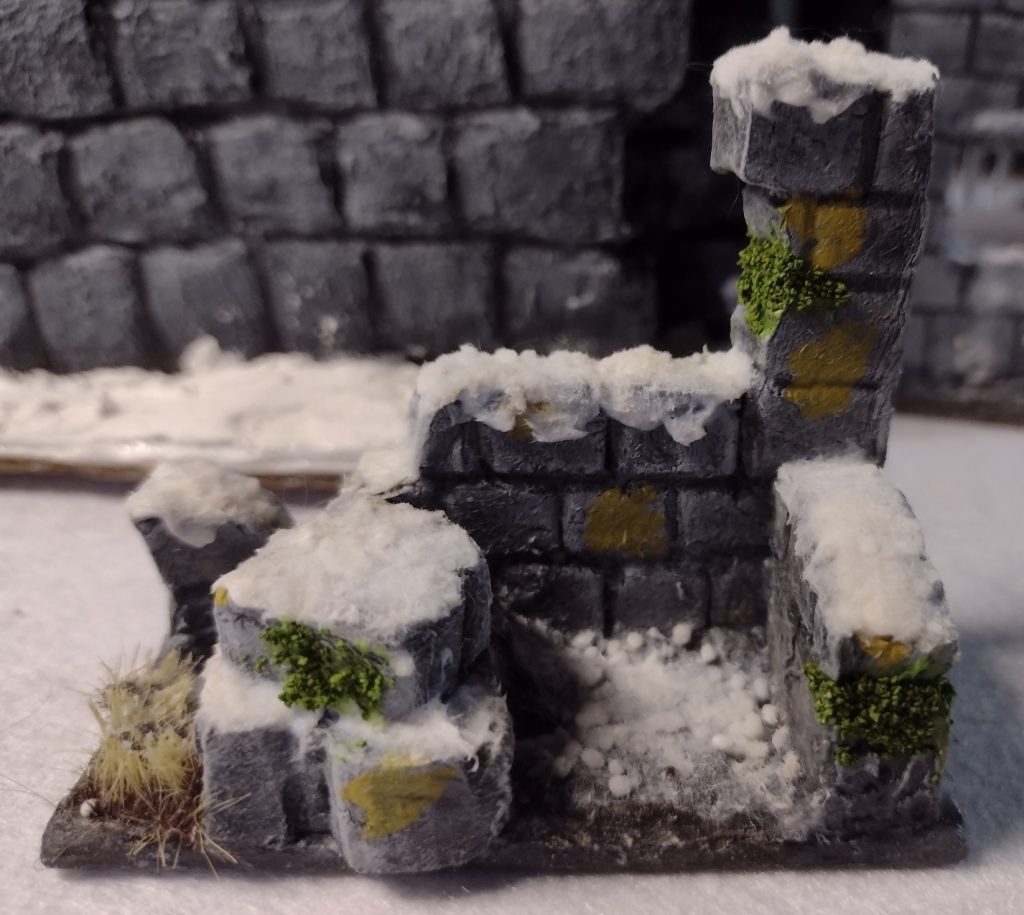
So starting on Felstad project I was determined to at least make something that I would not be totally ashamed of. And this little corner of a ruined building was the result.

It was a test piece built from scraps of XPS foam and odds and ends from my basing box, the first bit of my version of Felstad was born and although it wasn’t amazing I was fairly happy with it. The snow effect was some snow powder/flock I found on ebay.

Small crumbling wall model for Frostgrave wargame

What followed was a bit of an obsession. I spent a lot of the winter building ruins, experimenting here and there with different products and ideas. Mainly I was was using the XPS foam from an The Army Painter GameMaster Dungeons & Caverns Core Set, which I’d bought and only tried two tiles from.

What I found so inspiring about building for Felstad, was that it was a ruined city covered in snow. Which meant that if a bit of a building went wrong – I could just break it off and it would just add to the ruined look. Also you can cover up a lot of errors with snow effect. It turned out for me that broken things were fun and my sort of shabby wargame chic works ok with the ruined city aesthetic.

What is different now compared with the mid to late eighties of course, is that tutorials are so much easier to find. There are so many inspiring blogs and YouTube channels to help with wargaming projects. Black Magic Crafts and Geek Gaming Scenics are two I watch from time to time.

Newer posts »