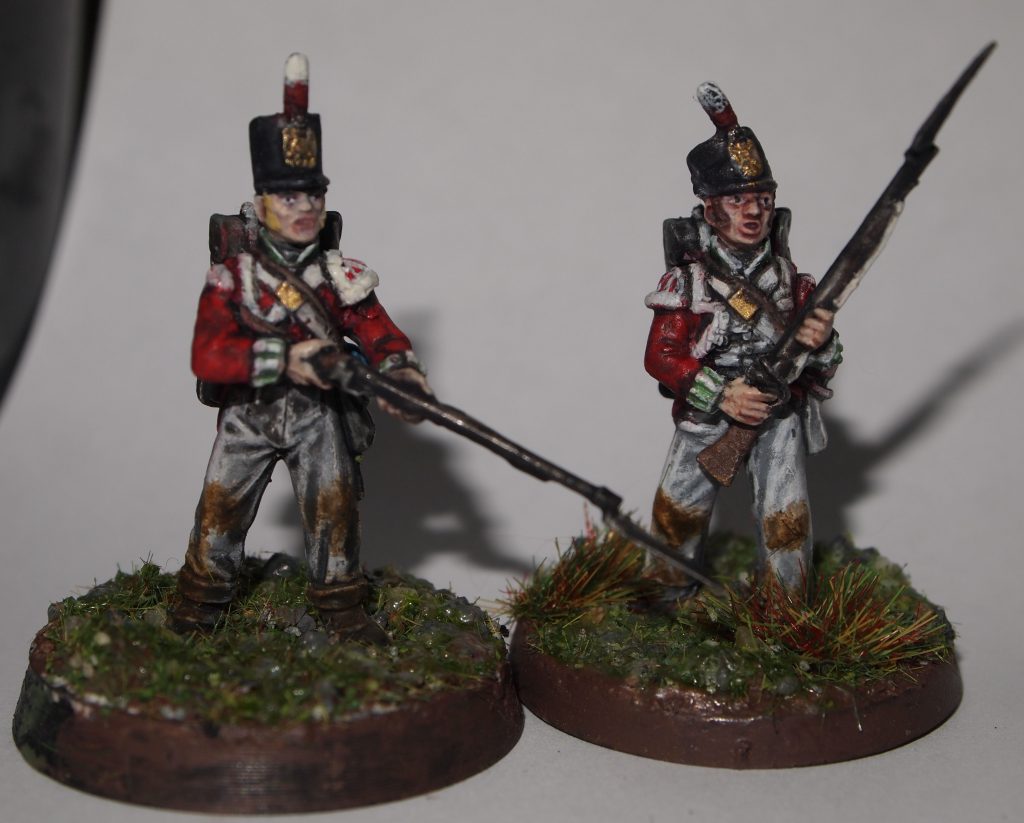
The original plan was to have just one unit for The Silver Bayonet. But as often happens with miniature based games, the ‘I’ll just buy the minis for one warband/gang/army’ promise to oneself rarely lasts.
You’ll be reading through a rulebook or supplement, or innocently looking at some miniatures online to see how people are painting them and a hitherto unseen seed of inspiration doesn’t just begin to germinate, but explodes in to a humongous great forest complete with a thriving ecosystem of tiny furry creatures! So it was with this unit. I was just looking online and the North Star Military figures – The French Unit popped up and two of the minis jumped out at me shouting ‘paint me, paint me! I’d be really good as…’ – insert character idea. So I ordered the box and got painting.
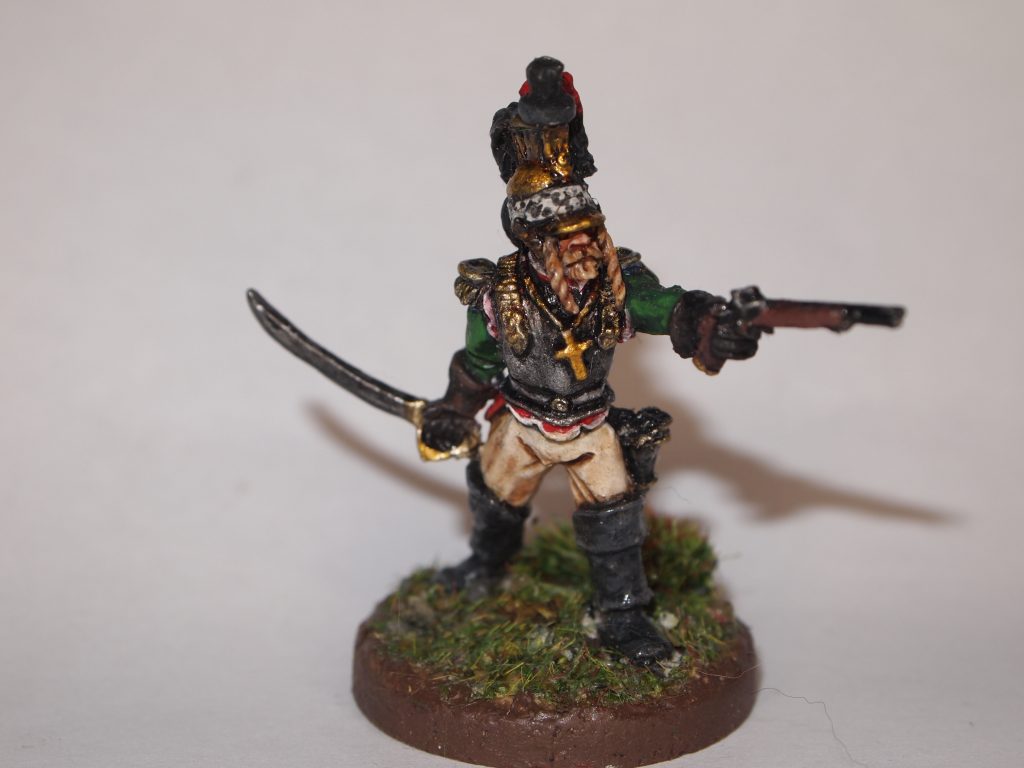
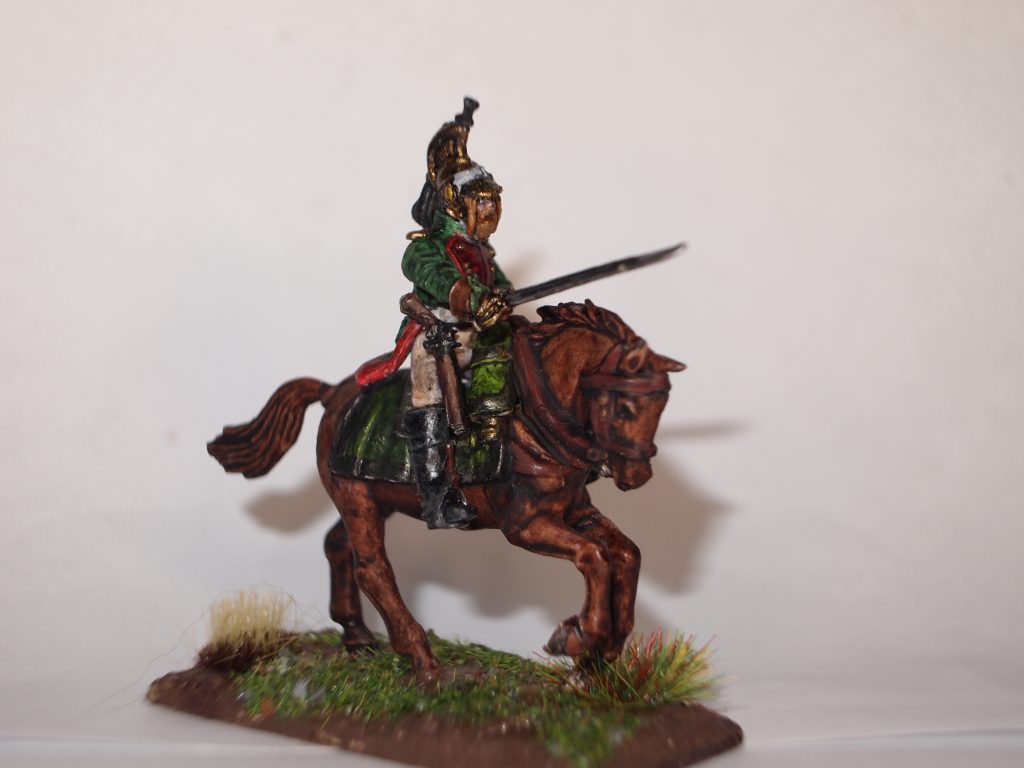
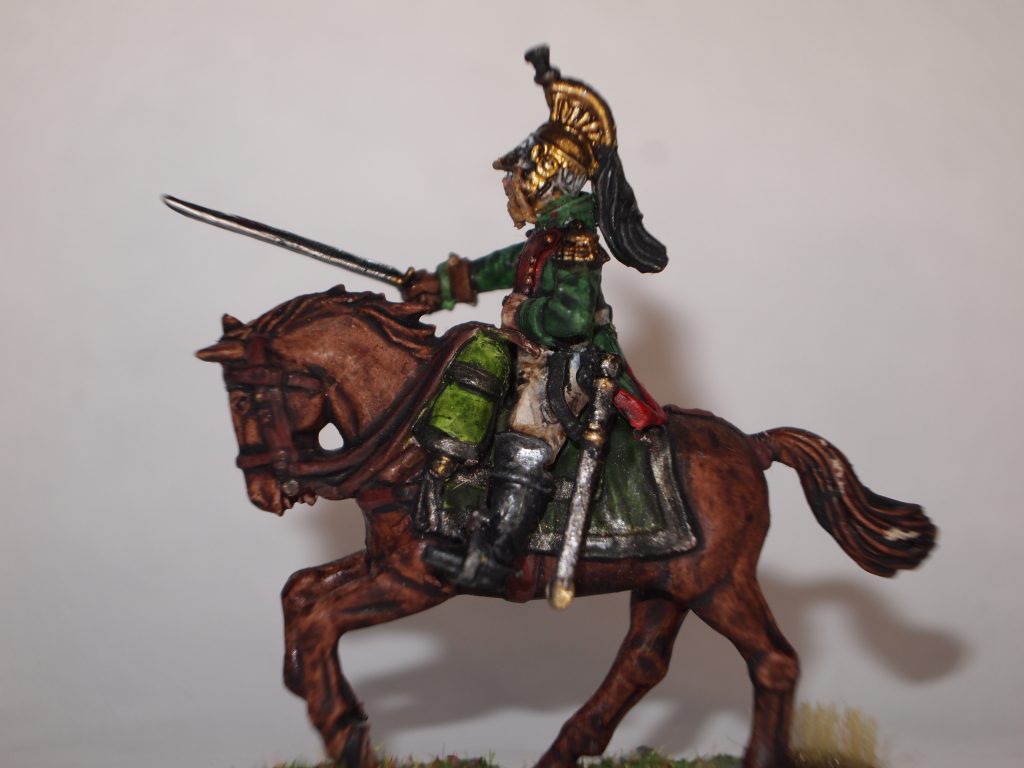
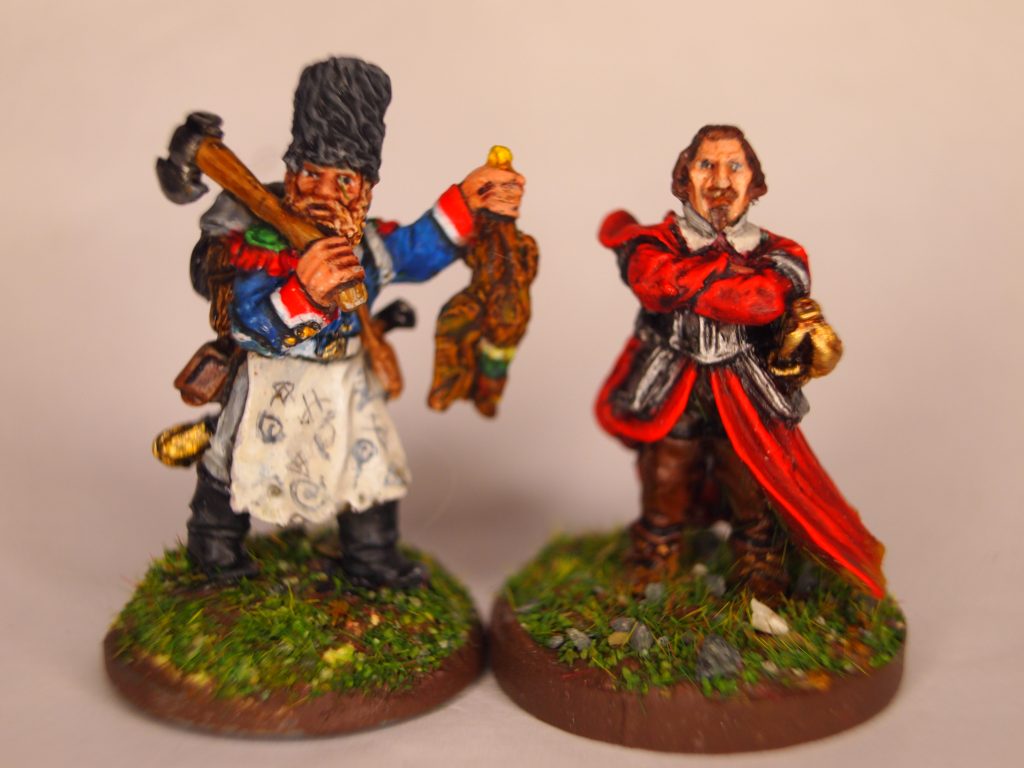
Major Armand d’Hubert – Officer
The mini is a French Heavy Cavalryman from the North Star set but I wanted it as my officer and went off script, as it were, and added some hussar’s braids, or cadenettes as they were called at the time, to what is more of a Dragoon mini. Greenstuff to the rescue for some very basic kit bashing. This was to represent the protagonist from the film The Duellistswhich is Ridley Scott’s first film, and an absolute masterpiece to my mind. Beautifully shot and oozing with atmosphere. Based on a short story by Joseph Conrad titled ‘The Duel’ or in some cases ‘A Point of honor’ , that follows two officers of the French Hussars through Napoleon’s campaigns. One of whom repeatedly calls the protagonist out to duel.
I gave the officer the cavalryman trait as it seemed appropriate and so needed a mounted version.
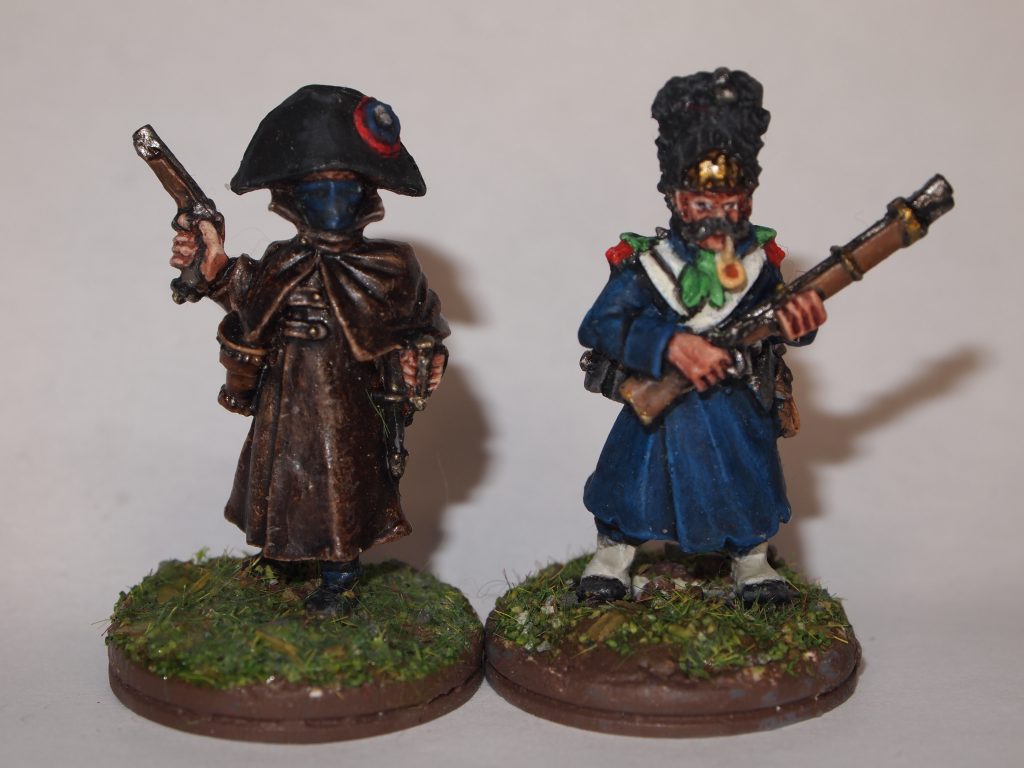
Captaine Didier de Malherbe (Veteran Hunter) and Jaque ‘oncle’ Tati (guard)
Both mini’s are from the North Star box where they are the Veteran Hunter and the Grenadier. I have a suspicion that the veteran hunter has a bit of inspiration from the film ‘Le Pact Des Loups’/’Brotherhood of the Wolf‘, which was one of the things that made me want the box set. I’m quite pleased with the distressed/aged leather look of this one. The names are from the French jazz musician of the same name and the French actor and film maker, Jacque Tati.
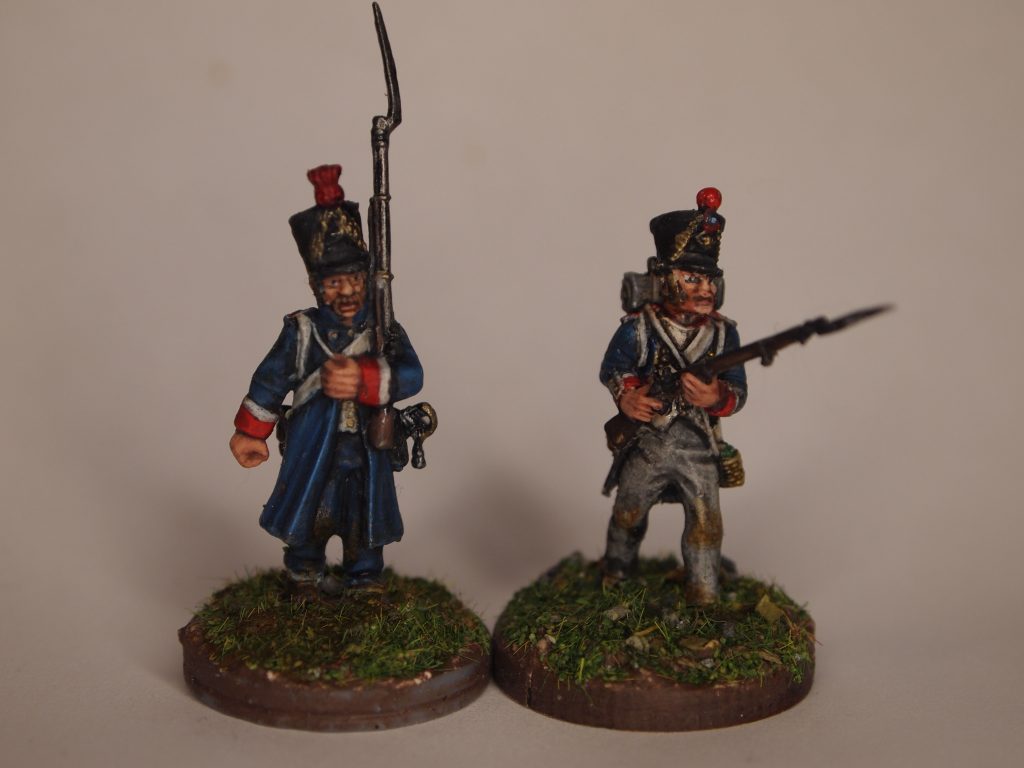
Sgt Sylvain Faison – Sapper and Cardinal Jean de Plesis – Champion of Faith
Both of these minis are from Warlord Games. Warlord Games Napoleonic French Peninsular Veteran: Philippe Berthet and WarlordGames Cardinal Richelieu, The Red Eminence. Back story for Faison is that he always goes into battle with his lucky pheasant, to the chagrin of his fellows. The runic apron was inspired by artwork in the rule book. There is a sapper in the Northstar box but I really liked the addition of the pheasant and tatty uniform of this Warlord Games mini.
For a French Champion of Faith it had to be the cardinal and he doesn’t look too out of place despite being from a couple of hundred years before The Silver Bayonet’s setting.
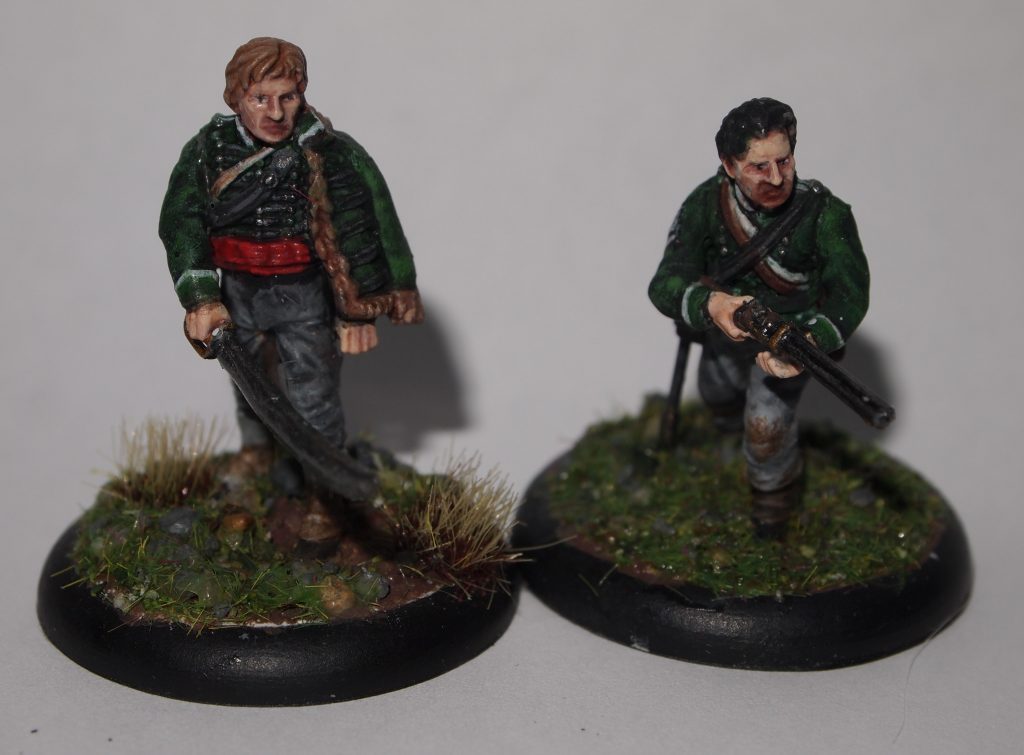
Pvt Jean-Jaques La Cible and Pvt Aimant de Balle – Infantrymen
I really enjoyed painting these minis and now have the bug for The Silver Bayonet Units. I have another already painted which I will blog about in the near future (he says while thinking about the number of posts that are in the ‘preparation’ stage).
Do you play The Silver Bayonet? And if you do how many Units do you have? Have you just stuck to one or are you building a collection? Let me know in the comments. Au revoir for now!
It wasn’t a difficult choice to make, and like many The Silver Bayonet Players I chose a unit that takes inspiration from the “Sharpe” TV series based on the novels by Bernard Cornwell. Though in the end I chose three of the characters from the TV series and made up the remaining members of the unit using other minis.
I had so much fun finding miniatures to represent the members of my unit and painting them. I found that reading through the rules had ideas popping in my head for all sorts of characters.
Major Richard Blunt and Sgt Major Podraig Clarsha
With a little wordplay I decided that Richard Blunt was a suitable name for the unit’s officer and Podraig Clarsha would take the role of Veteran Hunter and Blunt’s right had man. Both minis are from The Wargames Atlantic British Riflemen box of plastic miniatures. You get a good amount of minis and options and could easily have all your unit in rifleman green.
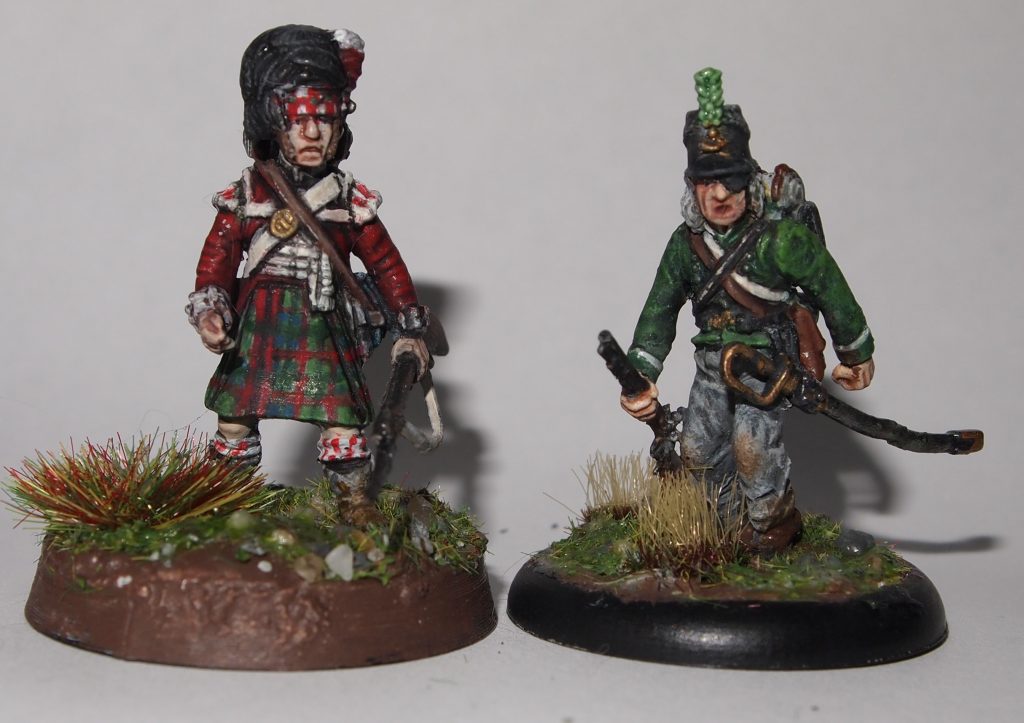
Private Wullie Mc Feegle – Highlander and Captain William Sweet – Rifleman
I wanted to also have a highlander in my unit so got some Victrix British Napoleonic Highlander Centre Companies. Again a great box of minis with more than enough options available to get some great figures. The name is a wee nod to Sir Terry Pratchet’s Wee Free Men. The other mini another Wargames Atlantic rifleman is based on the character of Captain William Fredrickson, with minor kit bashy green stuff eye patch and hair. His sword is a little wonky because I am a little clumsy and am constantly breaking bits of my miniatures. This one didn’t repair very well and I keep meaning to re-do it, but inevitably get side tracked with new minis to paint.
Privates Ezikiel Parts and Tobias Function -Infantrymen
I get the feeling that these two might not be around for long.
Dr Pestremus Sussorous – Doctor
The company avoid getting wounded as much as possible as this keeps the Doctor away, no one is very comfortable around him.
I didn’t have a mini for the doctor until I remembered that I had some STL files for Plague Doctors by Black Scroll Games. They don’t look to out of place given the Gothic Horror setting. I need to reprint the mini at some point on the newer of my printers as this one was done on an older printer and lost a lot of detail. The pistol is from a Reaper Miniatures Razig weapons pack.
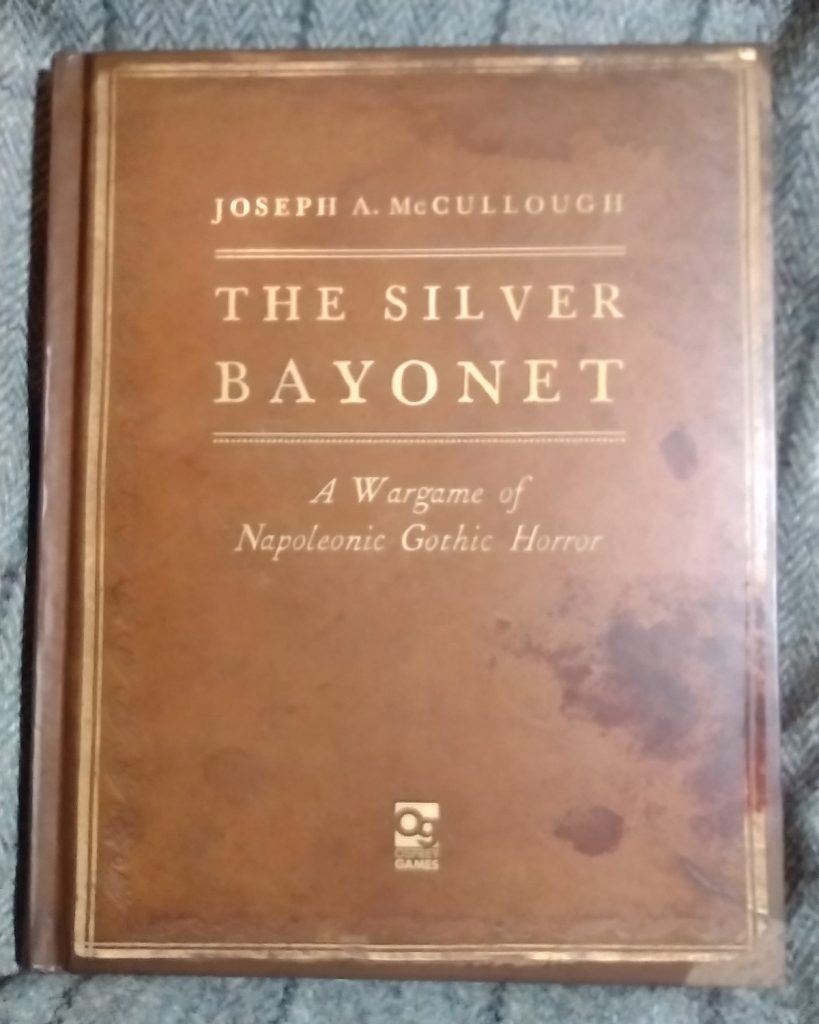
While looking at Frostgrave supplements on the Osprey Publishing site I began looking at another game by Joseph McCullough, ‘The Silver Bayonet‘. I’d seen it mentioned here and there but never really looked at what it was about. After reading the description, and realising that this was a great excuse to paint some military miniatures from the Napoleonic period, I grabbed a copy as soon as I was able.
I’ve always liked the idea of having a big army of miniatures from the Napoleonic era but have always held off because it would require spending a lot of money that is already earmarked for fantasy and sci-fi gaming and I probably would never get round to actually having any battles. So, The Silver Bayonet is perfect for going someway to scratching an itch. You don’t need a large amount of miniatures, the rulebooks and supplements are very reasonably priced and, the rules are fairly straightforward.
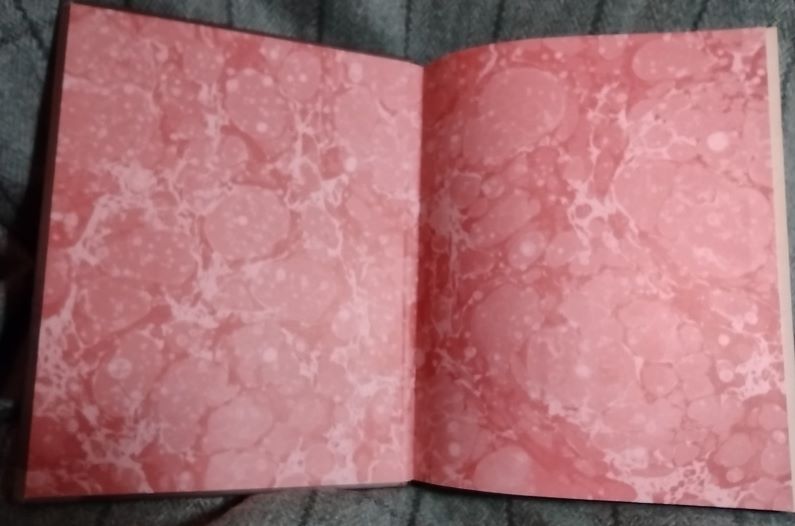
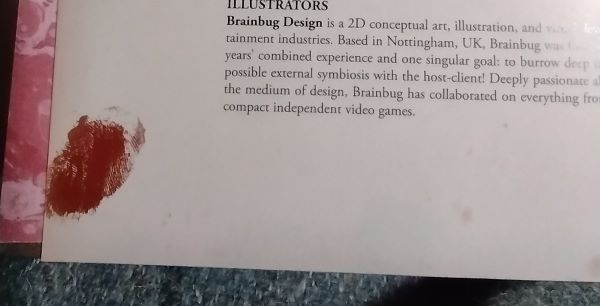
The rule book is very well presented and has been styled to look like an old hardback book with stains and damage. This is carried through the whole book with the ‘marbled’ style end papers and there are odd stains on some pages like the bloody finger print pictured below.
Napoleonic Gothic Horror
The Silver Bayonet is a skirmish wargame set in an alternative history where during the Napoleonic wars, fuelled by the deaths on the battle field, entities known as the Harvestmen began to cast their influence on the world, using their powers to release a horde of supernatural creatures previously thought of as myth or legend.
Britain is the first nation to respond to the threat forming units of special troops to hunt down and destroy these supernatural foes, awarding success with The Silver Bayonet. Other nations soon form their own special units.
The game oozes a swashbuckling vibe sort of like a ‘boys own‘ story produced by Hammer Horror. It can be ‘Sharpe’s Vampire’ or ‘Hornblower and the island of zombies’ or anything your imagination can conjure up for the Napoleonic era.
Specialist Units
The focus of play are the specialist units. These are formed by first choosing a country, Britain, France, Prussia, Spain, Russia and Austria, in the core rule book but there are options for other countries in the source books. Different soldiers are only available to some countries – the Highlander, for example being only available to Britain, but there is an optional rule to make up your unit with whatever soldiers you like.
The book also suggests that if you want to play a nation not on the list there is no reason not to. Simply grab some minis and choose one of the countries that fits. As with all optional rules, its good manners to make sure your opponents are happy with your choice.
What you need to Play
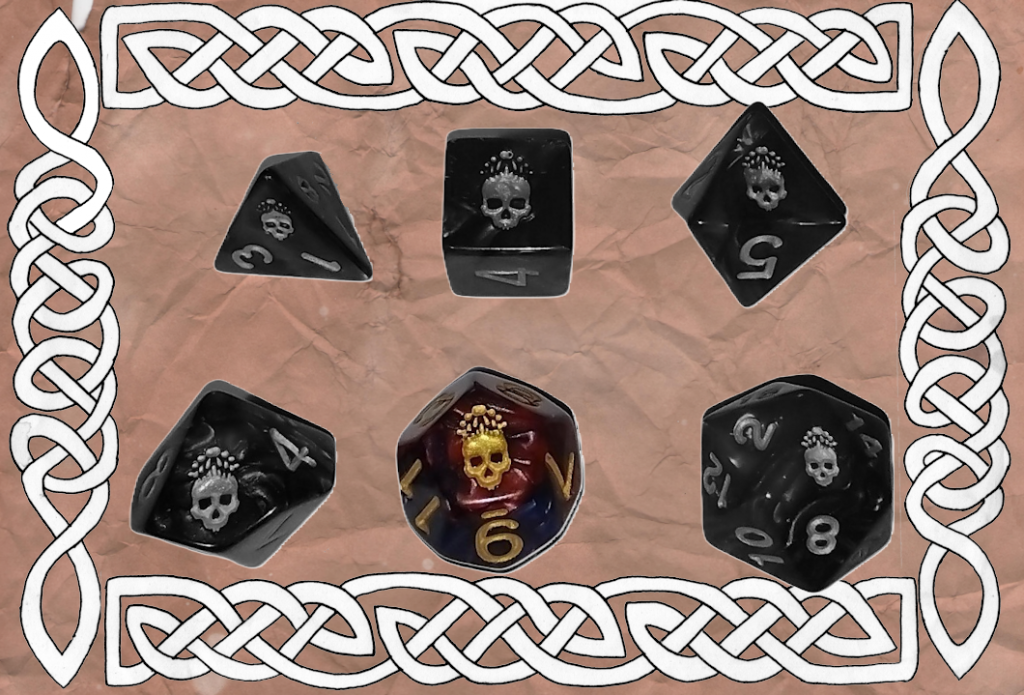
You will need up to 8 miniatures to represent your unit, one officer and up to seven soldiers. Plus some terrain, miniatures to represent the monsters, pencil and paper, a unit sheet – photo copied from the rule book or downloaded from the Osprey site and some d10s ideally in three different colours. The game is miniatures agnostic so you can use any miniatures you like. There is a great range of ‘official’ Silver Bayonet figures by North Star Military Figures. I have to confess I got badly bitten by the miniatures for The Silver Bayonet bug and now have three units (which will feature in future blog posts) and also have my eye on the North Star Russian Unit but am holding off for a bit as my pile of shame/possibilities needs reducing (and I just got my hands on a copy of Kill Team Hive Storm).
First you create a commanding officer who will lead the unit. There are some choices of increases to various starting stats so you can customise your officer a little. Further customisation involves the choosing two attributes. Attributes is a catch all term for skills, innate talents and special abilities in the game.
Next the officer needs to be equipped with a number of equipment slots to fill from two lists of equipment, a general list for standard weaponry with some items taking up more than one equipment slot, and a special list, items like silvered weapons and holy symbols, useful for fighting supernatural entities. A maximum of two items are allowed from this list though some of them are modifications to weapons and so don’t take up an actual equipment slot. Both are kept fairly small to keep things simple. A one handed sword or axe or club are all covered by the Hand Weapon, for example.
Next a company of up to 7 soldiers is chosen from a list of various specialists in keeping with the troop types during the Napoleonic era and. As well as military persons the lists there are also civilians whose skills make them useful to a Silver Bayonet unit. There is also the option of disregarding the country restriction and just choosing your soldiers as you wish. As is the case with much of Joseph’s game design the rules of fun and cool override those in the rulebook. Although it would be polite to check your opponent is okay with this in a competitive game.
The Game
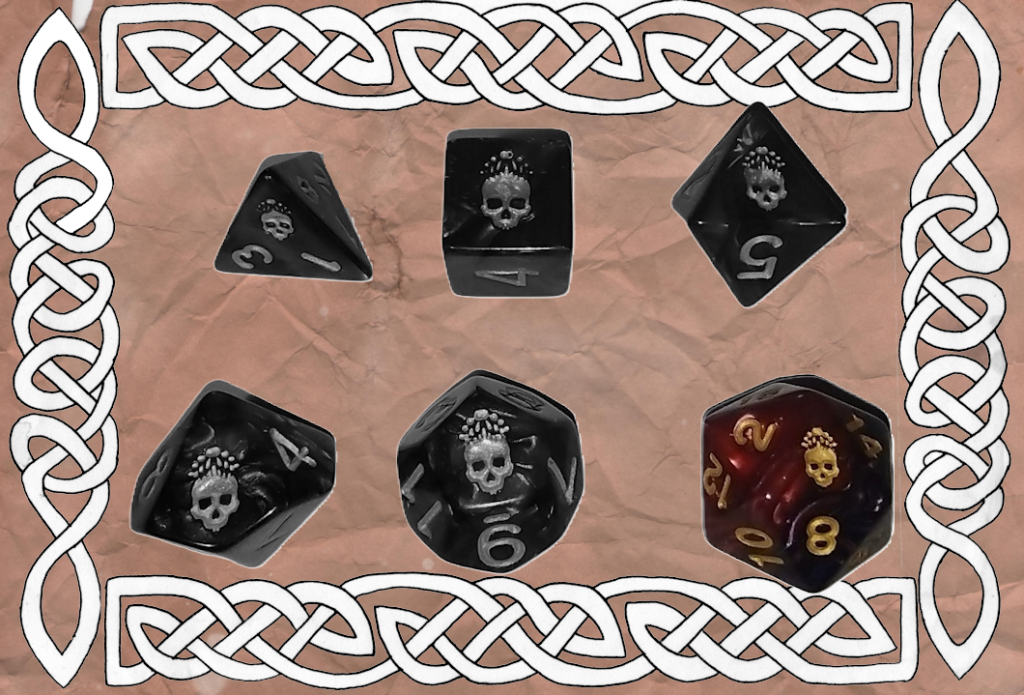
The rules are similar to the Frostgrave rules, a point I am in agreement with Mr Peachy about, if it ain’t broken, don’t fix it, but there are some differences, the main one being is Silver Bayonet uses d10s rather than d20’s as mentioned earlier. These come in three varieties, and is why it helps to have three different colours, some of which you keep in a pool to be used to affect rolls.
Turns are split into phases each of which is either your minis or your opponents (in the two player competitive version) and a phase for any monsters. Solo and co-operative play have slightly different phases but are essentially the same. A figure generally has two actions in their phase one of which can be move and the other shooting, melee attack, investigating, or other actions. A lot of the game depends on the scenario that you are playing and there are both competitive and solo/co-operative scenarios included in the book as wells a guidelines for creating your own.
Campaign Play
You can play the game as just a one off scenario or skirmish but I think where it shines is with campaign play. Campaign rules are included and guide you through the advancement of your unit as it gains experience.
Another Review
This is a fairly short review and doesn’t cover everything but Peachy over on Peachy Tips has done a nice The Silver Bayonet review and an excellent kitbash idea for making some zombies (round about the 23:49 mark) which is well worth watching. I also had a go at kitbashing a zombie for the game.
The Silver Bayonet Supplemental Rules and Settings
At the time of writing there are four supplements available for The Silver Bayonet, The Carpathians – Castle Fier, Canada, Egypt and Italy. Each adds new monsters and troop types as well as scenarios to play. It has also just been announced that the next supplement will be ‘Britain: Bones of Albion’.
Minature Battles Score
My one very small criticism of the rule book is the lack of photos of miniatures on the table. However, I can see that this may have been a design decision, photos possibly not fitting with the design aesthetic of the book, which is very well done – I particularly like the cover being styled to look like an old, stained book. So it is a really really small criticism. I would have liked to have seen some photos of miniatures, possibly in a gallery as an appendix after the main content, there is after-all a photo on the last page.
It is a very small criticism though. This game, like Frostgrave, has been a breath of fresh air and gets my imagination sparking away like a, well, a very sparky thing!
I’m giving it a d12, only because of the lack of inspirational photos. I’m trying to be fairly strict with my reviews otherwise the majority will score d20s!
Have you played The Silver Bayonet or are you intending to? What nation did you choose? Let me know if the comments!
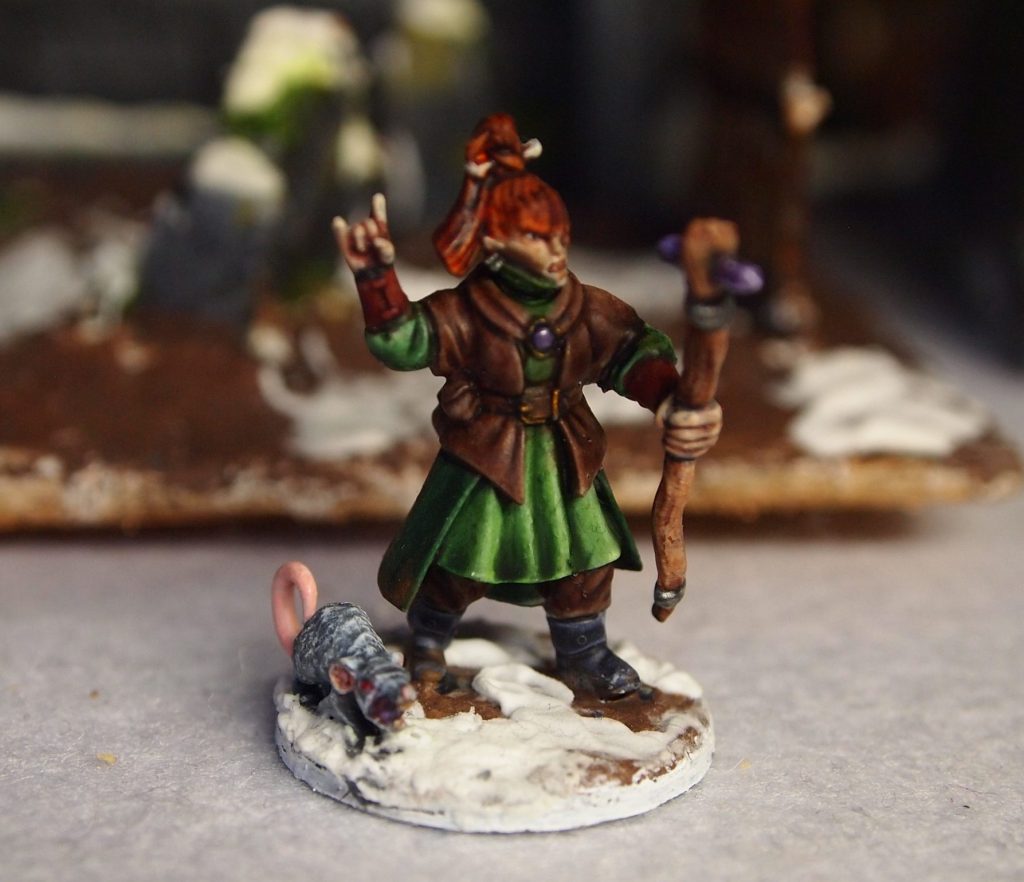
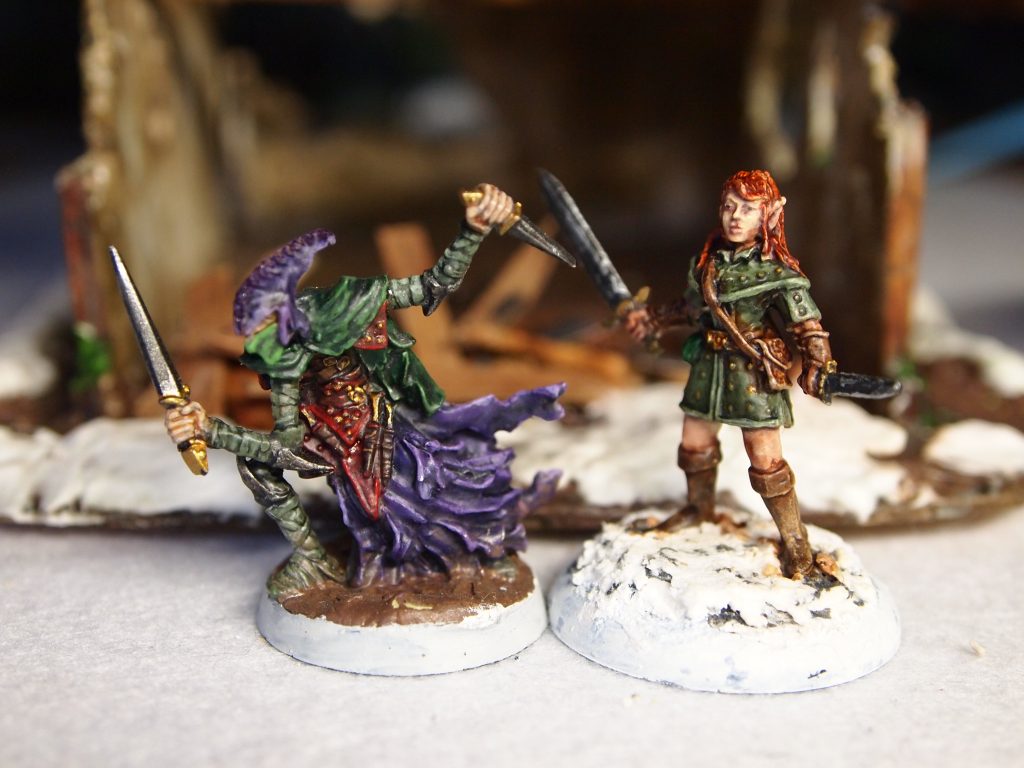
In which the witch Durnimlath Gul leads her merry band of elves in to the depths of the frozen city and wishes she hadn’t…
Finally, I found some time to play some Frostgrave. The scenario is the first of the solo and cooperative scenarios presented in the ‘Perilous Dark‘ supplement. Perilous Dark is a great supplement for Fostgrave that presents rules for playing Frostgrave solo and cooperatively, as well as lots of tips and ideas for creating your own solo or co-op scenarios. My notes definitely got confused at times so there are some inconsistencies in the following report so please excuse them.
The scenario involves the warband pitting themselves against wispy but deadly Vapour Snakes and crossbow weilding constructs as they move towards a door to a wizards workshop in the city of Felstad.
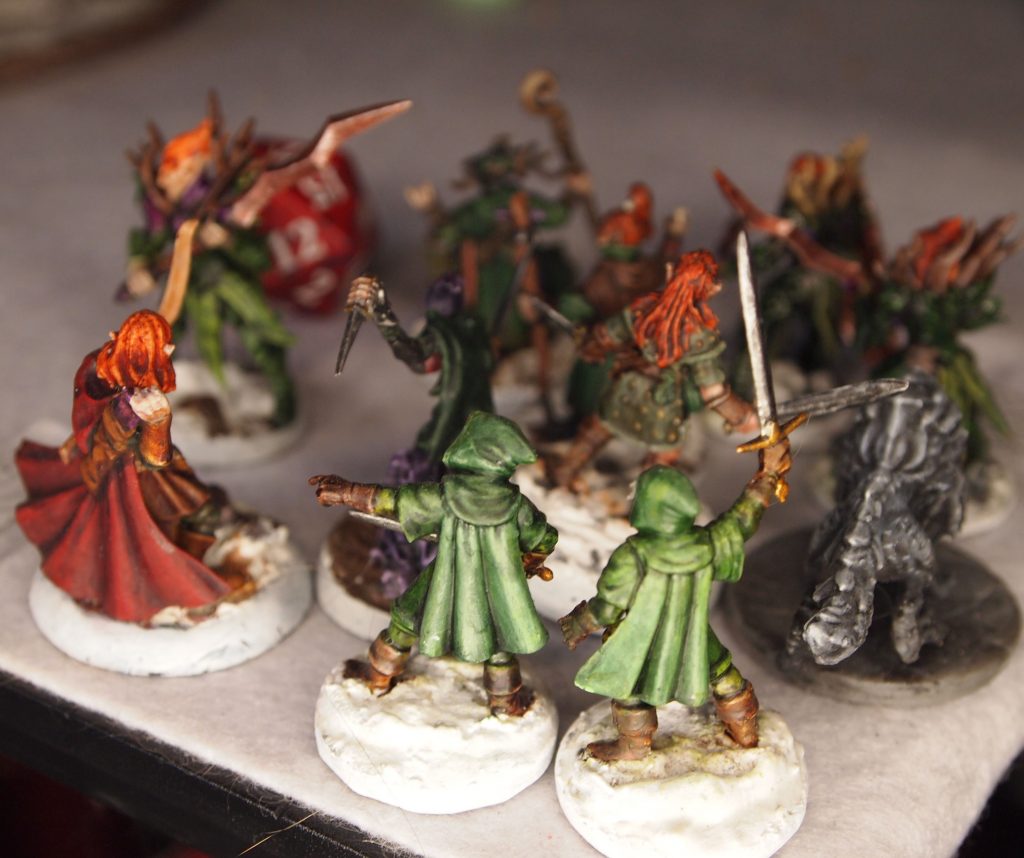
The Party’s Background
Durnimlath Gul, together with her trusty apprentice Mirhen and a group of loyal soldiers, has inadvertently stepped through a portal near their forest home, Farran Wood and found themselves transported to another world. The portal has delivered them to the outskirts of a strange frozen city.
With the portal only working one way Durnimlath now needs to search for another portal or means to return home.
The spirits of the group are at first low but are soon raised a little as they find a nearby inn selling a wine, that is not as good as the fine elven wine of their homeland, is nonetheless passable.
The inn keeper seems not at all suspicious of the strange coins that Durnimlath hands over, excepting gold as gold with a smile. The inn is like many in there own world and they soon learn that the strange city is named Felstad and they also hear tell of an old wizards workshop that might contain items of magical power.
Hoping that a portal or means to create one will be found among the frigid buildings, Durnimlath leads her party into the streets of Felstad.
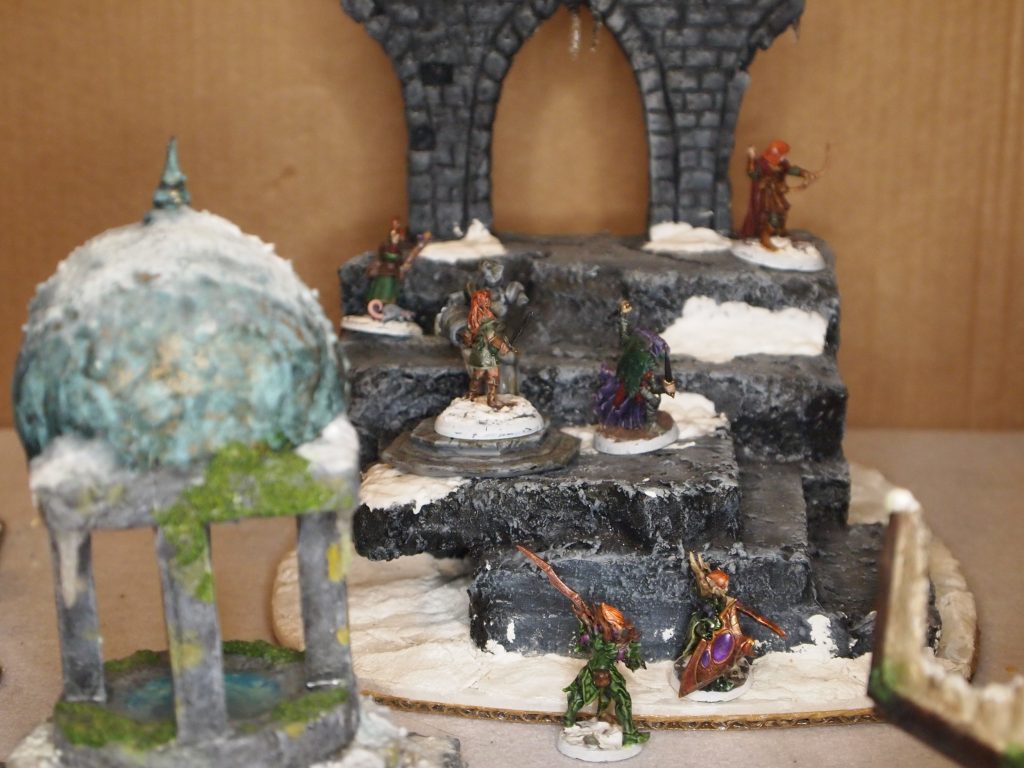
Setting up the table
The party start in one corner of the table, which is a bit comfy but will sort out as soon as they start to move.
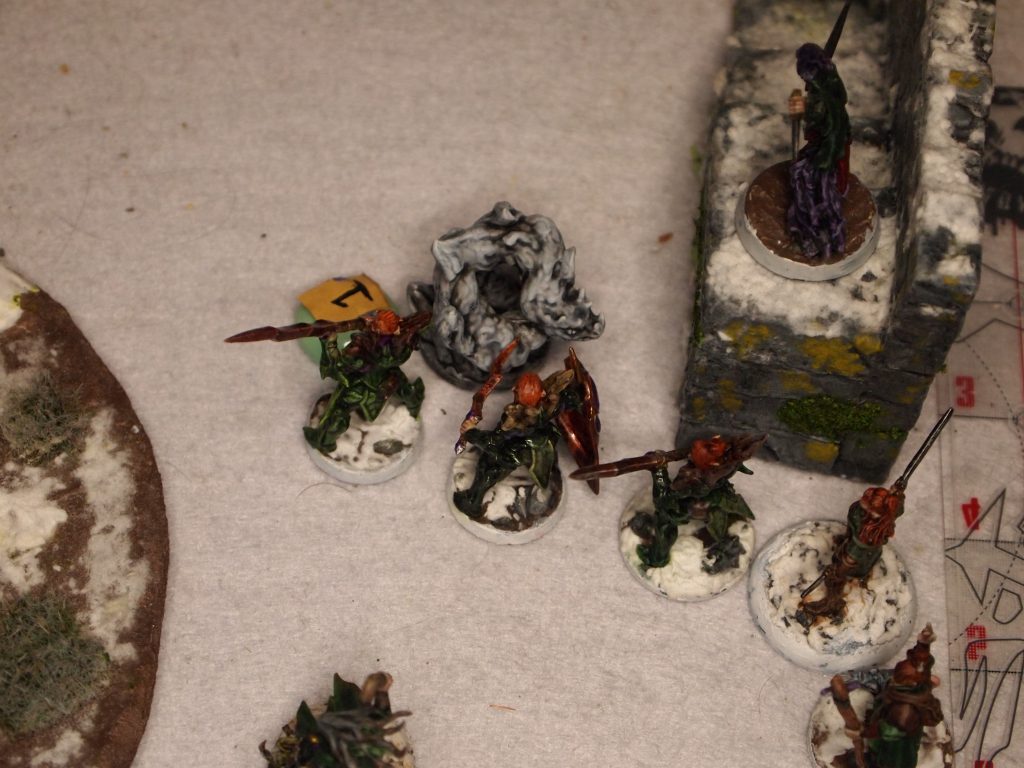
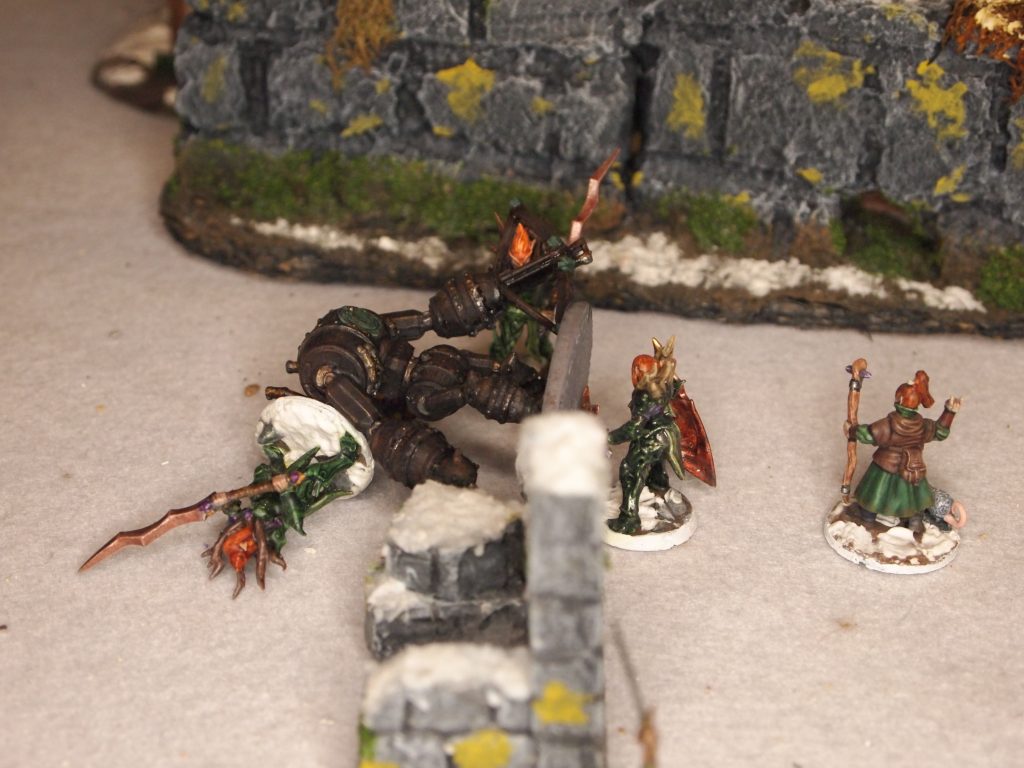
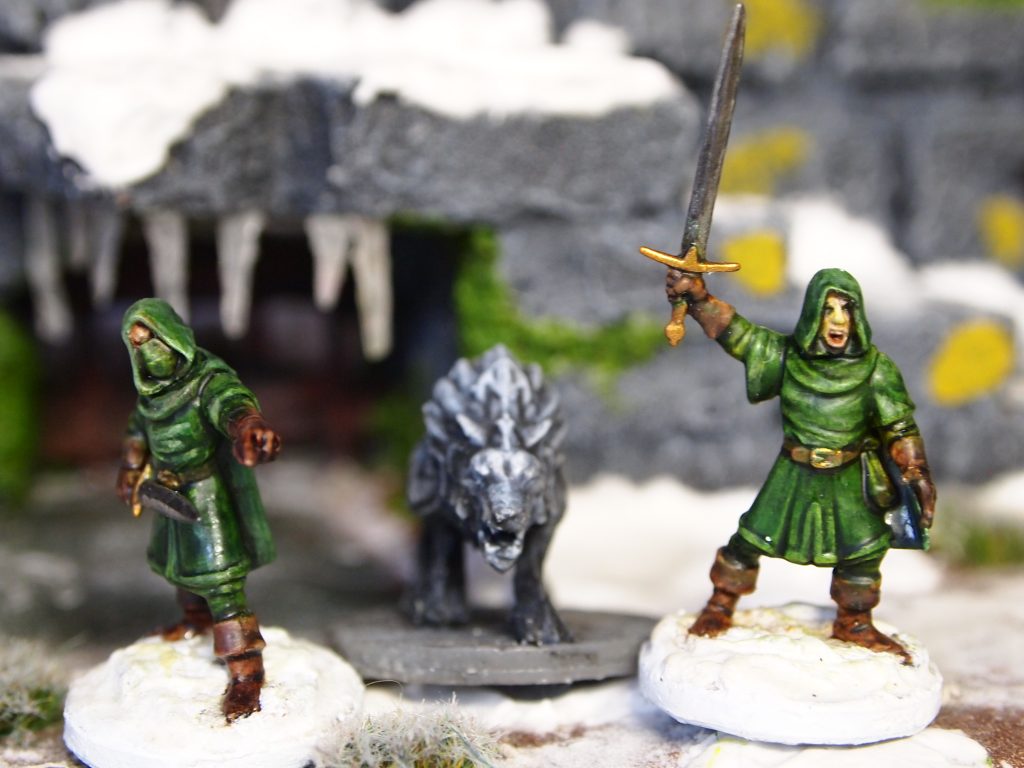
The Warband in the starting position at the bottom right corner of the table.
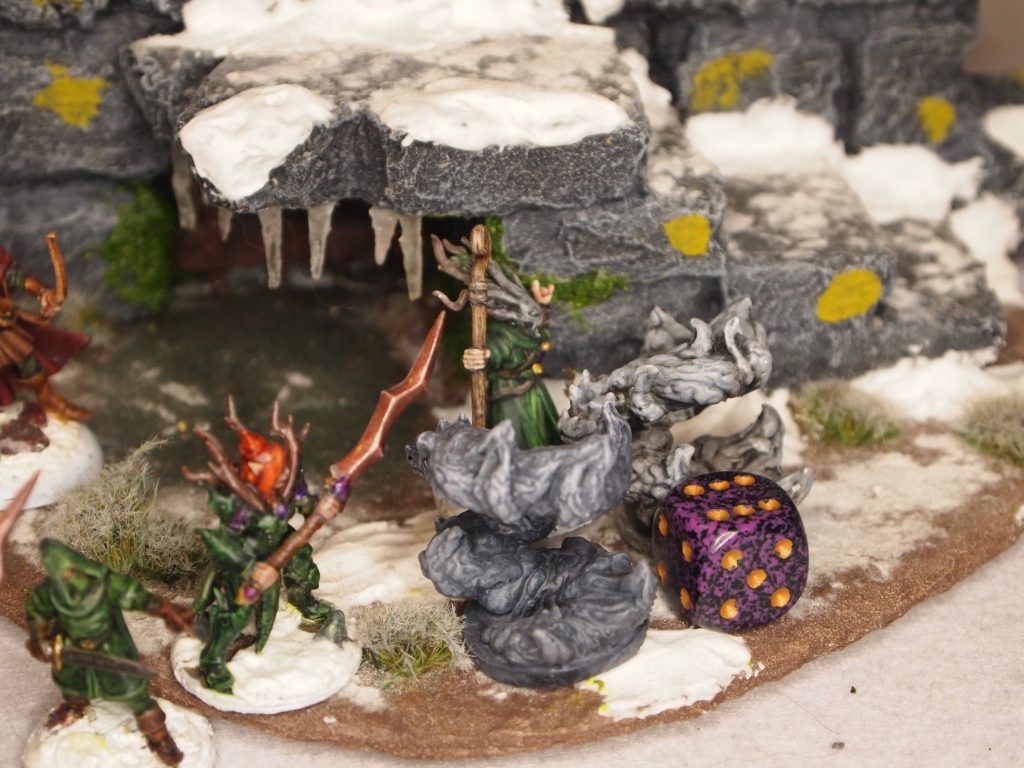
A door on the opposite corner to where the party start is guarded by two crossbow wielding constructs. Exiting through the door is the goal of the scenario.
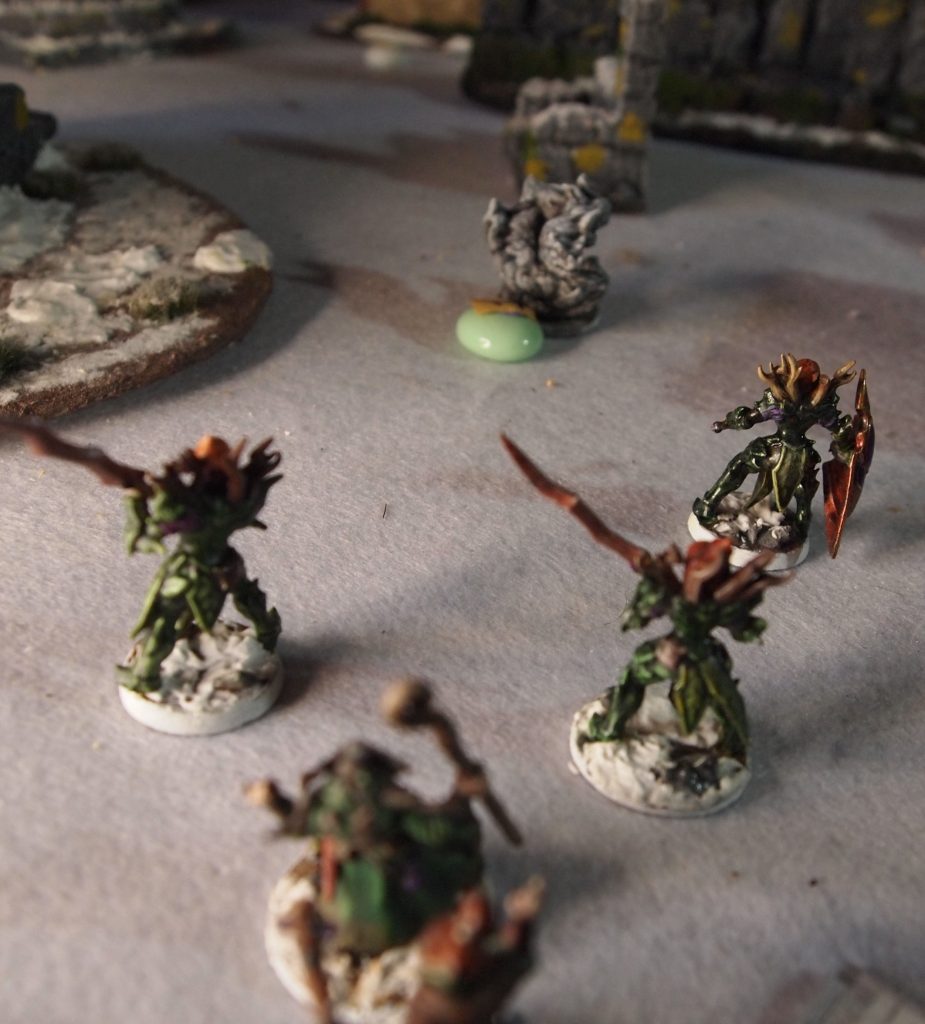
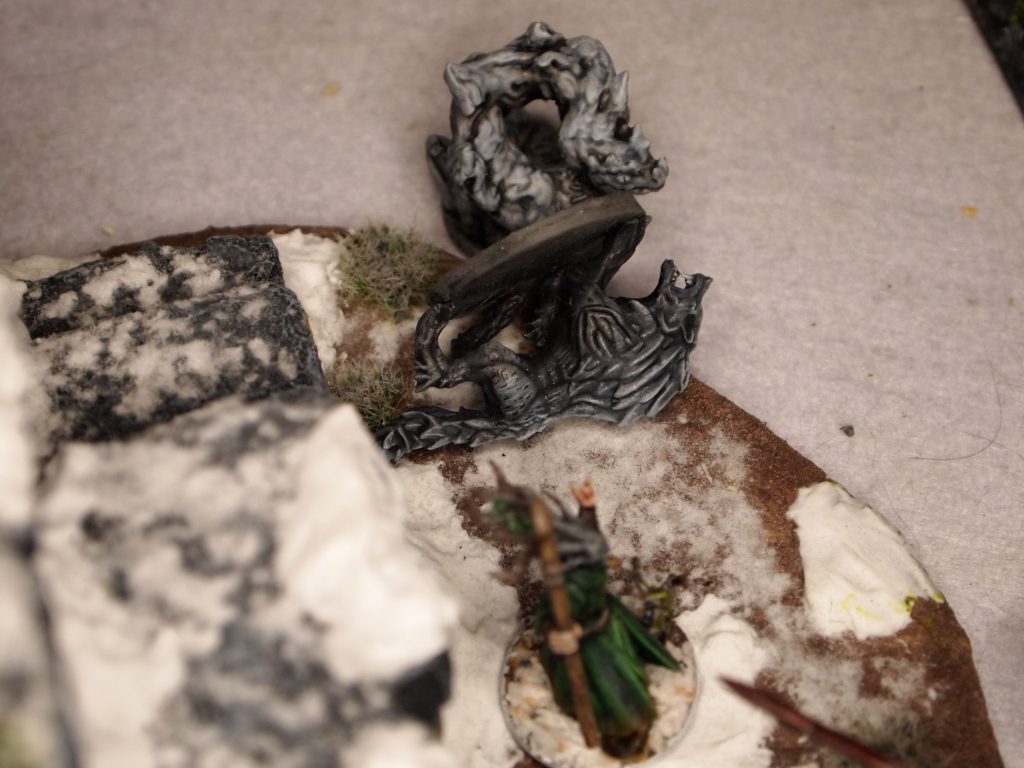
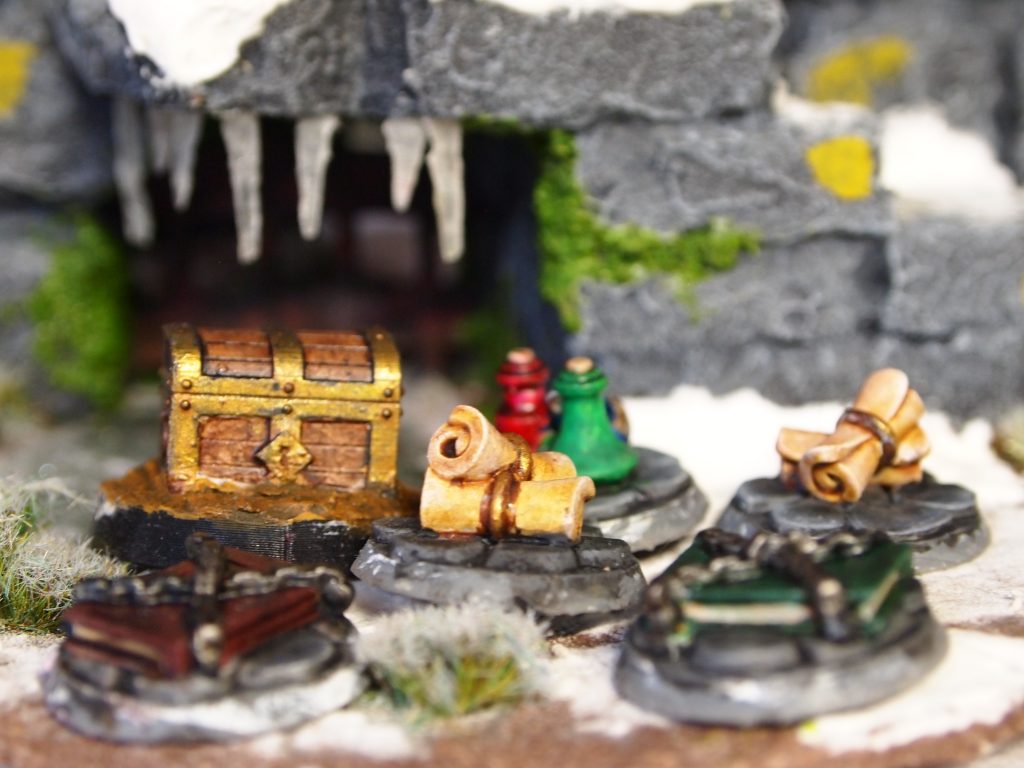
Five spawn points are placed on the table, one near each corner and one in the centre. Additionally, two treasure tokens are placed near the two corners that are not the party start point or the exit. A Large Vapour Snake is placed at each spawn point.
Each turn of the solo game is split into four phases, the Wizard phase, Creature phase 1, for creatures above a certain health level, the Apprentice phase, Creature phase 2 for all other creatures and the Soldier phase for any soldiers not activated in either the Wizard or Apprentice phase where up to three figures can be activated if they are within range.
I won’t list the phases in this report and just summarise each turn. I’ll also for each first appearance of a figure link to the relevant section in my previous post about the warband.
Some spells are cast out of game so both the wizard and apprentice try and cast a few. Both successfully cast ‘Familiar’, and the wizard casts ‘Summon Animal’ for a wolf to join the party for the game, and the apprentice casts ‘brew potion’ for a healing potion. I decided to use the optional critical hits rule that automatically wins a combat on a natural 20 .
Turn 1
Naru Magol, Gurth Bor and Galenglim moving towards a Vapour Snake
Durnimlath Gul, Naru Magol the Knight and the two infantrymen Gurth Bor and Galenglim all move towards the Vapour Snake that is directly in front of them. None of them have enough movement to engage.
Durnimlath Gul casts Enchant weapon on Naru Magol’s sword but fails. In Frostgrave failing a spell causes damage to the caster, the greater the failure the greater the damage. Durnimlath is reaonably lucky and only loses one point of health here.
Mirhen casts Bone dart at the Vapour Snake but fails and takes a point of damage. Kirgwaith and Daetir. The thieves spot a suitable wall that offers higher ground to spy out the terrain and move towards it. Daetir has enough movement to climb the wall.
The Warband ready to take on the Vapour Snakes
Most of the monsters on the table have no line of sight to the warband so make random moves, but three of the Vapour Snakes do see the warband and move towards them. The closest Vapour snake moves to attack Naru Magol. In Frostgrave both figures roll when combat is initiated with the winner having the chance to inflict damage. The Vapour Snake wins the combat but luckily the Knight’s armour blocks all the damage.
Turn 2
Gurth Bor and Galenglim move to support Naru Magol and Galenglim attacks the Vapour Snake, but it wins the combat and two points of damage get past the infantryman’s armour.
Durnimlath Gul casts Bone Dart at the Vapour Snake but it fails and she takes one point of damage.
Galenglim and Naru move into combat with a Vapour Snake
Naru Magol now attacks and wins the combat rolling a natural 20 and kills the snake. First blood (or first some sort of smokey stuff) to the warband!
A Vapour Snake moves to attack Gurth Bor wins the combat and does 6 damage.
Serethgaur the thug, attacks the Vapour Snake and wins but no damage gets through the armour
Turn 3
Draug the Wolf comes of worse in combat
The wolf attacks the Vapour Snake but the snake wins and does a significant amount of damage killing the poor pooch.
Durnimlath casts bone dart but fails the casting roll but not by enough to take damage. Mirhen is more successful casting heal on Gurth Bor.
Meanwhile, Naru Magol attacks rolling a critical hit and killing a Vapour Snake.
At this point I see that I have blundered with Durnimlath being a little isolated. A Vapour Snake moves in and attacks but is the one who takes the damage.
Durnimlath trying to fend off two Vapour Snakes
Another two Vapour Snakes are however both successful and reduce the wizard to 0 health.
Turn 4
Mirhen attempts to cast an elemental bolt but fails and takes damage. Seregthaur attacks a Vapour Snake and does a small amount of damage. Galenglim then finishes off a Vapour Snake. Snake attacks Sereg and kills him. Snake attacks Galenglim but dies in the process.
Now one of the Ballista II constructs has moved into line of sight uses its heavy crossbow, targeting Naru but misses.
Brikolad the archer targets a smoke snake and finds out that arrows do very little damage to them.
Gurth Bor attacks a smoke snake and her sword destroys it.
Turn 5
Mirhen successfully casts Plague of Insects,
Mirhen casts plague of insects on the Ballista II which will lessen its effectiveness for and fighting shooting, she needs to empower the spell for it to succeed so takes damage. The spell is helpful for Brik as he is the target for its next attack which misses.
Unfortunately the Ballista II then makes a willpower test and the plague of insects is no longer effective.
Brik shoots his bow at the Ballista II and hits, but its armour stops the damage.
Daetir sees some treasure and moves to secure it. Picking up the treasure spawns another Vapour Snake, though only a small one.
Turn 6
Mirhen casts heal but fails and takes damage. The Ballista II shoots its crossbow at Naru Magol whose armour protects her from damage.
The remaining members of the warband continue moving towards the door using any cover they can find.
Turn 7
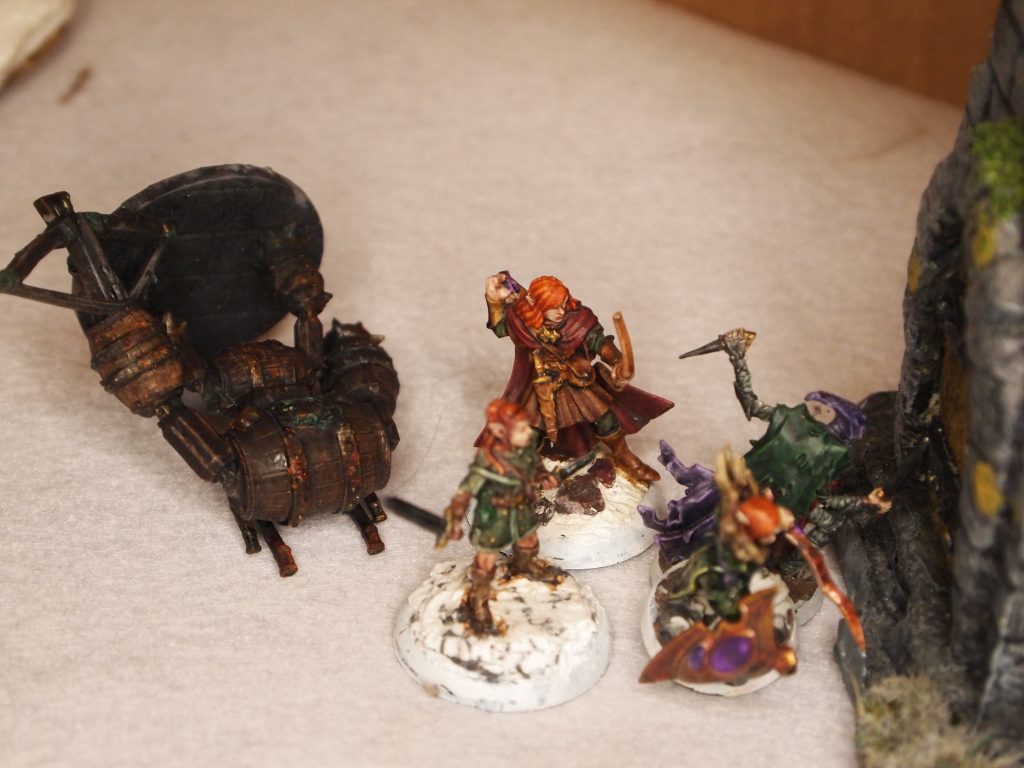
Combat with a Ballista II
Both the infantrymen and the Naru Magol attack the Ballista II. The Infantrymen don’t fair well both failing to win the combat, Galenglim being reduced to 0 health. Naru Magol is more successful and wins the combat with a critical hit and doing damage.
Mirhen casts heal and empowers the spell to make it successful so takes some damage.
The Ballista II retaliates and attacks Naru but loses the combat and is destroyed.
Brikolad who has a small smoke snake moving towards him moves up some stairs and shoots at the small vapour snake but misses.
Turn 8
Mirhen casts heal again but fails and takes damage. The small vapour snake attacks Mothorm wins the combat and does damage. Mothorm retaliates and wins the combat doing a small amount of damage.
Brikolad takes advantage of the small vapour snake’s distraction and moves to pickup some loot. This also spawns a small vapour snake.
Turn 9
Not wanting to risk another failed spell as her health is low, Mirhen drinks her health potion.
Another large snake now has line of sight on the warband and moves towards them.
Brikolad shoots at the nearest small vapour snake reducing its health by 1.
Turn 10
Mirhen casts bone dart at the small smoke snake and the 1 point of health is enough to reduce it to 0 health.
Turn 11
No combat takes place this turn as all the warband move to find cover and continue their progress towards the exit door.
Turn 12
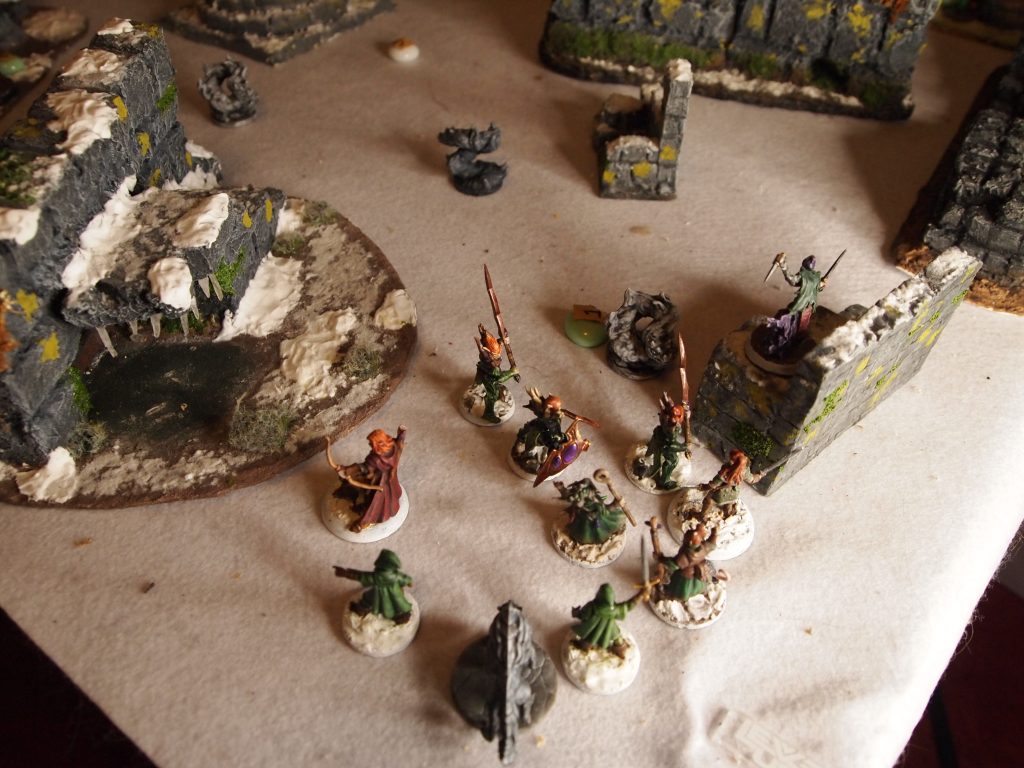
Warband using the ruins to their advantage
Brik moves into position to shoot at the second Ballista II but misses.
Turn 13
Brikolad is now in line of site of both the Ballista II and a small smoke snake both of which move towards the warband. The Ballista II shoots at Brikolad but misses. The archer retaliates and does some damage, then moves back into cover.
Kirgwaith moves to attack the small vapour snake and and reduces its health.
Turn 14
Mirhen casts bone dart at the Ballista II but fails and takes damage. The Ballista II takes aim at Mirhen skewering her and leaving her with 0 health.
The small vapour snake attacks Kirgwaith and and reduces the thief to 0 health.
The last large smoke snake attacks Daetir but loses the combat and takes damage from the thief.
Brikolad moves and shoots at the Ballista II but missies. Naru Magol attacks the large vapour snake, wins the combat and does damage. Gurth Bor follows this up with an attack on the large smoke snake finishing it off.
Turn 15
Ballista II moves to attack Mothorm, loses the combat and takes damage from the thug.
Naru Magol attacks the construct but loses the combat and takes damage.
Turn 16
The remaining members of the warband make it to the door
Balista II attacks Naru Magol but loses, takes damage and is destroyed.
The warband now move towards the door and make the roll to open it and leave the table.
Post Game
In campaign play figures reduced to 0 health are not necessarily dead (maybe they are mostly dead? Cue Miracle Max quote!). You get to roll on either a table for the Soldiers and/or a table for the Wizard and Apprentice.
Durnimlath Gul and Mirhen, Galenglim and Gurth Bor all made a full recovery! Seregthaur unfortunately succumbed to his wounds but Mothorm was only badly wounded so will be able to join the warband again after recovering for one scenario.
Experience wise Durnimlath Gul gains 2 levels with some xp left over in the bank.
I then rolled on the loot table for the two loot tokens recovered and the warband is now 40 gold crowns richer, has a curse scroll and a pair of gloves of strength.
So all in all not a bad outcome.
Wait I hear you say (or maybe it is my conscience) didn’t you forget some stuff? I realised that I missed out a few things. Firstly, Vapour Snakes should have spawned at the end of each turn after the third. Ah well, I’m not too worried about missing that as Joseph McCullough has stated that he made the scenario a little more difficult than intended. So I sort of balanced it a bit without realising.
Also I missed out some situational modifiers for combat, particularly for when there are more than one figure attacking another, which I need to re-read and shooting modifiers for cover and the like, which I completely forgot, but as they were not used for the monsters or the warband that is a balance of sorts.
I plan before playing the next scenario is add names to the bases of the minis, so I don’t confuse the two infantrymen, two thugs and the two thieves. I think I may also try using a voice recorder app for the notes. Juggling, rule books, camera, minis, dice, pencil and notebook got a bit chaotic at times so anything that helps will be welcome.
What do I think of Frostgrave now I’ve played my first solo scenario? I love it! It played a little slowly but that was my bad decision of writing my first ever battle report on my first time playing the game. So there was lots of note taking (much more than I really needed) and checking the rule book. Next I need to paint up some minis for the next scenario and decide on which advances Durnimlath is going to take.
It is one of the things that I like about Frostgrave is that it is miniature agnostic and you can use whatever minis you want. I’ve even seen people playing with Lego minifigs, for example.
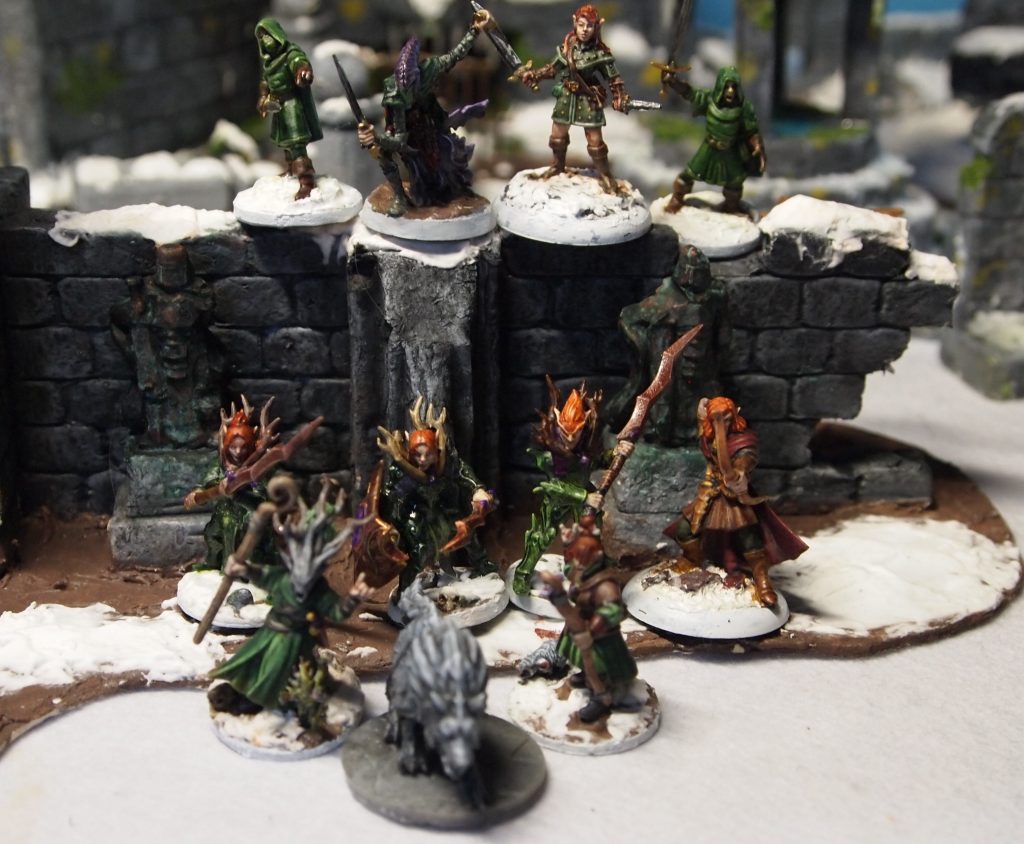
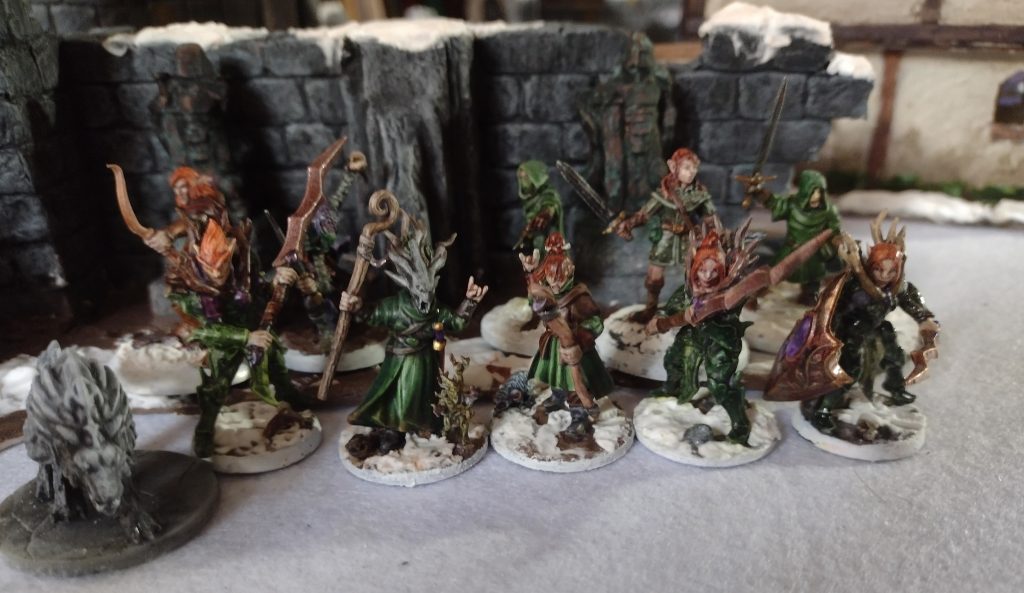
There aren’t any elves in Frostgrave but that doesn’t stop me from using elf miniatures. The “Official” miniatures for the game by North Star Military figures are great value as, for example in the Wizards II box, you get eight bodies and a whole range of heads, arms and extras to customise your minis. North Star is a great site and they make and or stock a great range of games and miniatures.
The Warband
As I’ve already mentioned you can use any miniatures for your warband. I started off with using minis I’d printed from Artisans guild – Sylvan Knights collection. They are gorgeous sculpts but I had some problems. I think they are designed to be printed at 32mm scale which meant they would tower over any 28mm minis I used. I did end up resizing a couple of them and adding them to my warband but another problem I have with 3d printed miniatures is that the often lack the detail of white metal, resin or plastic minis, at least with my printer, and this was exacerbated by rescaling. Don’t get me wrong this is not a problem with the sculpts, they are awesome.
I originally bought the collection to pad out my old Warhammer Wood Elf army and they are perfect for that. Some of them just didn’t “fit” for my warband.
The wizard as you can see is levitating surrounded by spell energy and the archer’s base just seemed a bit out of place for the Frostgrave setting. So, I looked around for some other minis.
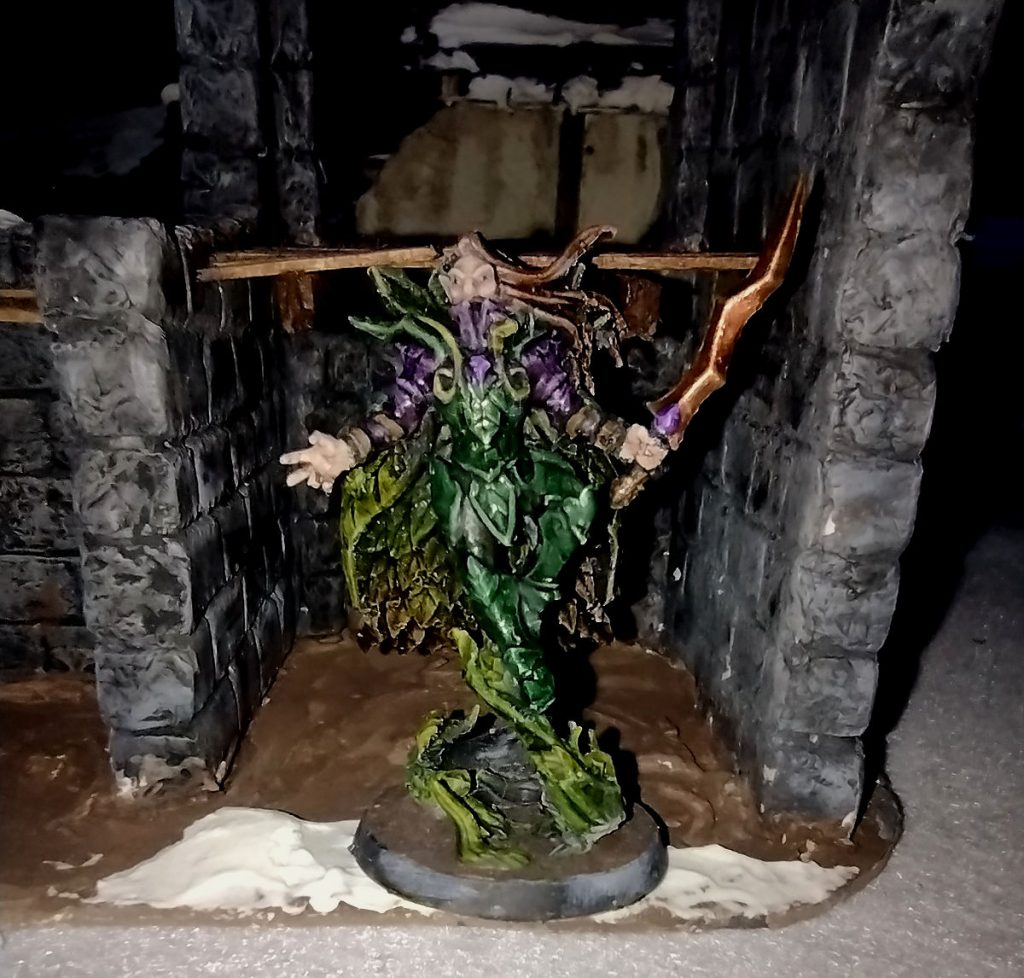
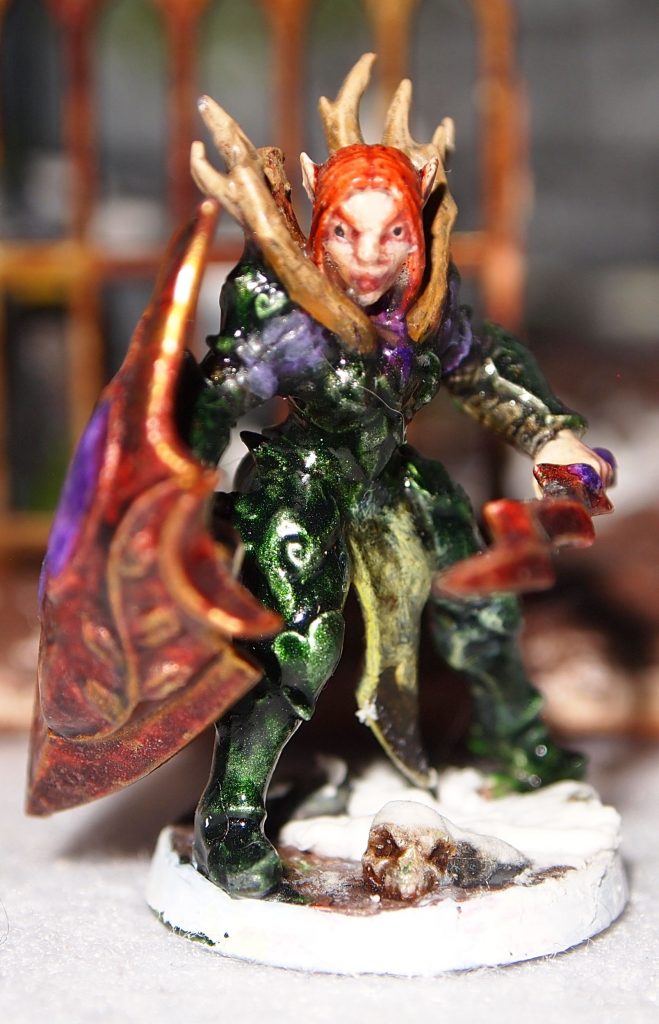
Starting with the wizard. Keeping with my elven theme I thought the nature based magic, Witch was a great fit. As I was building the mini, one from the Frostgrave Wizards II box from North Star Military Figures, I had a thought, that I had a load of old Warhammer Dryad/branchwraith heads left over in my bits box. So a little dab of polystyrene cement and Durnimlath Gul was born.
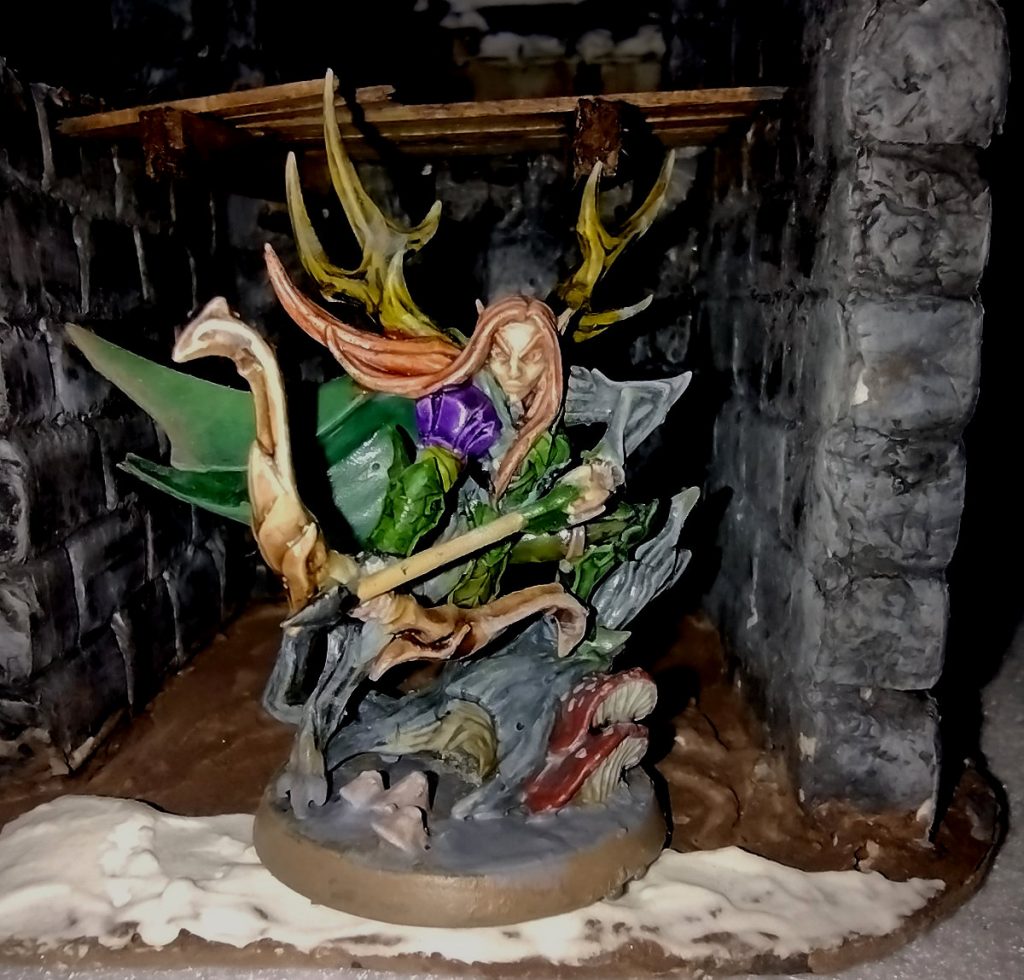
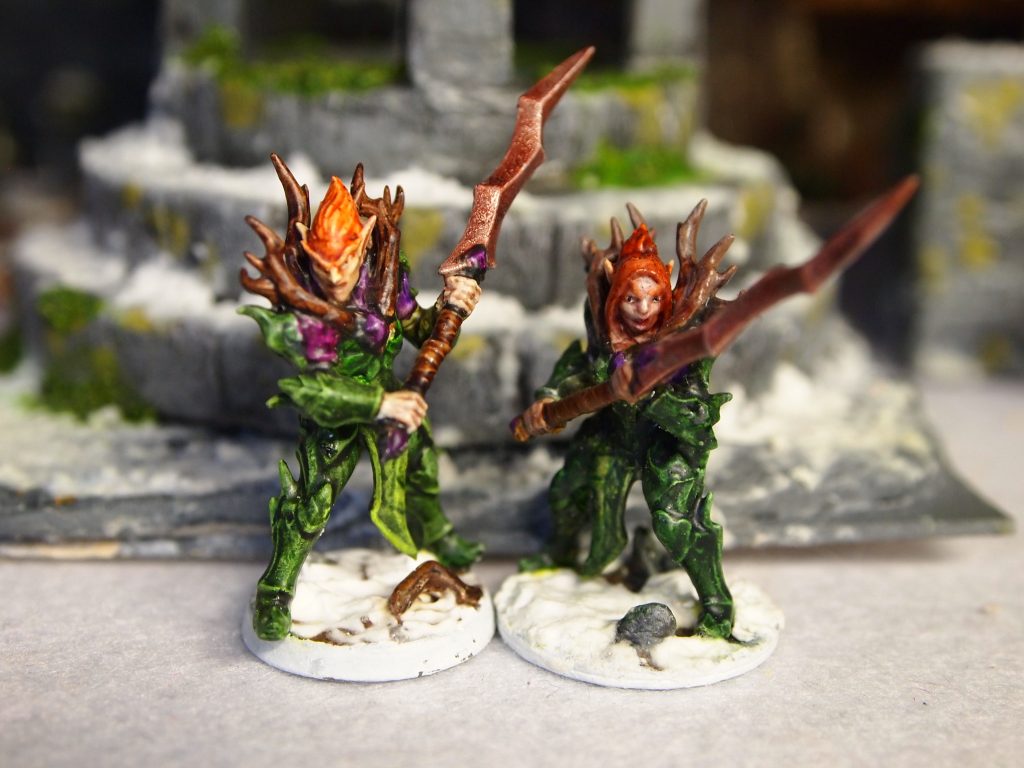
For the apprentice I continued with a figure from the Frostgrave Wizards II box with a Warhammer 40,000 Dark Eldar/Drukhari head because I love Drukhari.
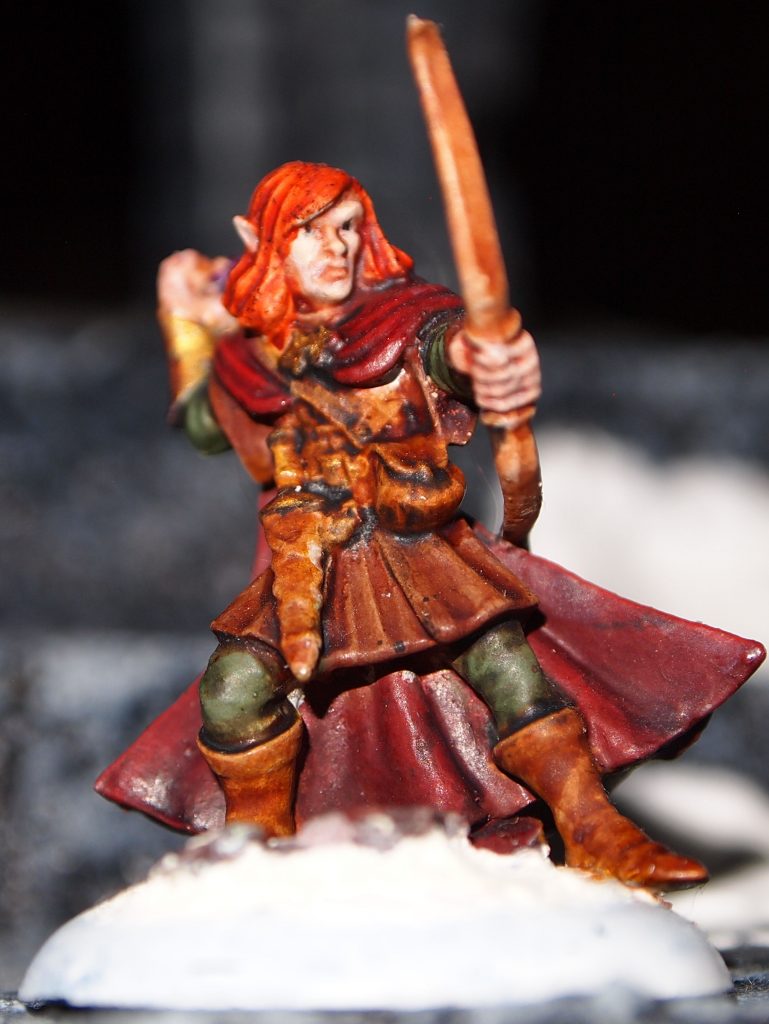
For the Archer, Brikolad, I went for a model from Reaper Miniatures and decided to mix things up a bit with the colour scheme and went for a sort of autumnal feel.
Next Naru Magol, Knight. This is one of the Arisan’s guild minis. Too many layers on the face but I’m planning on re-printing the mini and trying to use thinner paint in general.
Daetir Thief and Kirgwaith Thief are both from Reaper where they are called Kalash Dark Elf Assassin and Merryn, Elf Thief. The Daetir mini has been sat in my pile of shame for about 12 years, which is vindication for those of us who find it hard to throw away our old unpainted miniatures. “Its not a pile of shame, its a pile of possibilities!”.
Somewhat against my better judgement I bought a copy of Warhammer Old World: Tomb Kings of Khemri. I will probably not play the game itself but who doesn’t love a huge box of minis all shiny and bursting with possibilities on their little sprues? The minis will also be useful for many other games so I didn’t feel too bad about spending a large chunk of my gaming funds.
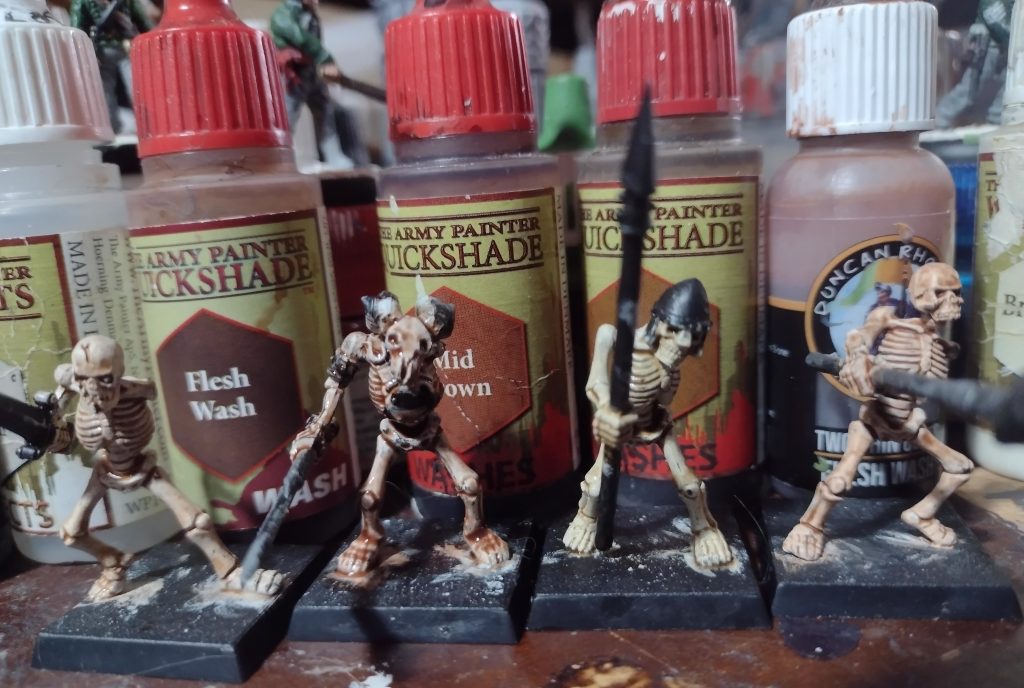
My go to method with skeletons has been, since the days of the first Warhammer PBS1 Skeleton Horde box , prime black, drybrush white and chuck on some brown wash of some sort to give them that aged bone look. Its quick and on the table doesn’t look too bad.
This time though I opted for a slightly different method. Prime then base coat with Army Painter Brainmatter Beige which is a great off white which I’ve been using for teeth and bones and as a base for anything white.
For the next step I couldn’t decide which version of brown wash I would use. I seem to have accumulated a few. Army Painter Quick Shade – flesh wash, mid brown wash and soft tone wash, plus some Two Thin Coats flesh wash. So in the interests of, well possibly not science I did a test of all four.
And I liked them all! So it might also look quite cool to have some variation and use them all. In case you were wondering the shield arms I left off to make them a little easier to paint. So it is sort of slap chop without the contrast/ speed paints. I might paint a couple of skeletons one with speed paints one with my “old school” method for comparison. Do you have a quick method for skeletons? Let me know in the comments.
(I probably should have written this before my previous post, but better late than never.)
Frostgrave is a mini agnostic skirmish wargame set in the frozen ruins of the city of Felstad by Joseph A. McCullough. Felstad was once a great city in a magic empire, its inhabitants producing objects of wondrous magic. But, the city was doomed by the actions of a wizard who lost control of some working and a great storm was unleashed shrouding the city in a cataclysmic blizzard that left behind only a frozen wasteland. The empire failed and its magic also.
After many centuries Felstad was almost forgotten but as the magical winter began to abate, those who remembered the tales of the city began to turn their thoughts to the ruins and the treasures that lie there hidden.
What you need to play.
Some miniatures to represent your warband and any of the dwellers of Felstad, some scenery, dice, Wizard sheet and the rule book.
Ideally your miniatures should be chosen to represent your warband, having the same equipment etc, but this isn’t a hard rule. You could play the game with tokens or anything you like, as long as you are having fun no one is going to tell you you are not following the rules.
The dice needed are d20s and the wizard sheet is included to photocopy/ scan in the rulebook, but it can also be downloaded from the Osprey website.
To represent the ruins of Felstad you’ll need some terrain and this can be as simple as some blocks or as elaborate as you want. The important thing is to have a lot of scenery as the game is designed to be played with a fairly crowded table.
The rulebook is nicely presented with some great illustrations and photos that will give you plenty of inspiration for your terrain pieces and your warband. The one thing that is a great incentive to try Frostgrave is that the rule book is relatively cheap round about the £20 to £25 mark at the time of writing for the 2nd edition. A PDF and Epub versions are also available from the Osprey website for £17.50,
The Warband
You create a small warband of up to 10 (although this number can be increased by some spells), the principal member of which is your wizard (or in some cases a witch – see what I did there?). It is the wizard who recruits the warband from their own funds.
Each wizard follows one of the 10 schools of magic available in the rulebook. There is a good range of schools to choose from and your wizard can be any one of the following; Chronomancer, Elementalist, Enchanter, Illusionist, Necromancer, Sigilist, Soothsayer, Summoner, Thaumaturge and Witch. The school determines which spells you can learn. Each school has allies, neutrals and enemies among the other schools and this determines which spells you can use and how difficult they are to cast.
To aid the wizard you can also recruit an apprentice whose stats are generated from the wizards, with a few adjustments. The apprentice is after all not as skilful as their tutor. They also share the same list of spells that their tutor has. It isn’t compulsory to have an apprentice but it is probably a wise move.
As well as the apprentice, the wizard can recruit another eight members for the warband. The wizard has 400 gold crowns with which to hire their followers. There are 9 specialists detailed in the rulebook and a wizard can have up to four of these in a warband. Standard soldiers are less expensive, which there are 6 to choose from including thugs and thieves who will join a warband for no fee. I get the feeling that the thugs and thieves probably all wear red shirts, but maybe I am just an old cynic.
With warbands created you are ready to play one of the 20 scenarios included in the rulebook. You can play these as one offs or as a campaign.
Campaign Play
The campaign rules cover a lot of ground. There are rules for permanent injuries, in campaign play being reduced to 0 health isn’t always the end and there is a chance that your soldiers who are on 0 health might survive, missing the next game if they don’t make a full recovery. For Wizards and apprentices there are a greater range of possible outcomes if they’ve hit 0 health including the possibility of a permanent injury.
Wizards in campaign play gain experience that increases their level and allows choosing, to improve either a stat, a known spell or learn a new spell.
In campaign play treasure is also dealt with differently from just determining the winner as in the one off game. Treasure in campaign play is rolled for on a table with results for gold, potions, magic items, magic weapons and armour, spell scrolls and grimoires. The rules include tables and descriptions for all of the list except gold which is worked out on the initial treasure table.
Campaign play also has the option of buying and selling loot, hiring replacement soldiers (although you are still limited to four specialists and a maximum warband size of 10) and equipping the wizard’s base of operations which is another aspect that gives campaign play some depth.
I can’t help kicking myself for not grabbing a copy of the rules a lot earlier. But there is some consolation that the game is “tried and tested” and has a good number of supplements as well as a dedicated magazine “Spellcaster” that includes loads of content to give your game some extra tweaks. Its available from Osprey, Drive-through rpg/ wargames vault and probably your local gaming shop. The supplements include a lot of extra content to make your games even more fun and helpfully the 2nd Edition also includes an appendix detailing how the changes from 1st Edition affect the supplements that have been released before 2nd Edition.
Miniature Battles Score
I give Frostgrave a solid D20 in my scoring scheme. I think I am going to be getting a lot of mileage out of the Frostgrave game.
You can find out more about Frostgrave and Joseph A. McCullough at his blog The Renaissance Troll
For my first “series” I’m going to be looking at Solo skirmish gaming with Frostgrave.
Roughly, November 2023, I took the plunge and bought a copy of Frostgrave 2nd Edition by Joseph A. McCullough, and was hooked!
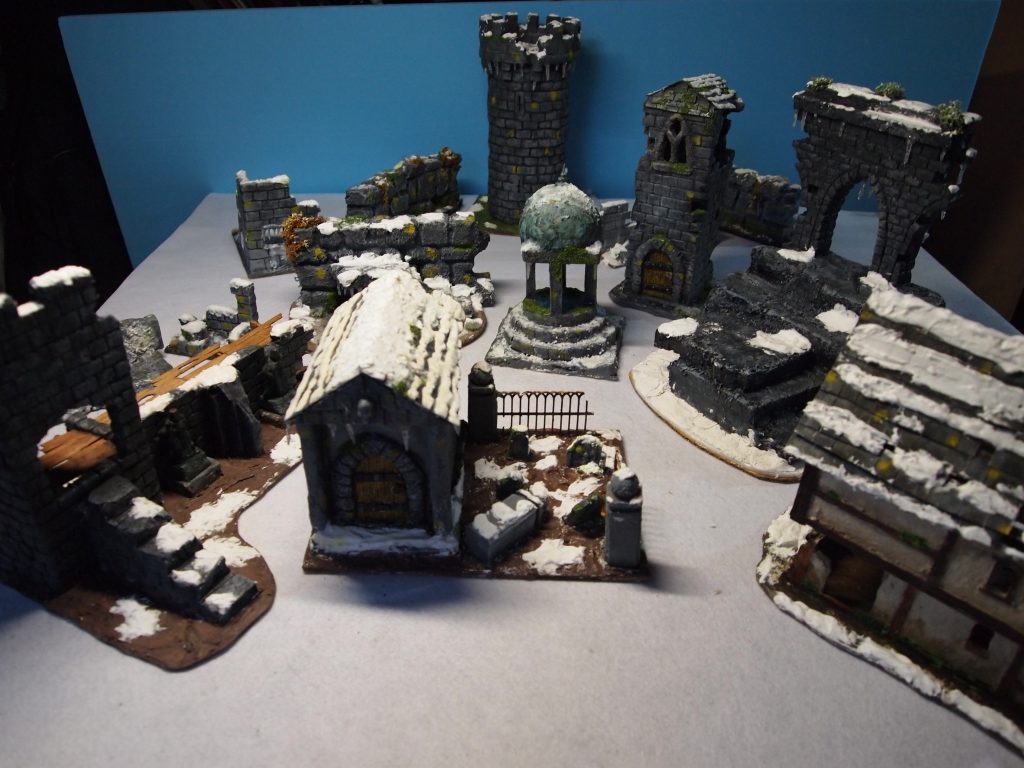
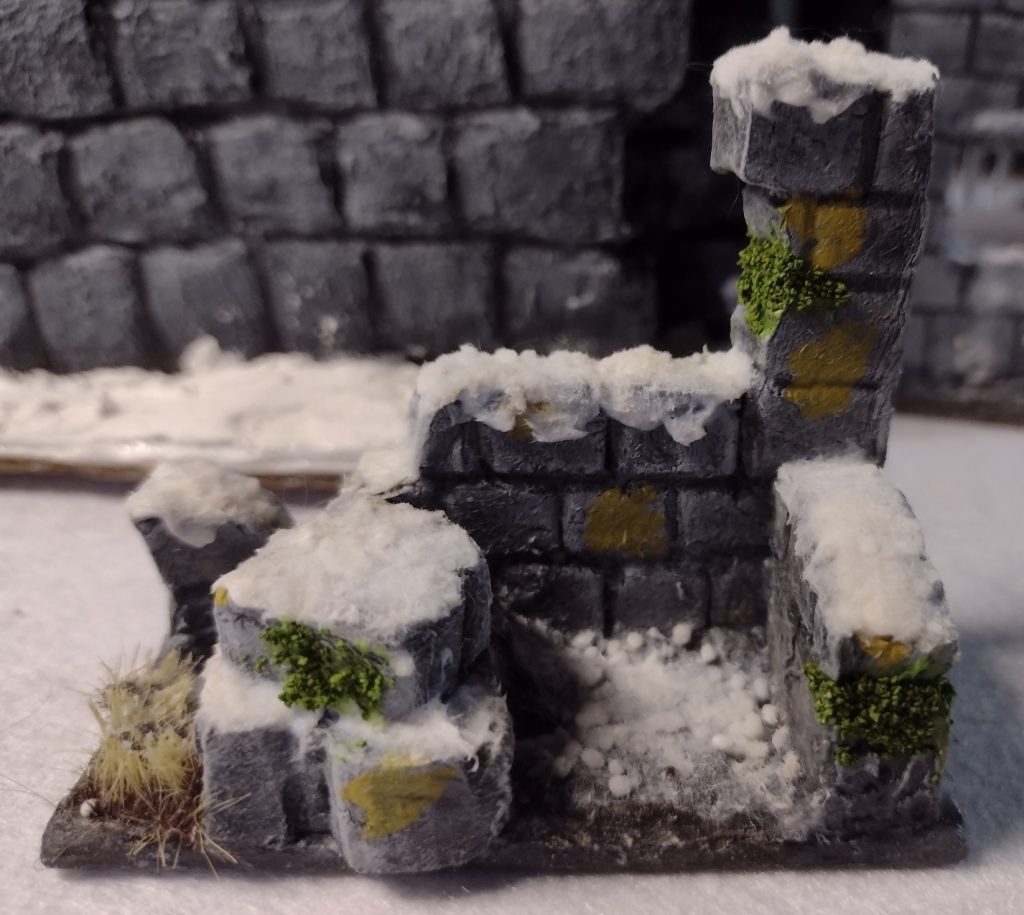
Table top scenery/terrain is not something I have really done before, not unless you count the “pill box” I made for Rogue Trader era W40k. Back then I was inspired by an issue of White Dwarf and set about looking around the house for things that looked like they might work as sci-fi buildings and decided that an empty yogurt pot would be great. A coat of primer and a coat of grey paint later I had a pill box/habitation unit. I decided it didn’t look as stone/concrete like as I wanted so I struck on the idea of covering it in something gritty, and not finding anything used some cat litter, fresh, I hasten to add, and another coat of grey paint.
Of course what I ended up with was a thing that looked like a yogurt covered in cat litter as a gaming buddy at the time quite rightly pointed out! So apart from miniature bases I didn’t really bother much more with terrain.
So starting on Felstad project I was determined to at least make something that I would not be totally ashamed of. And this little corner of a ruined building was the result.
It was a test piece built from scraps of XPS foam and odds and ends from my basing box, the first bit of my version of Felstad was born and although it wasn’t amazing I was fairly happy with it. The snow effect was some snow powder/flock I found on ebay.
What followed was a bit of an obsession. I spent a lot of the winter building ruins, experimenting here and there with different products and ideas. Mainly I was was using the XPS foam from an The Army Painter GameMaster Dungeons & Caverns Core Set, which I’d bought and only tried two tiles from.
What I found so inspiring about building for Felstad, was that it was a ruined city covered in snow. Which meant that if a bit of a building went wrong – I could just break it off and it would just add to the ruined look. Also you can cover up a lot of errors with snow effect. It turned out for me that broken things were fun and my sort of shabby wargame chic works ok with the ruined city aesthetic.
What is different now compared with the mid to late eighties of course, is that tutorials are so much easier to find. There are so many inspiring blogs and YouTube channels to help with wargaming projects. Black Magic Crafts and Geek Gaming Scenics are two I watch from time to time.