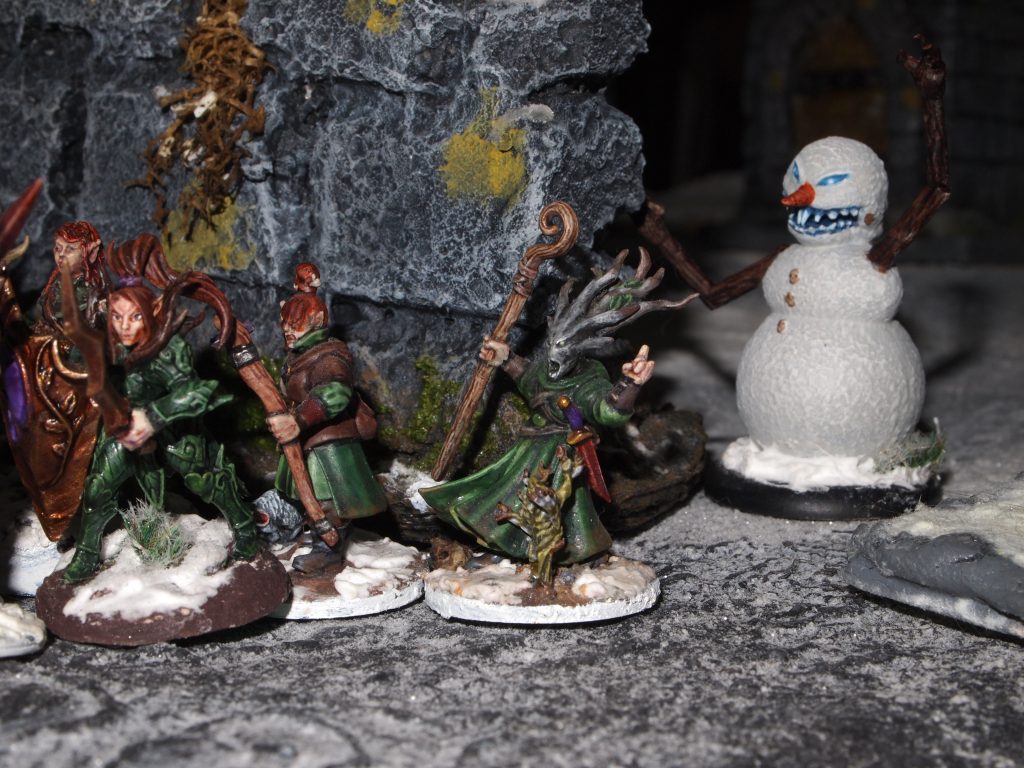
In which the brave warband take a break to rest for the Winter Festivities in a safe corner of Felstad
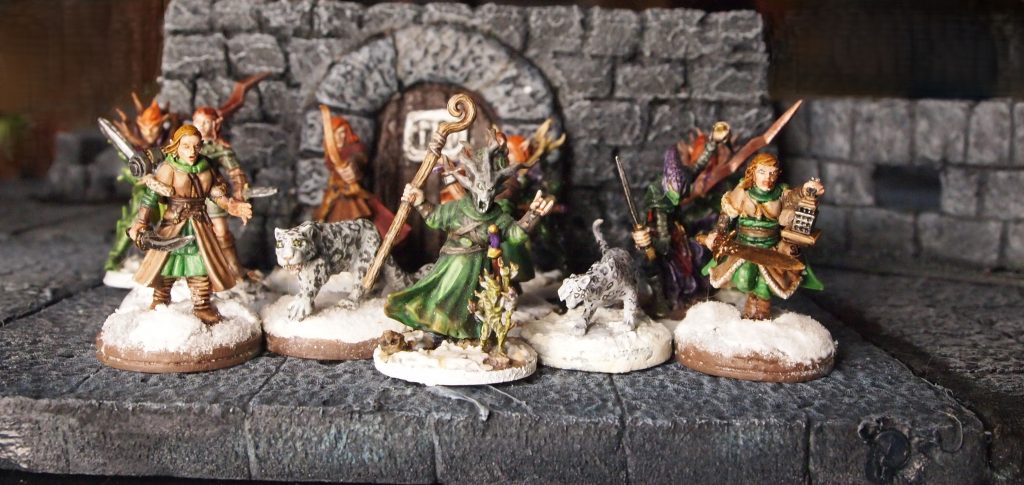
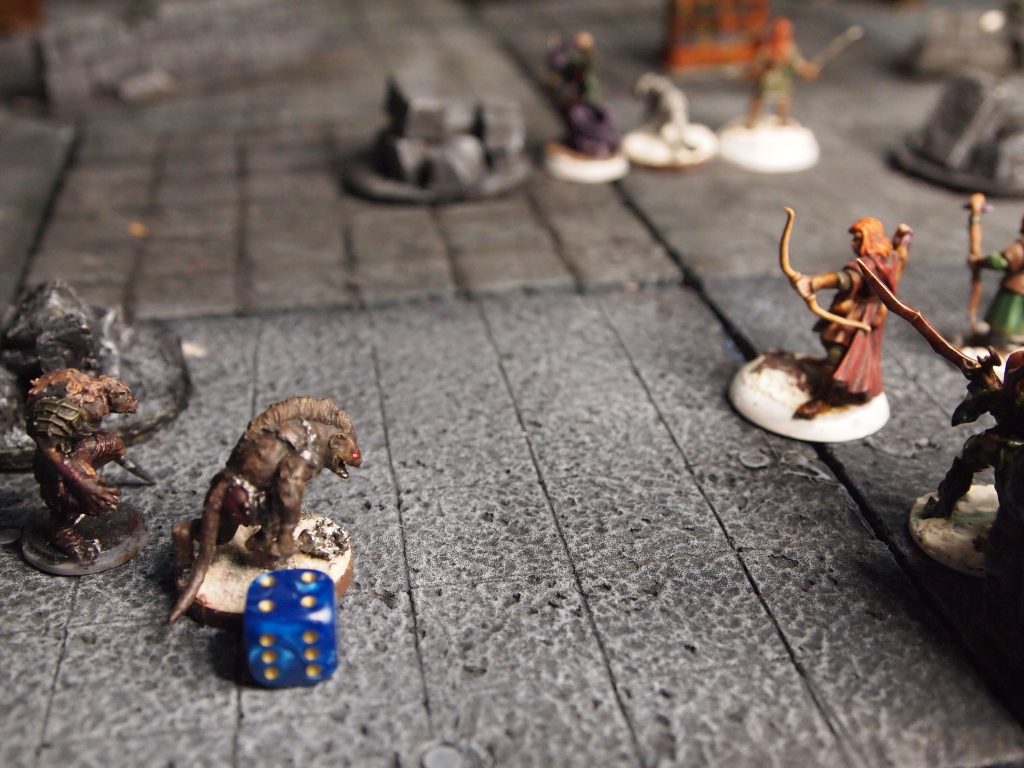
The brave warband rest awhiles in a quiet corner of Felstad, but what lurks around the corner behind them?
It is that time of year again so I am taking the time to wish everyone a wondeful winter holiday and here’s to a happy new year with lots of miniatures 🙂
The Sinister Snowman
I doubt miniature manufacturers will be quaking in their boots but Mr Frosty is one of my own sculpts and I’m fairly pleased with it. This one is more of a ‘sketch’ than anything as I’m still learning how to use 3d sculpting software but I hope to tackle some more minis over the coming year.
The Silver Bayonet: Bones of Albion is full of inspiration for kit bashing some minis. It introduces a whole range of new unread for your The Silver Bayonet games that are ripe for exercising the kit bash muscles.
There is a range of excellent miniatures made by Northstar Military Figures to go with the campaign book, which I’m going to pick up at some point but in the mean time I wanted to have a go at making some skeletal Roman Legionnaires as I had the right bits and pieces in my pile of possibilities. Here is how I put them together.
I started by chopping off the arm and removing the legs of the legionnaire. Then I removed the pelvis and rib cage from the skeleton.
The skeleton legs were then glued in place on legionnaire after drilling a couple of holes to act as sockets.
Making the Head
Next I carved out the legionnaires head from the helmet (only cutting my finger once!)
Then I cut the top off a skeleton head. The skeleton head needed a little bit of trimming so it would fit .
I’ve started recently, to use poster tack to hold parts of miniatures when cutting them. I’ve lost count of the number of bits that have pinged off to be lost in the realm of the spiders, under the sofa.
There were some ready made skeleton arms holding spears so I used those with the tops of legionnaires pila.
Next I added the other skeleton arm to the legionnaire shield.
I made some cuts into the hem of the tunic to make them look old and worn, then cut space for the skeleton shoulders into the upper arms of the tunic. I also made some cuts into these to also look ragged. Then I glued the spear arm in place. The shield I left as I would add that later because it would get in the way of painting.
Rinse and repeat
Then it was just a case of building the other legionnaires, priming with grey paint and dry brushing on highlights with a lighter grey then white.
Painting
For the tunics I went with a mix of Army Painter Speed Paints 2.0 Bony Matter and Ochre Clay diluted with Speed Paint medium.
For the bones I used Bony Matter.
Next I used some Broadsword Silver for the pila and Hoplite Gold for the helmets, greaves, breast and back plates.
For the belts, scabbard and straps I used Ruddy Fur.
I’m Really pleased with the result. Its a fairly simple kit bash but it’s effective and they don’t look bad. I think I’ve said in other posts I really like painting up zombies and skeletons, the grunging step covers up a lot of mistakes!
The crew for Stargrave took me a little longer to paint and assemble. This was mainly because I generally paint what I am in the mood to paint and I jump around projects, so often have a few things on the go and sometimes don’t complete a project.
My original plan was to use some Games Workshop miniatures but they didn’t have the right feel for me, so I looked around for some other minis, because you can never have too many minis, right? After looking around online for a bit I settled on the Northstar Military Figures Stargrave range and used a mixture of minis and parts from from the Stargrave Crew, Stargrave Crew II, Mercenaries II and Scavengers boxes. These are great minis and the sprues are packed with extras and its easy to use bits from one box with bits from another making it great for building minis that fit your ideas.
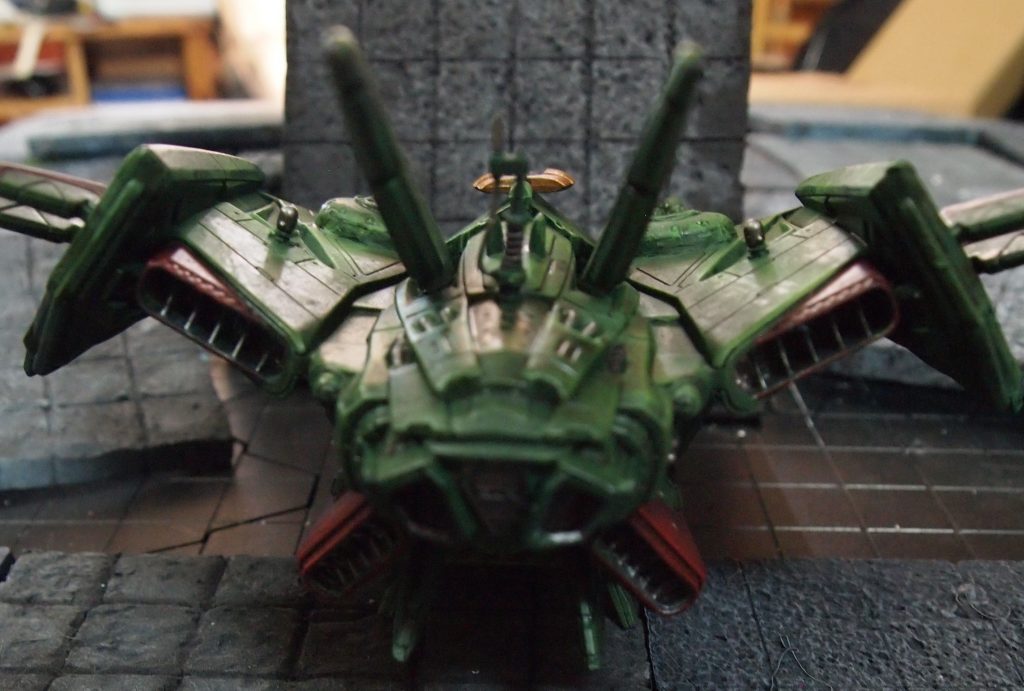
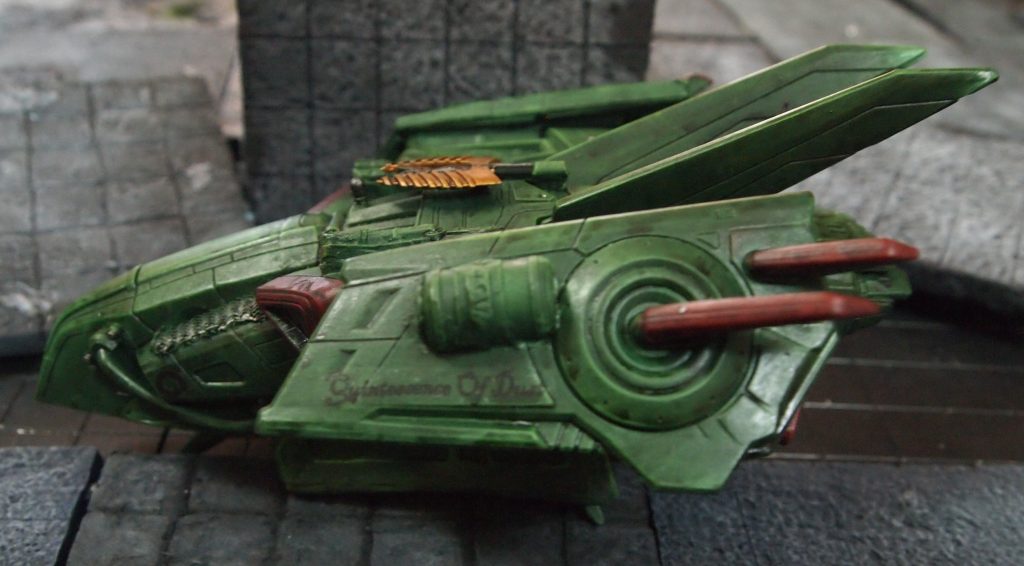
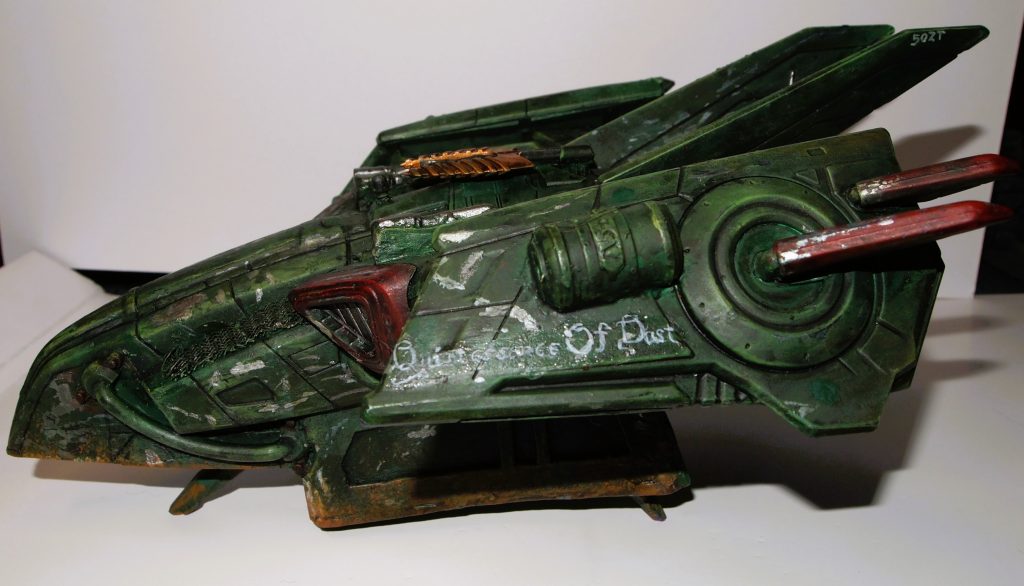
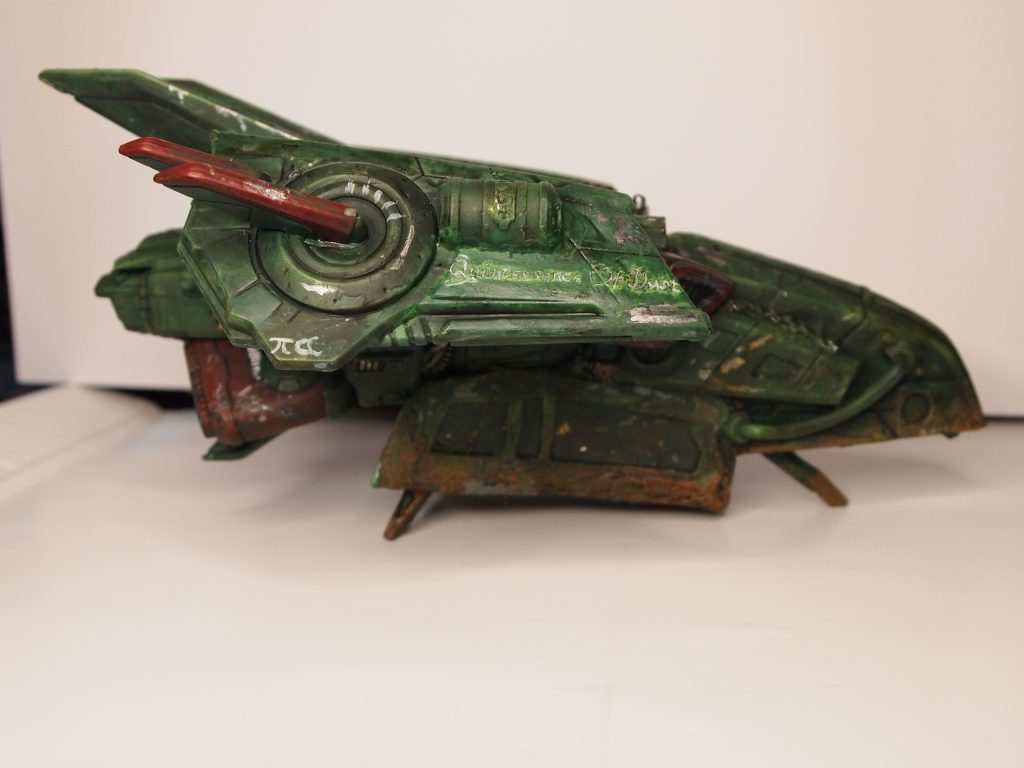
So here they are, the Crew of the good ship ‘Quintessence of Dust’. I haven’t decided on a crew name, but I am sure something will present itself at some point. I’ve ruled out so far, ‘Betelgeuse Bobbin Wreckers and “The Dust gatherers”. I’m leaning towards ‘Spiders from Mars’ but, I’m not definite yet.
From left to right Captain Bellatrix Madigan a Mystic, First Mate Charcharias Flay, a Psionicist who might not be entirely human, and Sniper Maliex Pelstig.
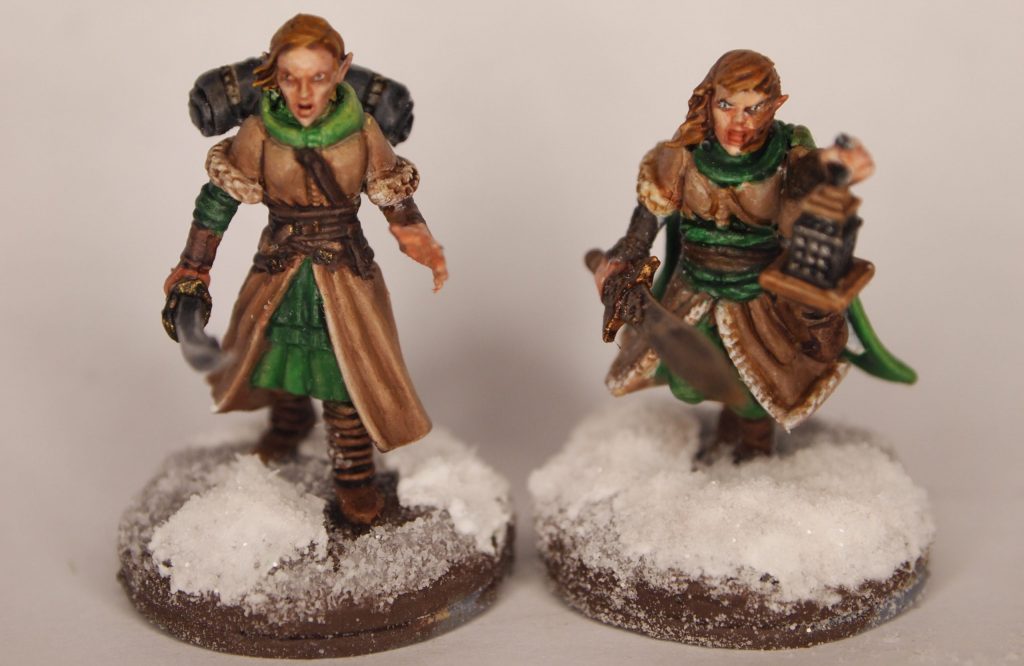
From left to right Chastity and Verity Wolfe. Sort of sisters of battle.
There they are then. All ready to go and now I want to paint up some bad guys, build some terrain bits and play the first solo scenario from the Hope Eternal supplement.
I’m also rolling an idea around in my head to create some back story and a campaign world. Five Parsecs From Home by Ivan Sorensen/Nordic Weasel Games and published by Modiphius has some useful stuff and I have a copy of Stars without Number by Kevin Crawford which is chock full of useful tables, as is good old Traveller. I want to set my campaign in a universe of my own design based on a table top RPG campaign I started writing but never ran.
Have you built a Stargrave crew? What minis did you use? Any suggestions for crew names? Let me know in the comments.
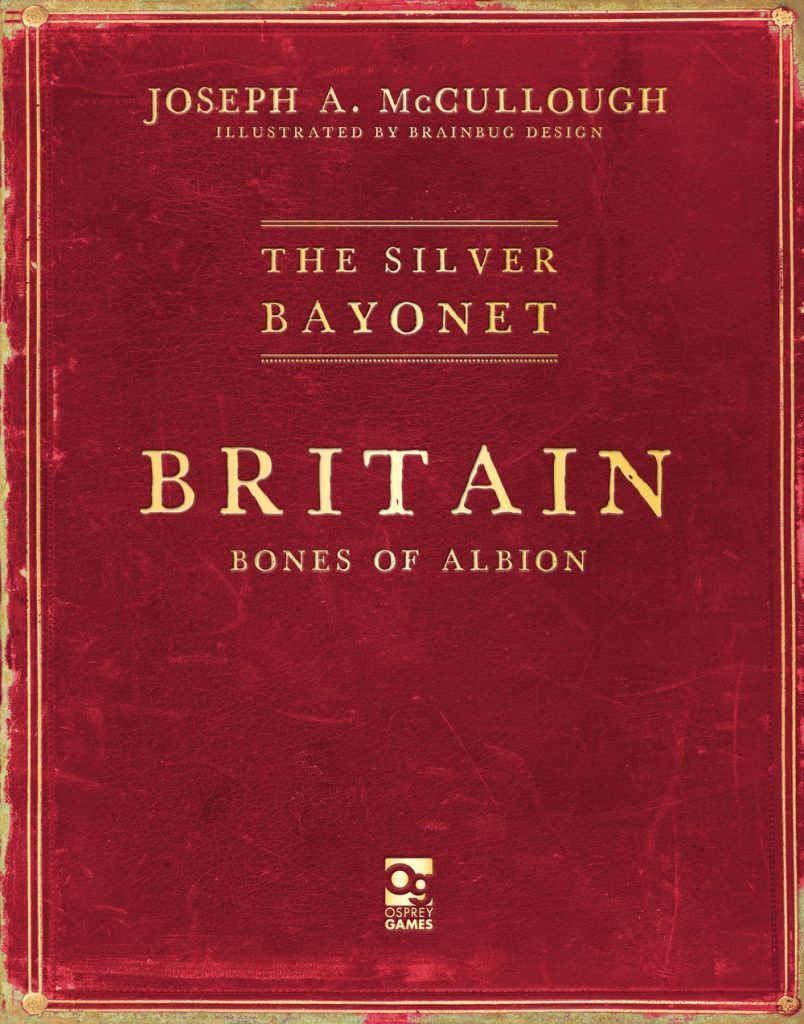
Disclaimer: Osprey Games were kind enough to send me a review copy of The Silver Bayonet: Britain – Bones of Albion withno obligation to post about the book. What follows then, is my review of the book and is my own opinion. #ad
The Silver Bayonet is coming home!
‘As the specter of invasion looms from across the Channel, the ghosts of Britain’s ancient past return to haunt the living.’ – Britain – Bones of Albion – Joseph McCullough.
The latest campaign book for The Silver Bayonet, brings the action back home to Britain. It takes Silver Bayonet units around Britain to discover the cause of the increased encounters with undead across the country.
A Look At The Book
The Silver Bayonet: Britain – Bones of Albion by Joseph McCullough and will be published by Osprey Games on the 25th September 2025, continues the theme seen in previous books in the series with a cover styled to look like an old book with gold-ish lettering on a dark red cover, showing signs of wear. ‘Slightly foxed, but still desirable’ in book collecting terms, I believe. So, it will look great next to other books from the series on your book shelf.
Inside, the pages continue the style aesthetic and look like the well read pages, of an old book, occasionally stained with blood splashes, bloody finger prints or showing damage to the edges.
The book is liberally sprinkled with excellent illustrations by Brainbug Design that carry on the great work they have contributed to other books in the series.
The book opens with an introduction from Joseph giving us an insight into some of the inspiration for the campaign and how the idea came to him while out cycling one day.
Chapter One
Here Joseph details the background for the campaign, weaving in threads from many parts of Britain’s history of invasions. The campaign has its roots in the island’s distant past when druids performed a ritual to curse the invading Romans, but were unsuccessful. Centuries later an ancient magical black stone has been uncovered that has belatedly finished that ritual. Now the undead of the island’s many invaders from the centuries since the original ritual are rising to plague the country. Thus, Silver Bayonet Units are making their way to Britain to investigate and deal with the risen dead.
Chapter Two
A short chapter but sweet nonetheless detailing a new soldier type available for British units or any unit if you use the ‘Go outside the list’ optional rule from the main rulebook, the Bow Street Runner.
These were possibly London’s first professional police force and were attached to the Bow Street magistrates office, giving them the nickname of the Bow Street Runners. The previous link is to the website of The Bow Street Museum of Crime and Justice. It’s well worth a look, full of little bits of historical gems. Don’t have a suitable mini for officer? Look no further than Northstar Military Figures who are producing a Bow Street Runners set of two metal miniatures for the very reasonable price of £6.00 at the time of writing.
Chapter Three
This is where you will find the campaign itself. There are eight linked scenarios intended to be played by two players competitively, but the book also offers advice on increasing the player count to three or four players.
The campaign sees the special units visiting eight ancient sites across the British mainland in search for the titular Bones of Albion. The bones are relics left over from the magical ritual of the druids in Roman times and are the targets of the first seven scenarios.
Joseph offers an option to make the campaign more fantastical by using a ‘Bones of Albion Deck’ separate from the clue marker decks found in the first seven scenarios. He also advises a method of assembling the Clue Marker Deck for each scenario to make investigating clue markers more incentivised.
Unexpected Events and Encounters are triggered as detailed in the main rule book, but there is a table of events and encounters specific to the campaign.
I won’t detail each of the eight scenarios as that would be a spoiler and nobody likes spoilers. Suffice to say that each scenario takes place at a different ancient site, so it is an excellent excuse to make some awesome scenery. Of course you can use whatever you have handy to be proxies, nothing wrong with that!
As mentioned earlier the first seven scenarios have their own clue marker decks and many of the scenarios have special rules and or a specific events tables that further add to the flavour of each one.
The Bestiary
Chapter four details all the new creatures and new attributes that feature in the scenarios and they are great. There are undead representing many of the peoples that have invaded Britain over the centuries. Apart from making these scenarios great you could also obviously use them in your own scenarios. An idea I’ve been playing with is having a sort of random undead deck. Should be interesting, might go horribly wrong!
The varieties of undead are just itching for kit bashing but if that is not your for you Northstar Military Figures have got you covered with their ‘The Silver Bayonet. – Wave 9 Miniatures: Britain’
Further Campaign Ideas
The one thing I’ve found with Joseph’s games that I currently play, Frostgrave, Stargrave and The Silver Bayonet, is the books just make ideas pop and fizzle in my head, hugely inspiring. ‘Britain – Bones of Albion’ is no exception. Joseph states in the beginning of chapter three that this is your campaign and you can make any changes you want. He suggests that you could make scenarios based on any interesting locations in your own area. Living in Devon I am close to so many such locations, what horrors could emerge from the many ancient sites of Dartmoor? There could be a Silver bayonet unit hastily recruited from French POWs from Dartmoor Prison!
The inspiration link of The Silver Bayonet to the Sharpe’s books by Bernard Cornwell could easily be extended to another of his book series The Arthurian saga. Maybe events that took place in those books have echoes in the times of The Silver Bayonet? There was one ritual in particular that Merlin started that could be the basis of a similar quest. Or what if an ancient evil could only be slain by Excalibur? The special units could then search for the ancient blade. Or may be the special Units travel to Ireland in search of the four treasures of the Tuatha De Dannan? The Fomor of Irish myth make excellent bad guys and Balor of the Evil Eye would be a fantastic end ‘boss’.
Another scenario idea I had, inspired by the themes of the Bones of Albion is something loosely based on the classic (and one of my favourites) horror film ‘The Wicker Man’ – Silver Bayonet units are sent to a mysterious island of the coast of Scotland to investigate the disappearance of a Bow Street Runner who was investigating the island. Possibly having Lord Summer Isle as a sort of vampiric creature that feeds on the deaths of innocents, ‘Summer is a coming in…’
The Miniature Battles Rating
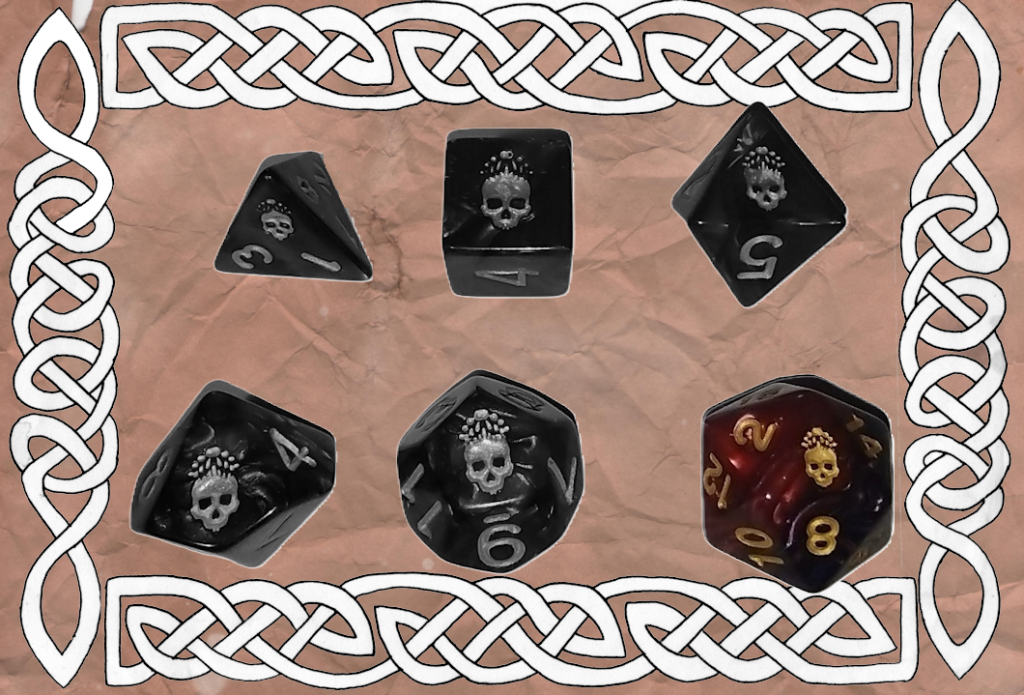
I can’t find anything in the book that I don’t like. I think even if you never play the campaign the book is just stuffed full of inspiration for creating your own scenarios, and that to me is the sign of a ‘must buy’ supplement. The Silver Bayonet: Britain – Bones of Albion gets a D20 in my scoring system!
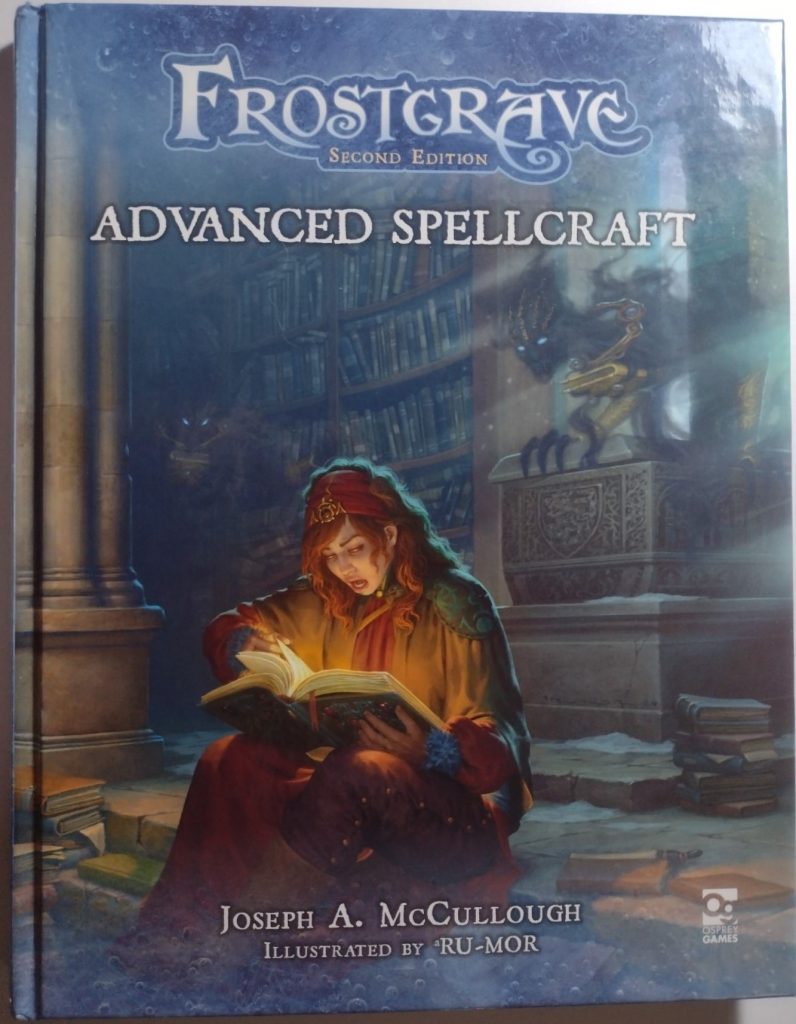
Like its predecessors Advanced Spellcraft is beautifully presented with a cover depicting a mage studying a magical tome with a look of surprise or perhaps building terror on her face while unbeknownst to her two whispy Book Wights approach from behind. Inside the text is liberally adorned with great photos by Kevin Dalimore, of miniatures painted by him and Paul Cubbin, and stunning artwork by aRu-Mor. The painting on page 27 is one of my favorites and is wonderfully creepy.
What’s inside?
The book opens with an introduction from Joseph. I always enjoy reading these because I always get the feeling that Joseph is as excited about playing his games as he is writing his books, so you know you are in good hands.
The book is themed around the rediscovered Bibliosepulchre of Felstad. This vast library-crypt was the resting place of ancient librarians who were entombed, each holding tightly to a rare grimoire. Chapter One details a range of eight optional spellcasting rules that you can add to your game. My favourites are the Casting Roll Criticals and Flourishes.
As the name suggests Casting Roll Criticals add an enhancement on a casting roll of twenty, a critical success or a detrimental effect on a roll of one, a critical failure.
The Flourishes are used for when a Wizard finds or purchases a grimoire of a spell that they already know, they can then use it to learn to cast the spell with an optional flourish, to achieve different effects albeit with a harder casting roll. These are a great addition to the game adding further depth and variety to the spells.
Chapter Two is the Codified Spell List. All the spells from the Frostgrave rule book are covered with Critical Success and Critical Failure effects and apart from one spell, two or more flourish effects. Additionally there are notes or FAQs for many of the spells listed.
Next is The Bibliosepulchre Campaign that consists of ten scenarios written for two players and recommended for experienced wizards as they are ‘extremely dangerous and include deadly monsters’, to quote the book, so will be suitably challenging if you have been playing Frostgrave for the last 10 years. The scenarios are playable in order but there is also a table for rolling for them randomly. Each scenario takes place in a section dedicated to one of the schools of magic from the Frostgrave rulebook. A nice touch is that the scenarios can be played with your normal Frostgrave terrain as the Bibliosepulchre reflects the city and also many areas would be collapsed ruins. Ideally though you might want to make some book shelves, lecterns and other accoutrements found in libraries. I will admit to not having read through all the scenarios, mainly because I like to read them in sequence of playing them, if you get what I mean, and I haven’t had the time yet.
Chapter Four details thirty nine new treasure items that can be found in the Bibliosepulchre. After each scenario one treasure token can be exchanged for a roll on the Bibliosepulchre Treasure Table. There is a huge range of magical items detailed here and a note is made that due to their rarity none of them should be available to purchase which will keep them as a great incentive to play the scenarios.
The final chapter details fourteen new creatures that may be encountered within the Advanced Spellcraft scenarios. There is of course a random encounter table and details of new creature traits not found in the main rulebook.
Conclusion
I have to say that Advanced Spellcraft is a really great supplement for Frostgrave and adds so much to the games. I haven’t gone into page by page detail in this review, partly to keep the review to a reasonable length, and partly as doing so would feel a little like giving out spoilers. If you enjoy Frostgrave, go and buy the book or the PDF, I don’t think you will be dissapointed! I’m giving Advanced Spellcraft a d20 in the miniature battles rating scheme.
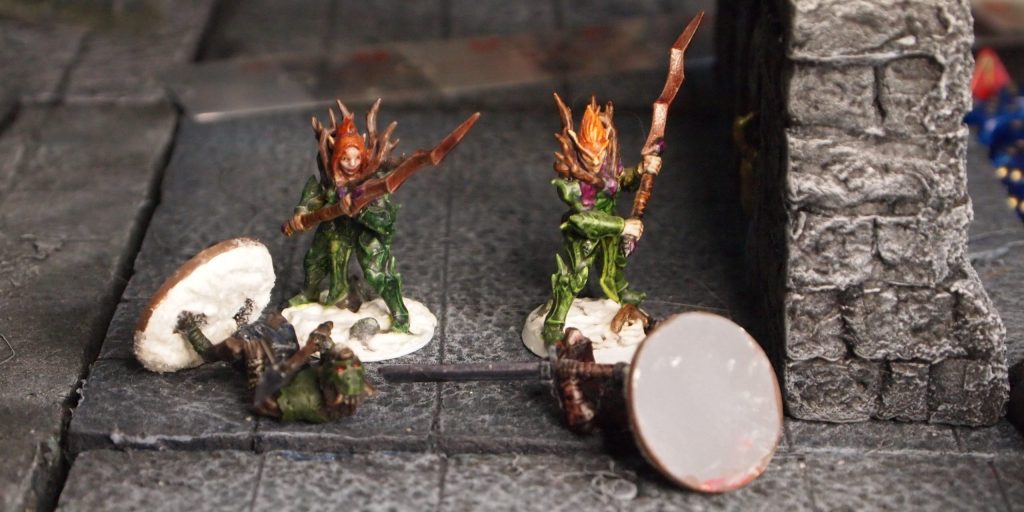
Durnimlath watched as the unconscious bodies of Seregthaur and Mothorm became surrounded by a hazy light, flickering from blue to purple and back again. The air was filled with a subtle tang of hot metal which she associated with magic being used. Both the elves became indistinct as the light grew stronger. And then, as the light winked out the two forms were replaced by two different elves, Breged and Calaraglar. Both sat up looking confused.
The new Thugs – Breged On the left & Carlaraglar On the right
“Welcome to Felstad” Durnimlath said with an ironic smile. “Tell me. What were you doing before you arrived here?”
“We were patrolling near the Sentry Oak” Breged replied, standing up and brushing dust from the floor from her leather clothing.
“Yes, and then I heard a sound like screaming in the distance that got closer and became louder until I felt like I could not bear it…” Calaraglar said, her voice trailing off into silence.
“I heard it also, yet I thought it more like the cry of marsh geese, and then we were…here.” Breged continued looking at the nodding Calaraglar.
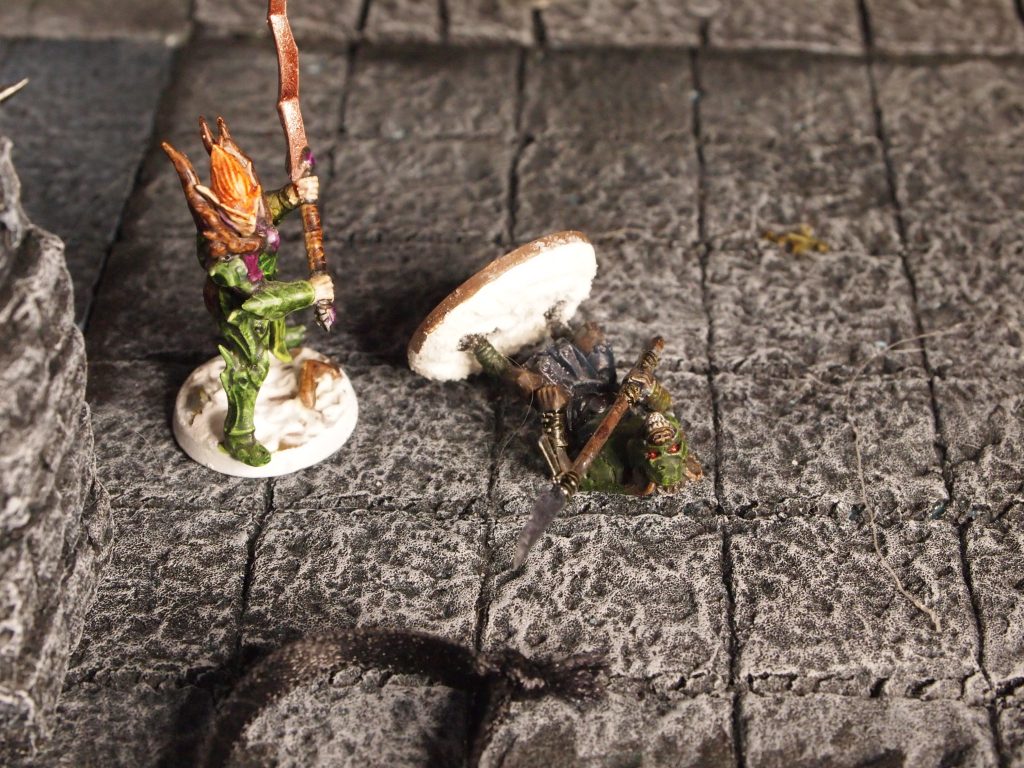
“I am sorry my friends but it seems that someone or something is using strong magic to play games with us. We were likewise patrolling the boundaries of the forest and then we found ourselves on the edge of this ruined city. It is Felstad and we are at the doorway to an abandoned weapon shop. We here have already fought with strange smoke like serpents to get this far. It is my hope that inside we will find items to aid us in returning to Farran. Until then I fear we may have many adversaries to overcome.”
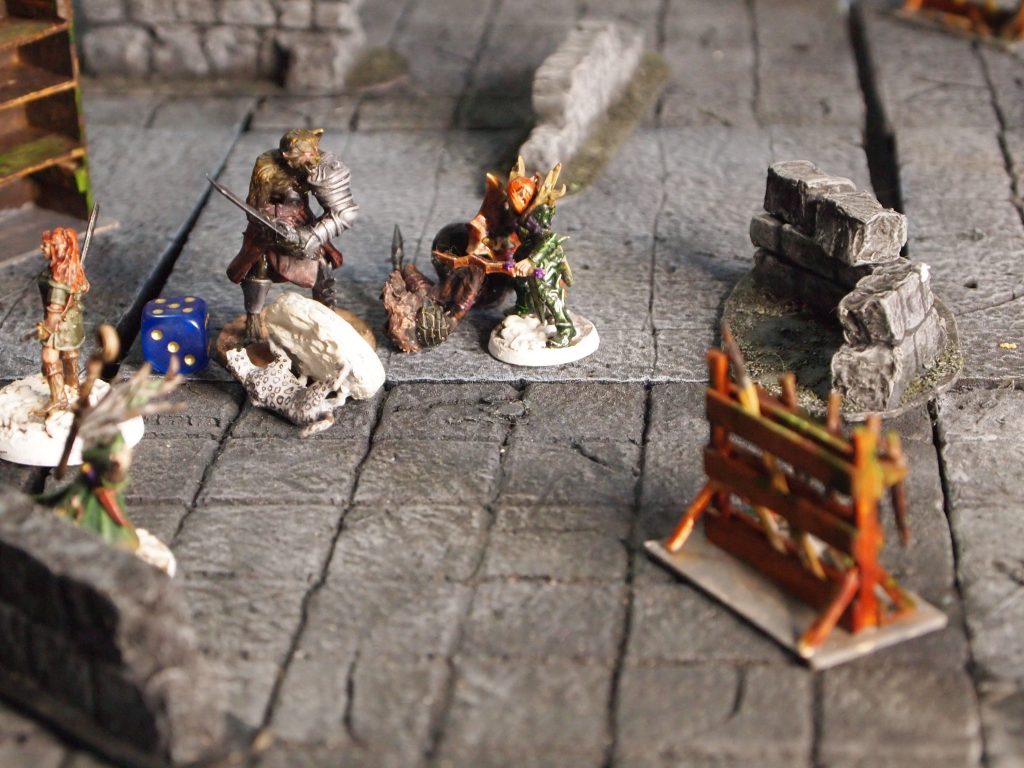
The Setup
This, the second solo scenario from the Frostgrave “Perilous Dark” supplement, takes the war band to the weapon workshop of Isher, in search of magical items. It begins with the war band having come through the doorway of the ruined weapon shop.
I made a change to my war band after the previous scenario and made Brikolad a captain using the rules from “The Frostgrave Folio“. This lets you have a war band member who can gain experience, in return for a small fee. The initial cost is 100GC and as I’d already spent 75 on Brikolad I just paid an additional 25.
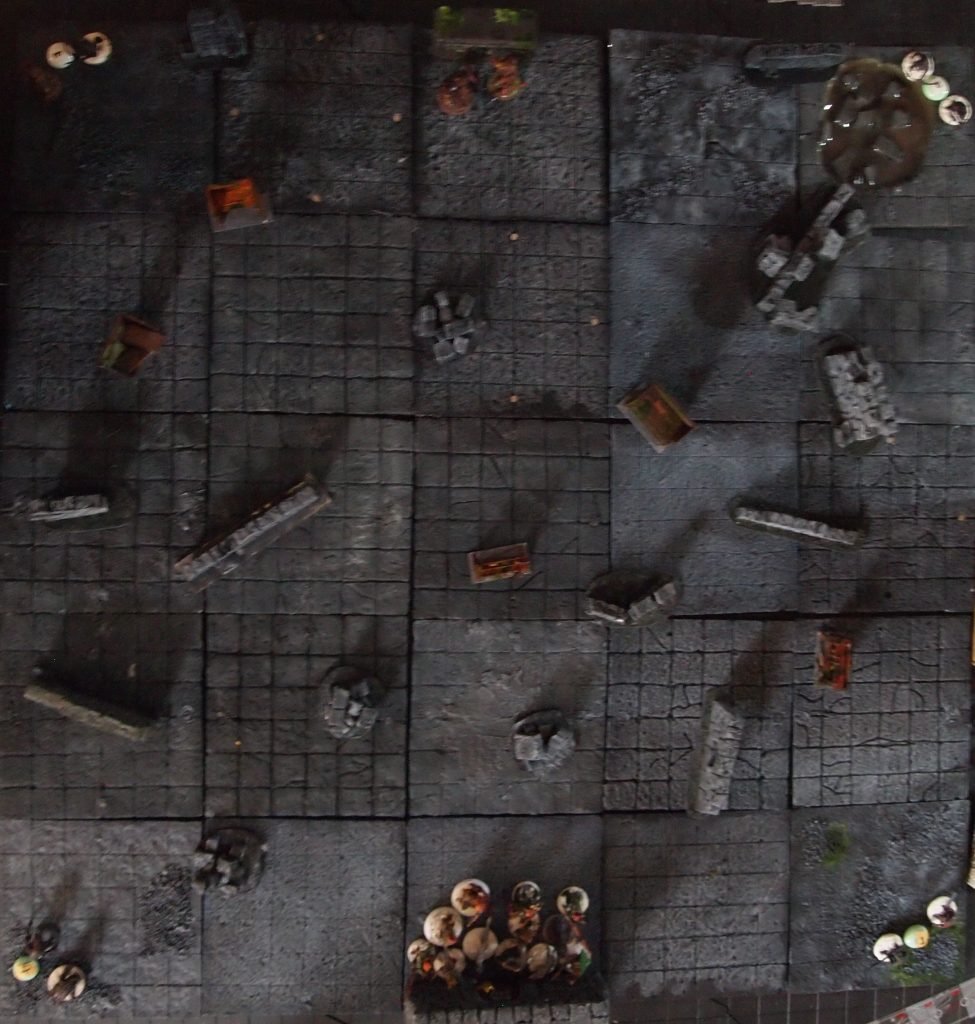
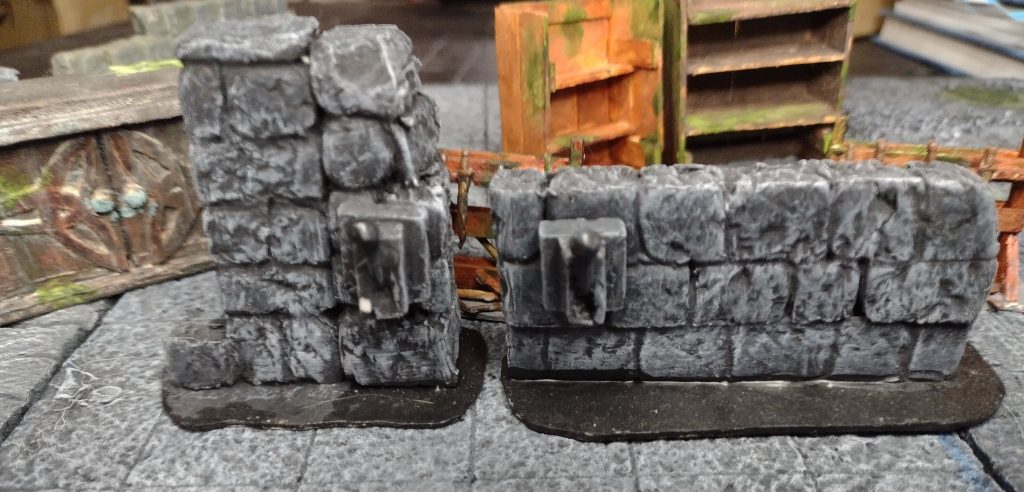
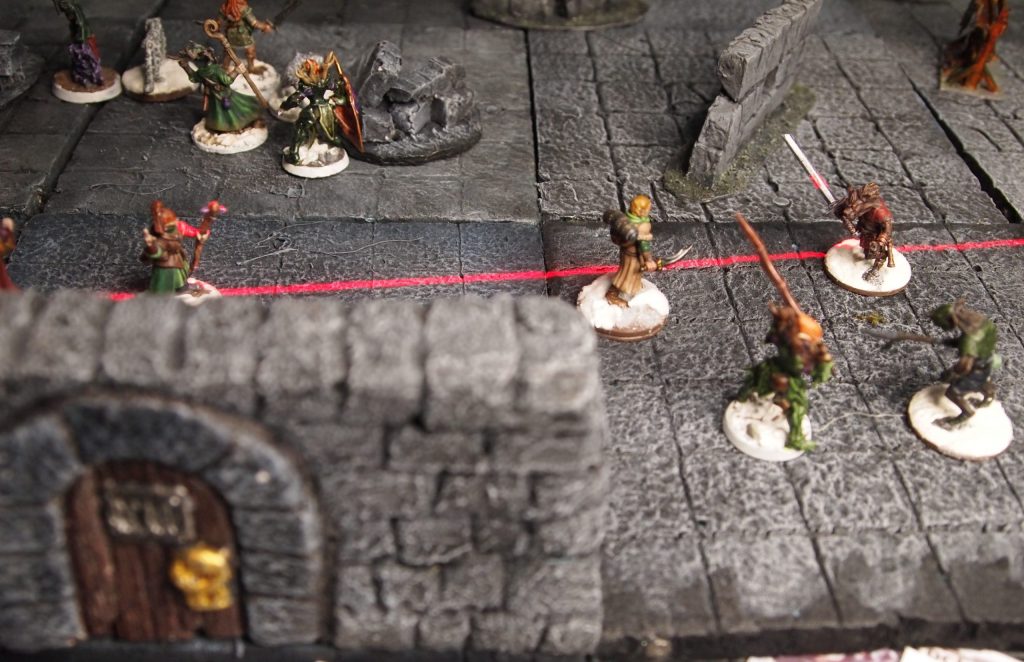
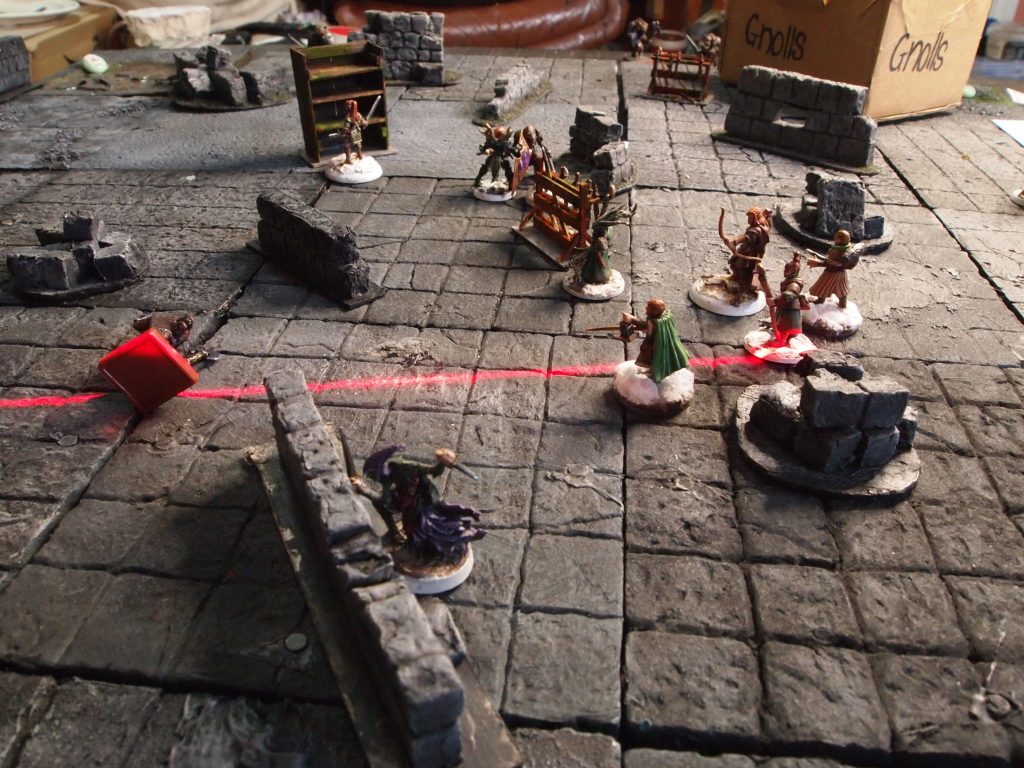
I used some home made, slightly wonky, slightly scruffy, dungeon tiles and various piles of rubble and walls also made from XPS foam plus weapon racks and shelves made from coffee stirrers.
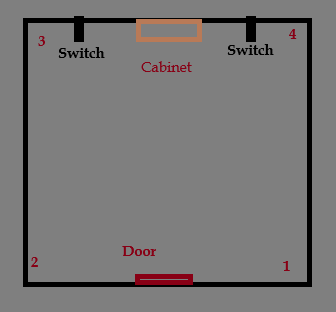
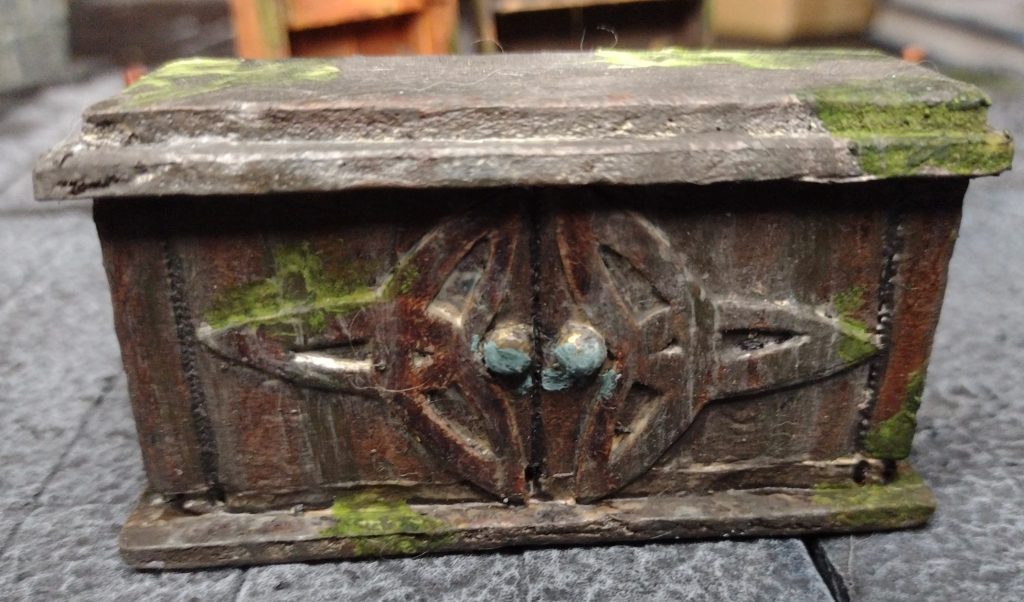
The object is to get from the door to the opposite side of the board where there is a magical cabinet with a switch on either side. When both switches are pulled the cabinet will open, depositing two loot tokens. Then the war must get back to the door and exit the workshop, ending the scenario. At each corner of the board is a numbered spawn point. At the beginning of the game there are two gnoll thugs at each of the spawn points and two gnoll knights standing in front of the magical cabinet.
Diagram of the board layout
Switches on walls made with XPS foam and bamboo sticks with green stuff.
The magic cabinet made with thick card and XPS foam
Out of game spells
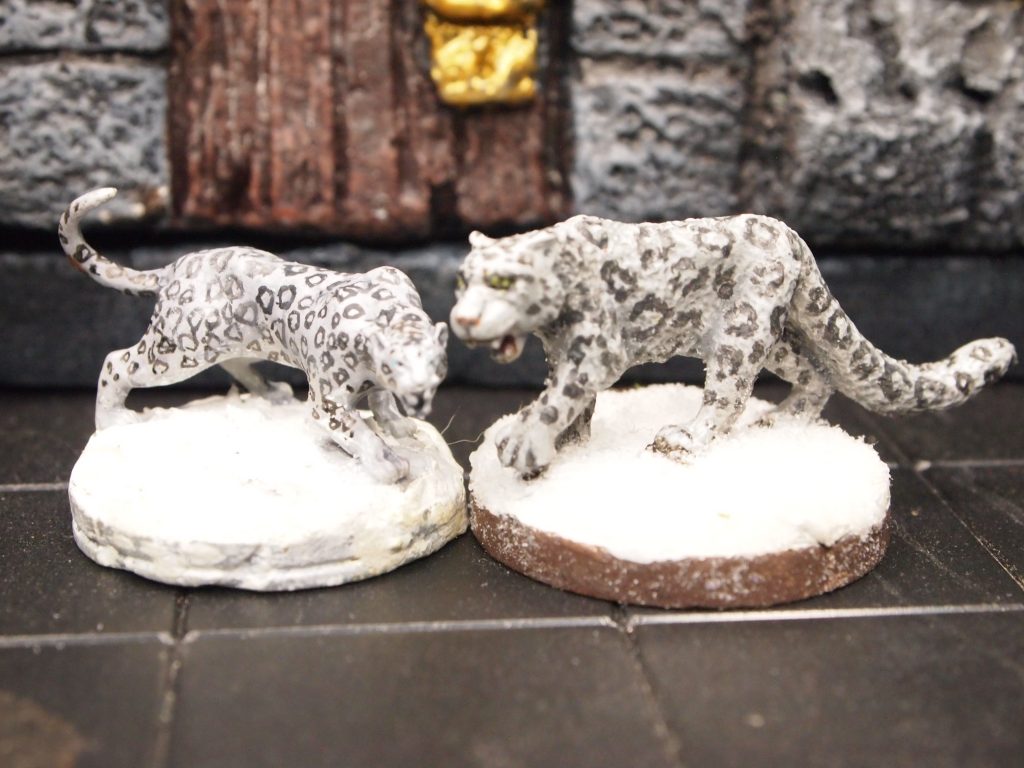
Durnimlath and Mirhen both cast Out of game spells Familiar, Brew Potion and Animal Companion (more on that at the end). Only the Animal Companions were successful so they each start the game with a Snow Leopard companion.
The following are the highlights (and low lights) of the skirmish.
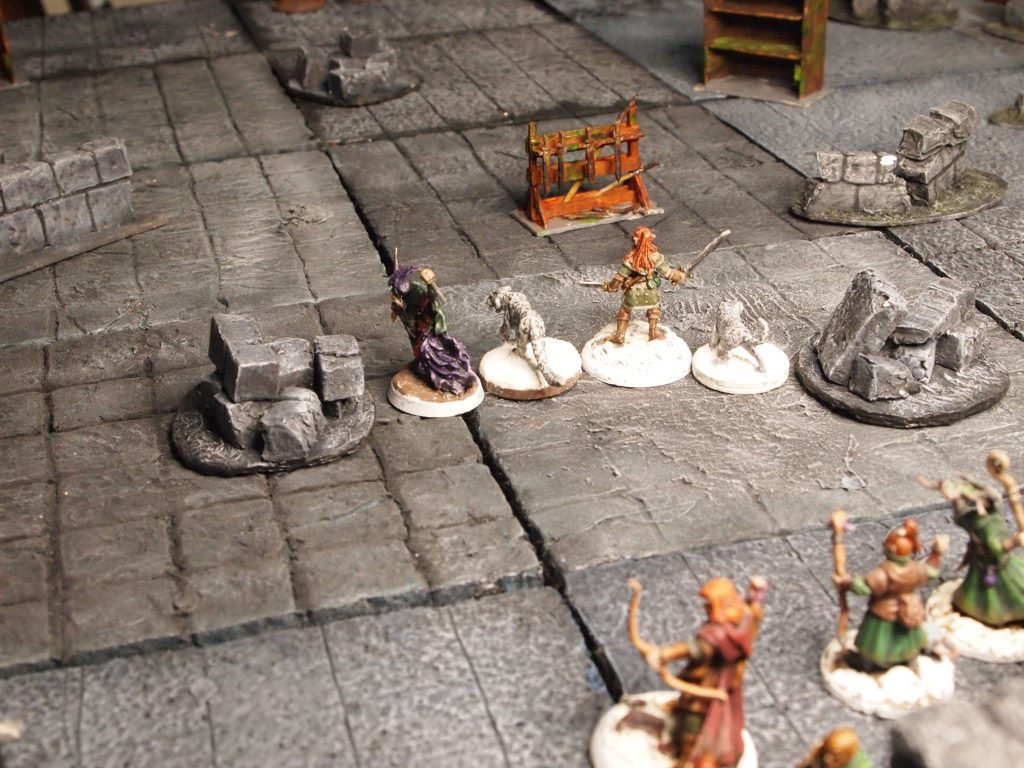
Turn 1
My plan was to move the thieves and snow leopards up the board as fast as possible to throw the switches and open the cabinet, while the Wizard, Apprentice, Captain and knight move up the board ready to grab the loot. The rest of the war band was to stay fairly close to the door to keep it clear for when the others come back with the loot.
Durnimlath successfully casts enchant weapon on Daetir‘s dagger – this is useful as it negates the -1 damage penalty that daggers have.
In the creature phase II the gnolls begin moving towards the centre of the board. I decided that the two gnoll knights would however, stay guarding the cabinet.
Turn 2
Brikolad gets first blood taking a gnoll down with his bow and Durnimlath casts another Enchant Weapon, this time on Kirgwaith’s dagger.
Mirhen does a great job casting an Elemental Bolt successfully despite an effective -4 penalty and does enough damage to also kill a gnoll. That laser burned up my whole special effects budget!
Back near the entrance Calaraglar and Galenglim are attacked by gnolls. Calaraglar takes damage but Galenglim wins the combat and damages the gnoll.
In the soldier phase Calaraglar attacks the gnoll and removes it from the game.
At the end of the turn a gnoll knight spawns at 2.
Turn 3
Apart from maneuvering and some failed casting rolls nothing much happens until the soldier phase when Gurthbor, Galenglim and a snow leopard all attack and kill gnolls.
At the end of the turn two gnoll thugs spawn.
Turn 4
Durnimlath begins the turn by casting elemental bolt at a gnoll. She needs to empower it (taking damage) but it hits and kills a gnoll.
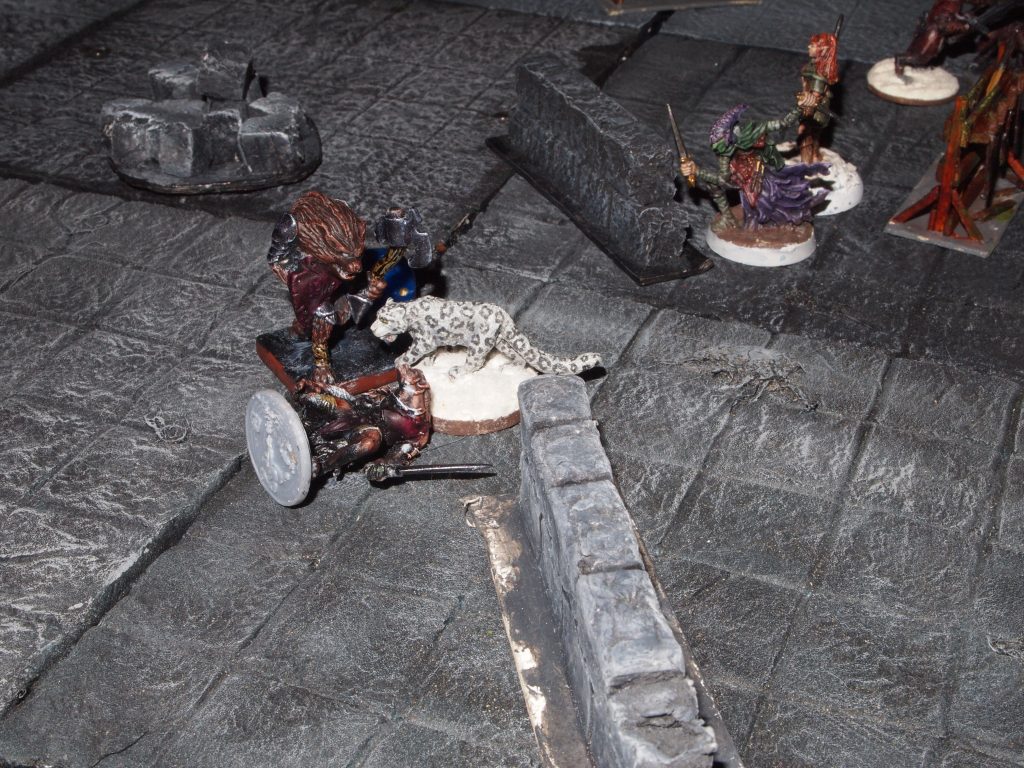
In the soldier phase the first war band casualty occurs when a snow leopard attacks a gnoll, loses the combat and is killed.
At the end of the turn two more gnoll thugs spawn.
Turn 5
At the beginning of the turn Durnimlath casts another empowered elemental bolt and kills a gnoll.
Later in the turn Mirhen successfully casts bone dart killing a gnoll.
In the creature phase 2 a gnoll attacks Calaraglar and removes her from the board.
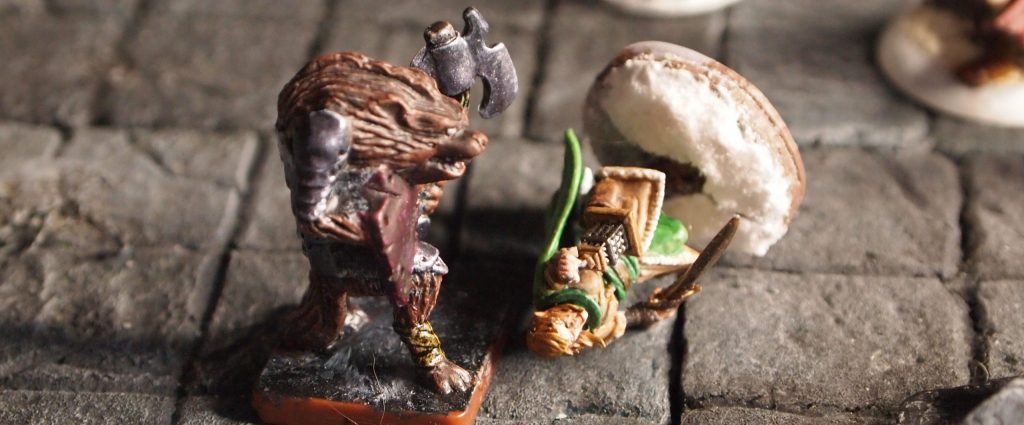
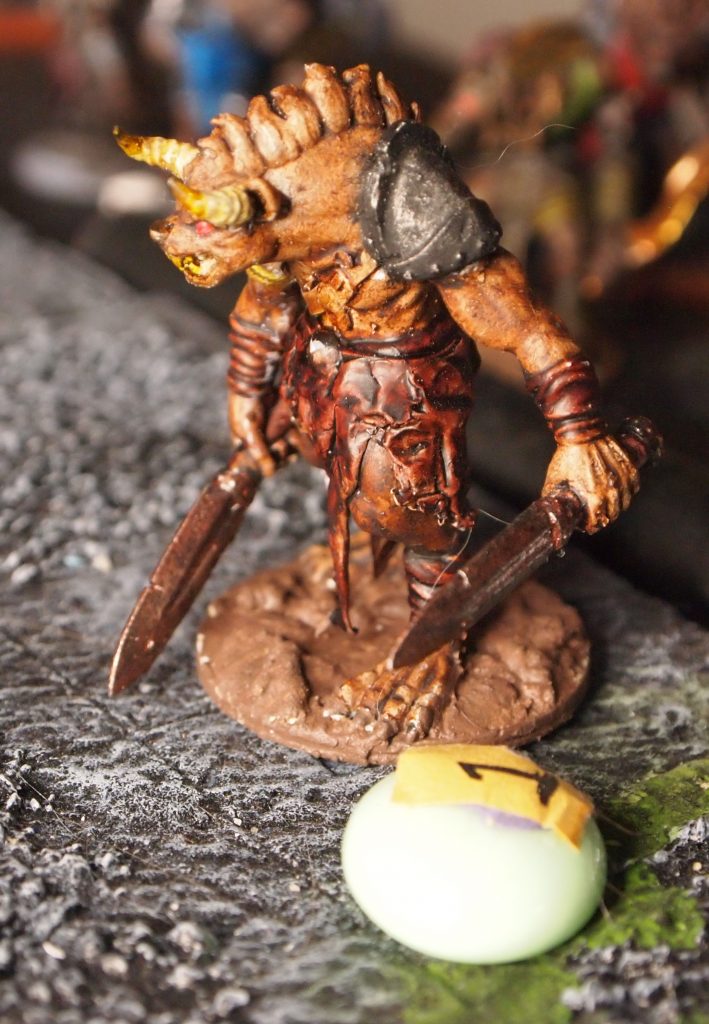
The Coming of Borock
Borock is a huge gnoll mutated by magic to be a Minotaur/gnoll hybrid. Big bad and able to send other gnolls into a killing frenzy, he will be a big problem for the war band. There is a chance that he might spawn earlier but if he hasn’t, he spawns at the end of turn 5.
Breged rolls lucky attacking and killing a gnoll..
A Gnoll attacks the remaining Snow Leopard killing it while another gnoll loses its combat with Naru Magol and is killed.
At the end of the turn a gnoll archer spawns.
Turn 7
The thieves continue moving towards the switches while Naru Magol attacks and kills a Gnoll. Gurthbor and Galenglim both attack gnolls and kill them.
At the end of the turn both a gnoll thug and a gnoll archer spawn at spawn point 2.
Turn 8
Daetir reaches the left-hand switch and Kirgwaith is nearly at the right-hand switch but, has a gnoll thug and a gnoll archer (who has already done 8 damage) very near-by.
Galenglim and Gurthbor attack Borock, hopefully keeping tied up and not able to inspire other gnolls to frenzy.
At the end of the turn a gnoll knight spawns, at 3 right near the left-hand switch!
Turn 9 – Turn 12
This where it all started to unravel. Galenglim and Gurthbor kept Borock busy but Galenglim was brought down before Gurthbor finished him off. The rest of the the war band were slowly whittled away including Mirhen the apprentice. Durnimlath was left all alone and made a break, heading back to the door to leave but was brought down by gnoll archer, inches away from reaching it.
Post Game
Luckily both Durnimlath. Mirhen and Brikolad had good rolls on the Death and Injury table, making full recoveries.
The soldiers rolls were as follows:
Naru Magol – Full Recovery
Gurthbor – Dead
Galen Glim – Full Recovery
Daetir – Badly wounded
Kirgwaith – Badly wounded
Calaraglar – Badly wounded
Breged – Dead
Badly Wounded means the soldier will not be available for the next scenario. I’m going to replace the two thugs with animal companions and the two thieves with new ones as they are free to recruit. They will look somewhat identical to the ones that the replace. Odd that! Gurthbor is replaced by a new soldier a Man At Arms.
I also realised I had miss-read the rules regarding the Animal Companion spell and that they should have taken up a soldier slot. I also forgot that both the magic users had heal spells – doh!
There was some XP and Durnimlath goes up a level and raises her shoot stat, which will help with Bone Dart and Elemental Bolt. This also means that Mirhen’s shoot stat also raises.
The war band have moved into the Treasury to use as their base and found some Gold Crowns so that was some good news.
I’m undecided whether to run through the scenario again or just go on to the next. I think I will run it again but with a changed gnoll spawning table.
I was surprised at how tough the scenario felt. There is a lot talk on the internet about the previous scenario being overpowered, and Joseph has said as much himself, but I thought this one was as tough, if not more so. What, I think makes it difficult is the spawning of extra gnolls at the end of every turn.
As I think it is said in Perilous Dark, balancing solo scenarios is not easy. Of course, if I had had a lot of better dice rolls, my perception might have been different, and you do have a reasonable chance of any downed soldiers surviving which is a plus. I also possibly didn’t have enough scenery as it is suggested that you have a bit more than for competitive games.
I think I will re jig the gnoll spawns to have less knights and only spawns on every other turn. After all Borock is out of the picture so maybe the gnolls are leaving that area now their leader is gone.
Overall i really enjoyed the game and am looking forwards to playing again.
And a group of “Heroscape: Gnoll Fighters” which I can’t find any details on plus some basic gnolls from an old D&D game.
Let me know in the comments if you have played this scenario and how you found it? Also how do you find campaign play in skirmish wargames? Are there any that get it spot on?
I think it was in one of Peachy’s videos that I first heard about the Brunswickers. A little tasty morsel of the Napoleonic wars history that I hadn’t previously heard about. And on looking them up on the internet was then determined to have a special unit based on them for The Silver Bayonet. As someone who habitually wears black clothing the appeal was obvious.
The “Black Brunswickers” was the nickname of the military unit raised by Frederick William, Duke of Brunswick-Wolfenbüttel, the Brunswick Ducal Field-Corps, as a response to Napoleon’s taking of German territory.
Looking around there were a few miniature manufacturers making suitable minis including Perry Miniatures and Gripping Beast. In the end I went for the Gripping Beast miniatures and bought a couple of packs to give me a large choice of figures. My plan was to try a little bit of minor kit bashing to make them look more like a Silver Bayonet Special Unit.
In terms of The Silver Bayonet nationality choice you could use the Austrian list or possibly the British as later in the Napoleonic campaigns they were attached to the British army, if I’ve read things correctly! There is also the optional rule ‘Go outside the list’ where you build your unit from any of the soldiers regardless of nationality. For solo play you are the final adjudicator and the game is very much a ‘do what is fun for you’ so I built the unit around what I thought I could kit bash.
I originally photographed the miniatures some time ago and typically for me, got side tracked by other projects then misplaced the photos, the found them and decided that they were not good enough and re did them.
So here they are. Apologies for the not so brilliant photos, they are marginally better than the first attempt, my camera is one without a viewfinder and the display screen looks like it is on the blink, added to that I’ve reached that age where I need two sets of glasses, neither of which helps getting things in perfect focus.
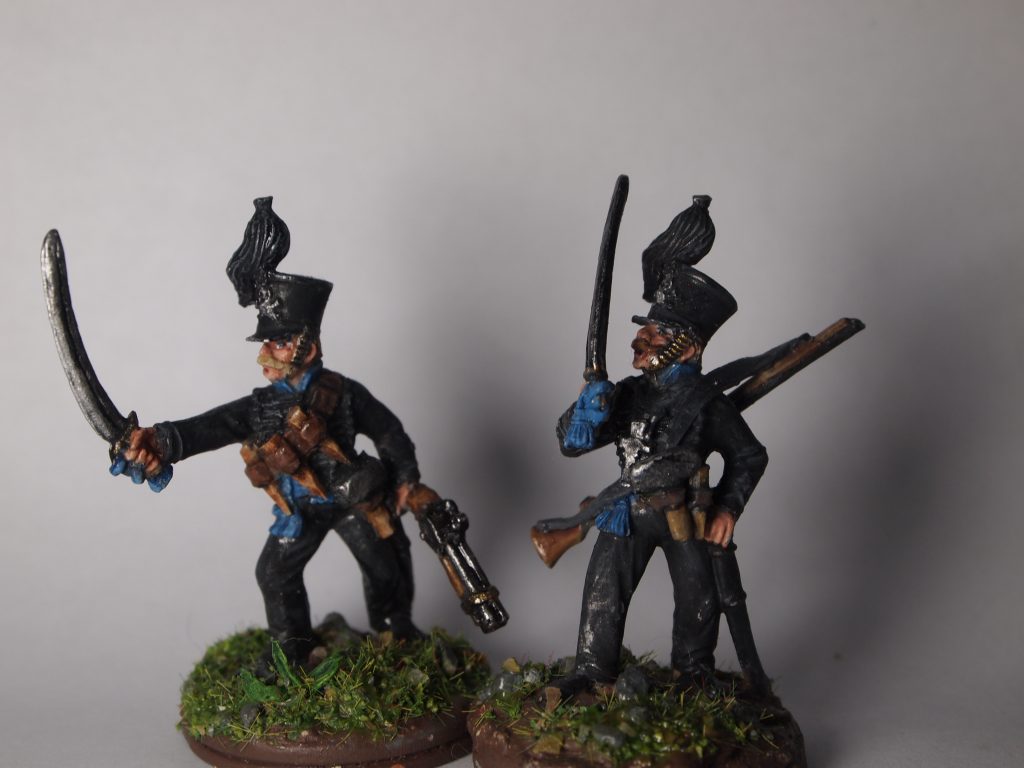
Capitaine Edgar Mandarinetraum & Baal Brecht Veteran Hunter
I went with the addition of a rather large pistol from a Reaper Miniatures, Razig Weapons Pack and stakes made from cocktail sticks, which in hindsight are a little too large, in a green stuff belt. Maybe the stakes are for extra large vampires? The hammer is also made from green stuff.
The veteran hunter also has a hammer and a stake plus a rifle from my bits box with a green stuff strap. I also added a green stuff cross, which you can just about see in the photo.
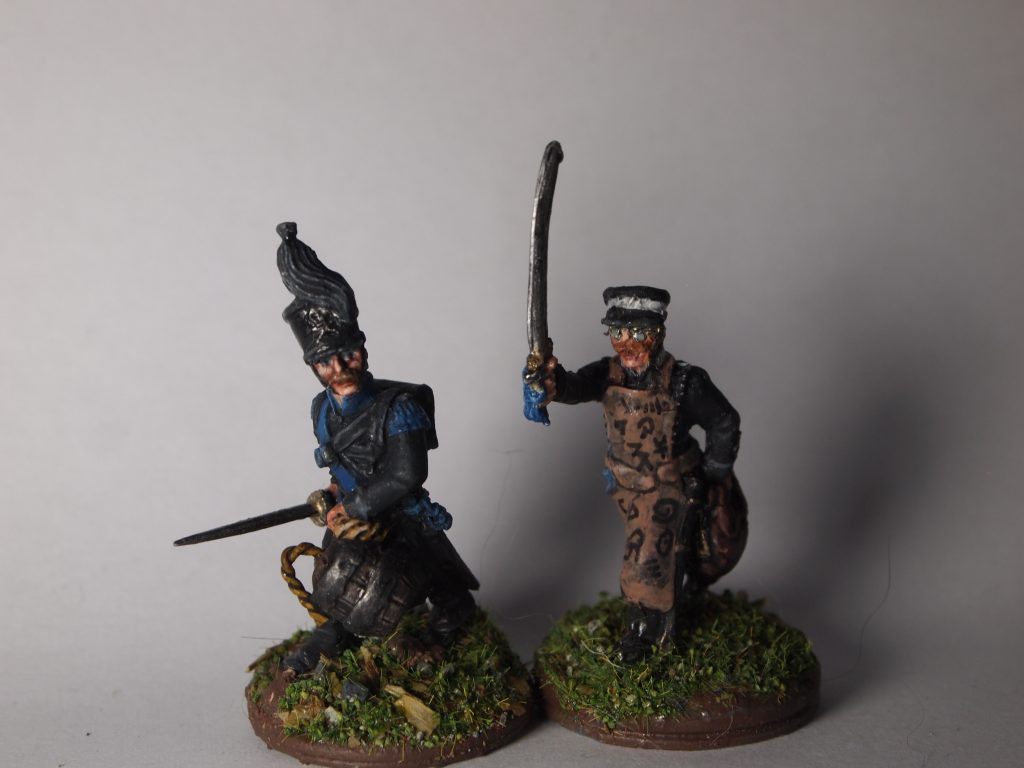
Otto Kehrtwendung – Sapper & Ausgang Gruppe Regiments-Feldscheer (Doctor)
The Otto miniature started out as a drummer so needed a bit of modification to turn the drum into a powder keg, carving the drum to make it look like a barrel with green stuff for the hoops, fuse and rope handle. The sword came from my bits box. Ausgang had a green stuff apron, doctor’s bag and spectacles added and the shako was cut down to make a cap as I found a reference suggesting that Brunswicker surgeons wore caps. Typically I can’t find the reference again at the time of writing. Not to worry, it was on the internet so must be true.
Whenever I attempt making the smaller scale stuff with green stuff my admiration for those who sculpt minis grows. The spectacles were particularly troublesome and I had many many attempts before I got them to not look like the mini was wearing a couple of dinner plates on their face.
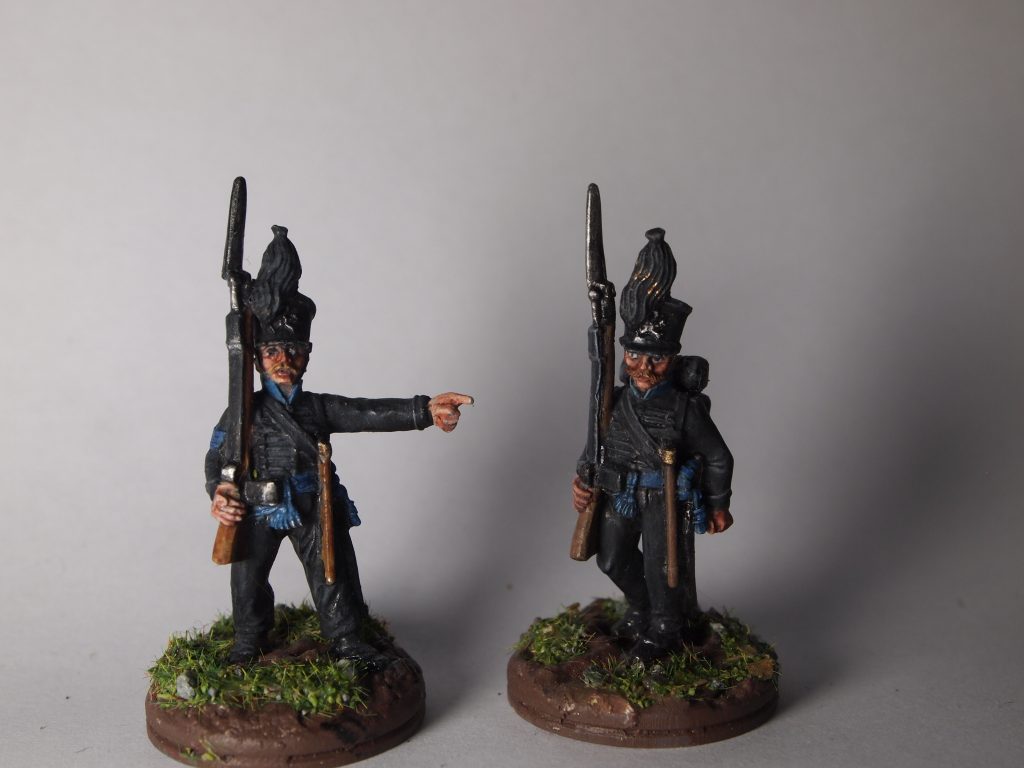
Gemeine Wilhelm Grimm & Gemeine Jacob Grimm Infantrymen
I left these two un-modified but may add some extras in the future. This photo should possibly have the caption ‘My Brother did it honest Corporal’!
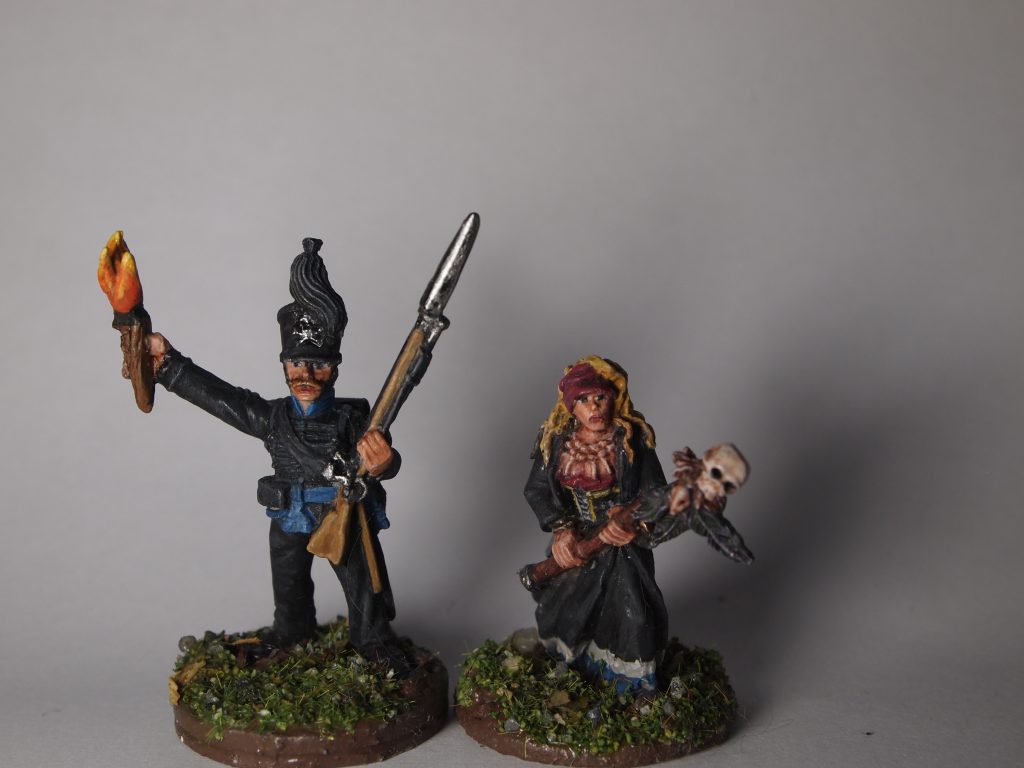
Gemeine Karl Unnütz – Infantryman & Christa Päffgen – Occultist
I have been a bit of a sucker for the Killteam big boxes. There is something irresistible about opening a big box full of loads of minis and scenery. I had more or less decided I would stop collecting them though when they were selling out quicker than I could click on a link a couple of years ago.
So when I saw the preview for Hivestorm I thought I wouldn’t get a chance to get a copy. But as it was GW seemed to have made enough to go round this time and I was gifted a Hivestorm boxset last December.
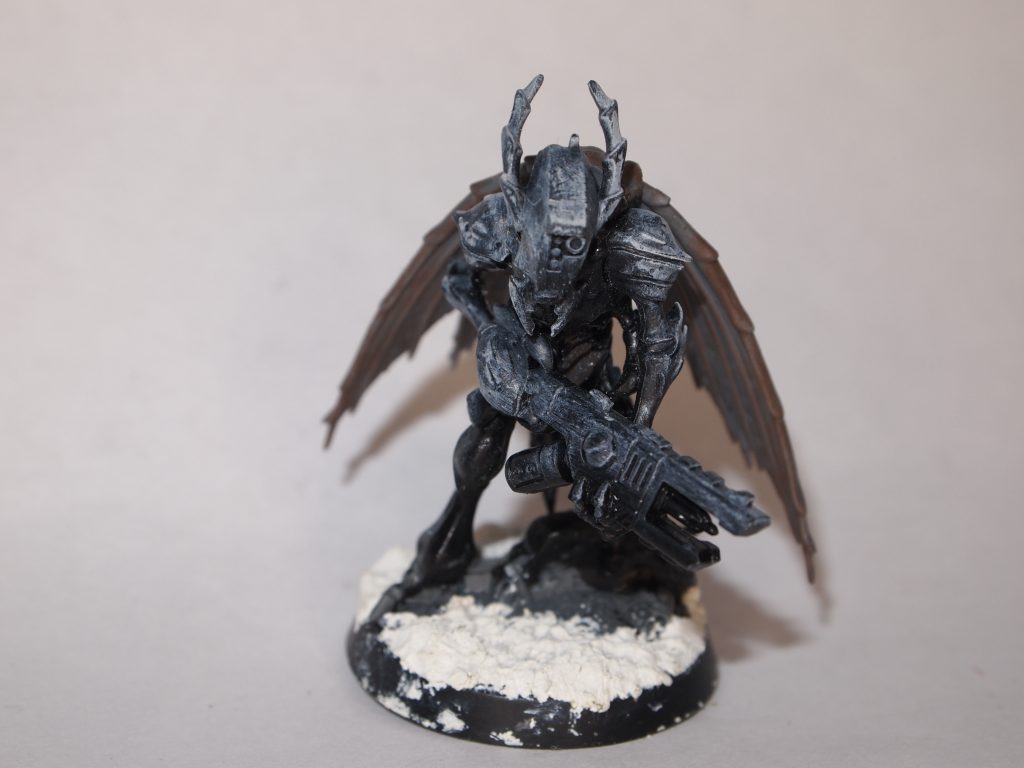
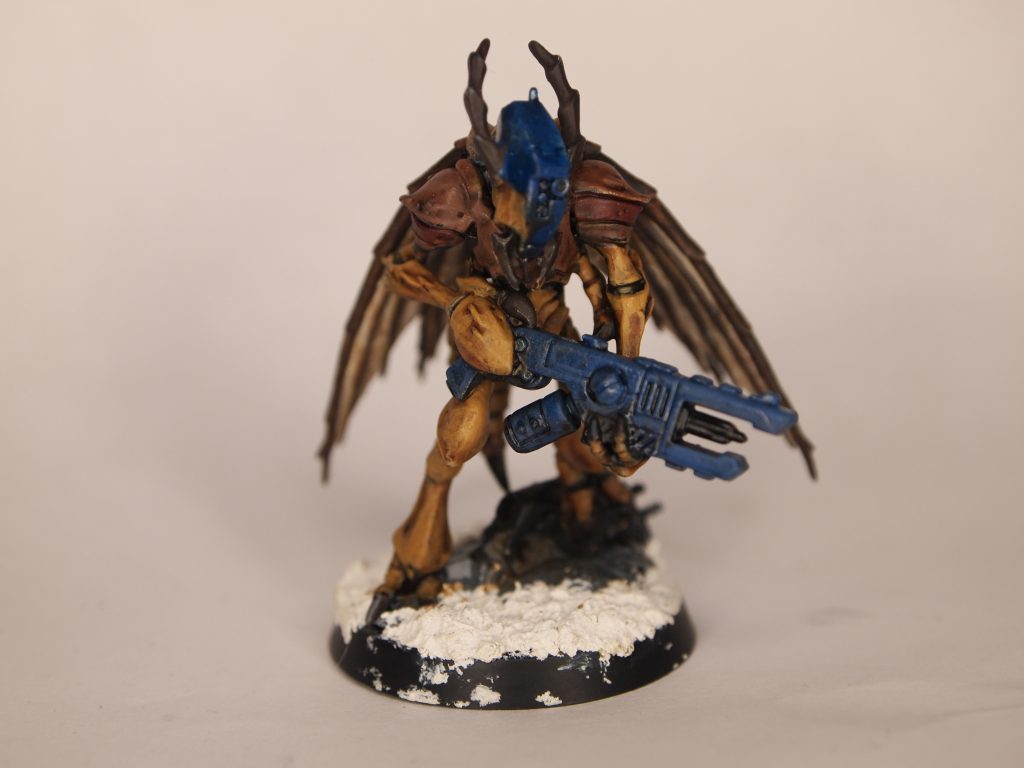
I particularly wanted Hivestorm because the scenery looked excellent and the Stingwings are just awesome. I studied entomology as part of my degree way back in the mid ’90s and have a soft spot for any insect like miniatures. Another incentive to getting the box is that the new Killteam has rules for solo play.
The inspiration for the paint job was easy, vespid is from the family name (Vespidae) for social wasps so I tried to emulate the colouration of Vespula crabro, the European hornet.
After assembling the model and removing mold lines. I started off with black primer then dry brushed with first grey and then a lighter drybrush with white to act as a guide as it shows up the details. Not quite a zenithal highlight but almost.
Preparation
The base was then prepared with grout. I mostly use grout, Polyfilla (if I have an old tube in the tool box) or sometimes bits of green stuff or Milliput left overs.
The base colours
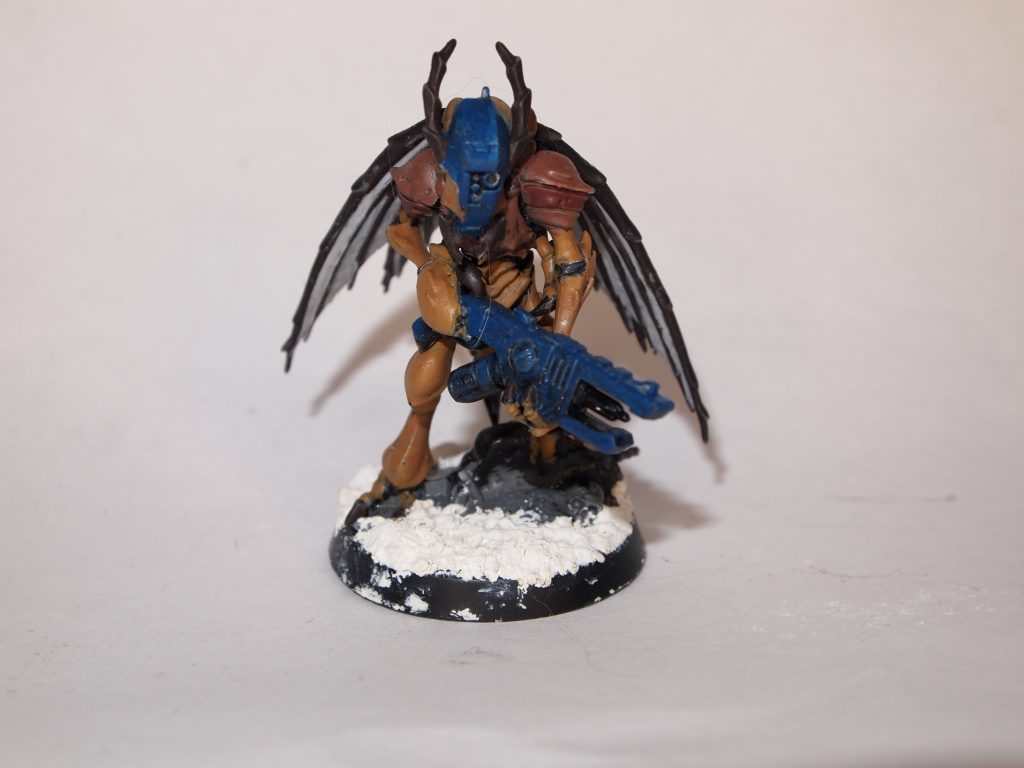
For the abdomen and the limbs I mixed a yellowy brown using Army Painter Warpaints Fanatic Tree Ancient, Army Painter D&D Goblin Skin and Army Painter Warpaints Daemonic Yellow in a rough 1:1:3 ratio.
Then for the darker areas, mainly on the shoulders, I mixed a darker brown with APWF Tree Ancient, Army Painter D&D Goblin Skin in a 1:1 ratio.
For the reddish bits on the shoulders, I mixed Duncan Rhodes Two Thin Coats – Berserker Red and APWF Tree Ancient in a 1:1 ratio.
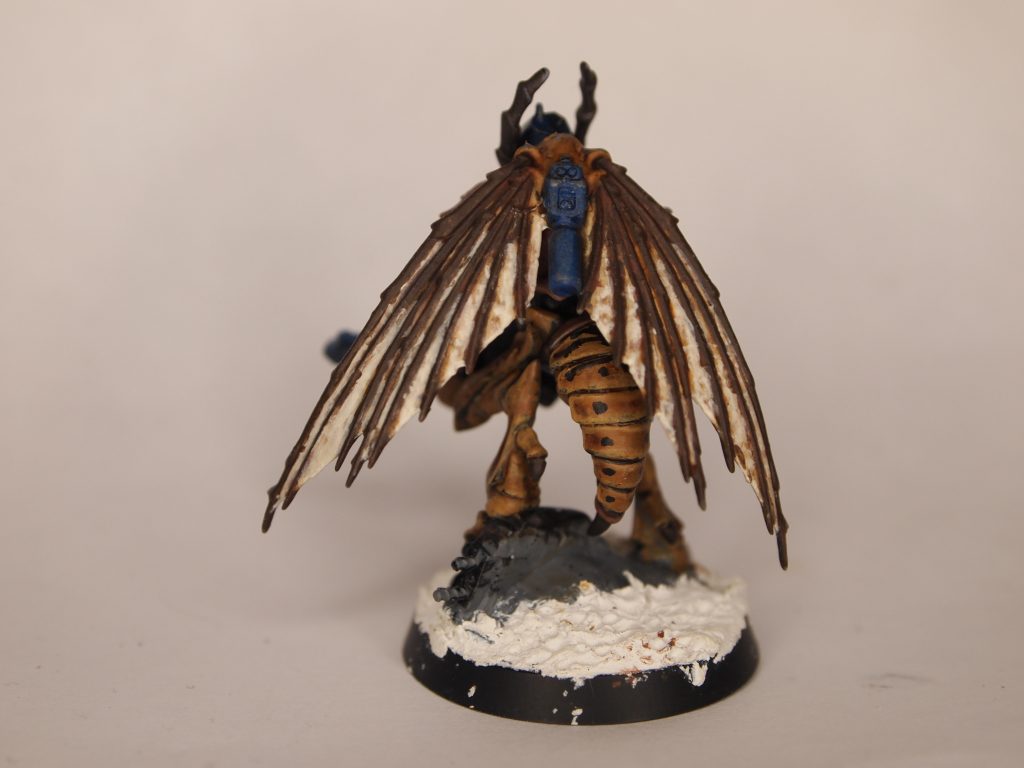
For the mandibles, antennae, claws and wing veins I mixed APWF Tree Ancient and Black in a 1:1 ratio.
For the weapon and ‘tech bits’ I wanted to use a sort of complimentary colour to the main colour so used a dark blue using APW Deep Blue.
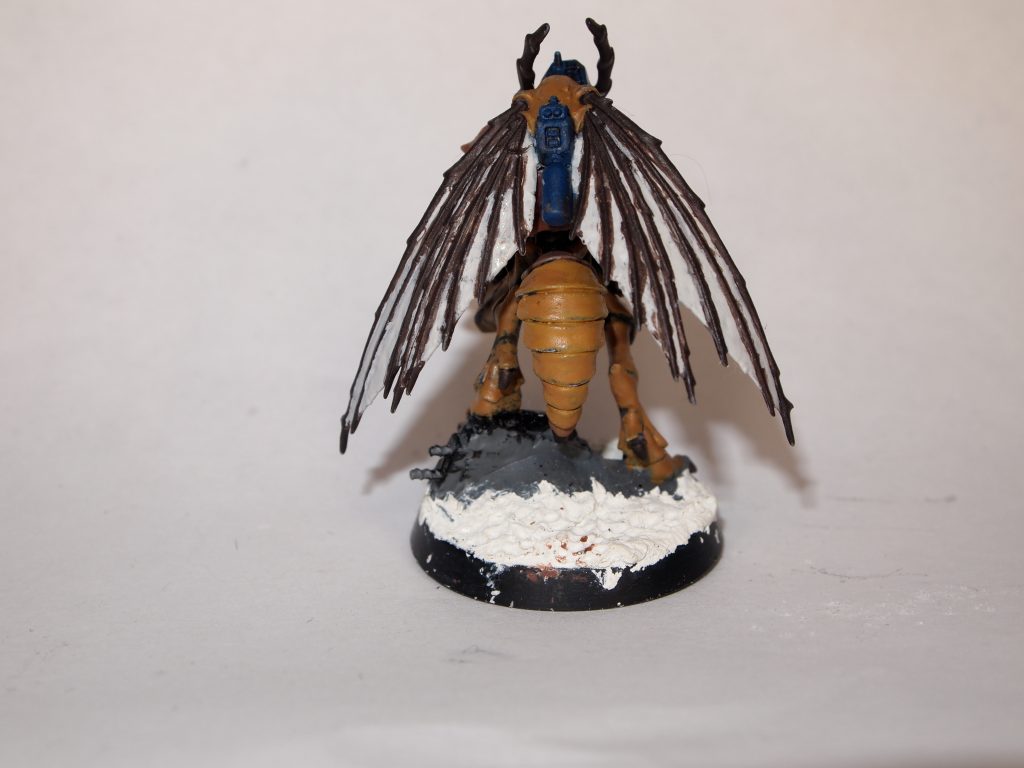
For the wing membranes I went for an off white with APW Brainmatter beige, which is one of my favourite paints, I go through loads of it. I haven’t tried the new Warpaints Fanatic version and hope it isn’t very different.
Adding washes
With all the colours added I then used APF Strong skin tone and Flesh Wash in a 2:1 ratio over the torso (or should that be thorax?), arms, legs, mandibles, abdomen, antenna, claws and wing veins. The wing membranes were washed with APW Light tone. The tech bits were washed with APW Blue tone. This stage is to add some deep shadows and pick out detail that would have been obscured by the base paints.
First Layer
For the first layer I used lighter versions of the base colours, trying to cover all the surfaces except where the deepest shadows would be. I also started to add some hornet type markings to the model.
For the abdomen and limbs I added more Angelic yellow increasing it in the base colour to 4 parts.
On the shoulders, for the brown areas on the shoulders I increased the Goblin Skin parts to 2 and for the reddish area I increased the Berserker red to 2 parts.
For the tech bits I added mixed the Deep Blue 1:1 with DR2TC – Gravestone Blue.
For the mandibles, antenna, claws and wing veins I used just the APWF Tree Ancient and for the wing membranes just the Brainmatter Beige.
Second Layer
With the second layer I tried to paint a smaller area over the previous layer with lighter paint mixes so adding more angelic yellow and goblin skin for the limbs and abdomen, and the brown areas of the shoulders, respectively and also using goblin skin to lighten the berserker red on the shoulders.
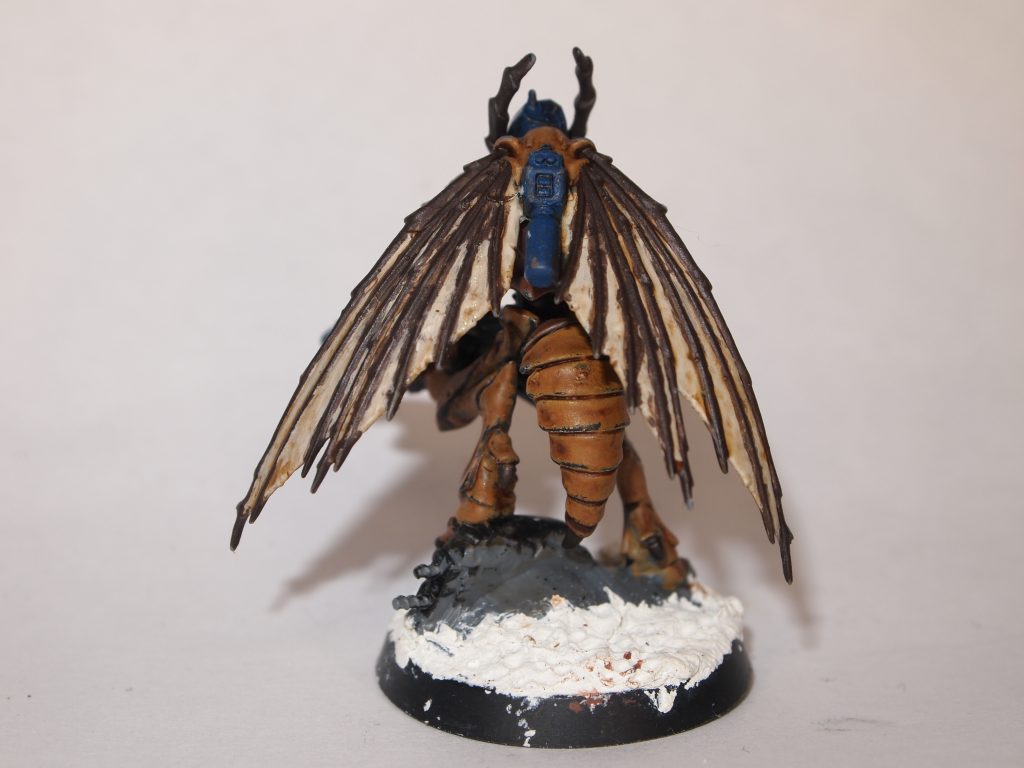
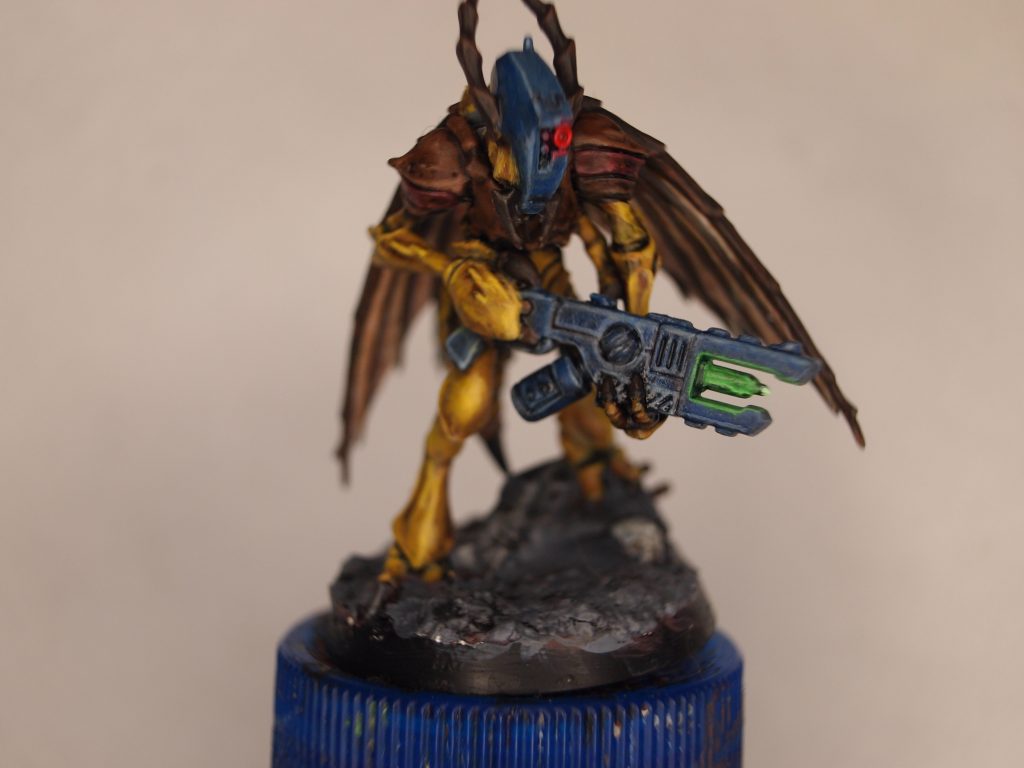
I also added some Army Painter Warpaints Fanatic Deep Grey to the base and the gun ‘spike’. I then washed the spike with thinned white paint before adding a couple of layers of APWP Data System Glow which I aslo added as an edge highlight around the ‘spike’, and added white dot at the tip of the ‘spike’.
The eye ‘lens’ I painted white and then painted over with Green Stuff World Flour – Fluorescent Red
Highlights and Finishing touches
For the highlights it is just a matter of increasing the lightness of the previous mixes and applying in thin areas where the highlights would be, mostly edges.
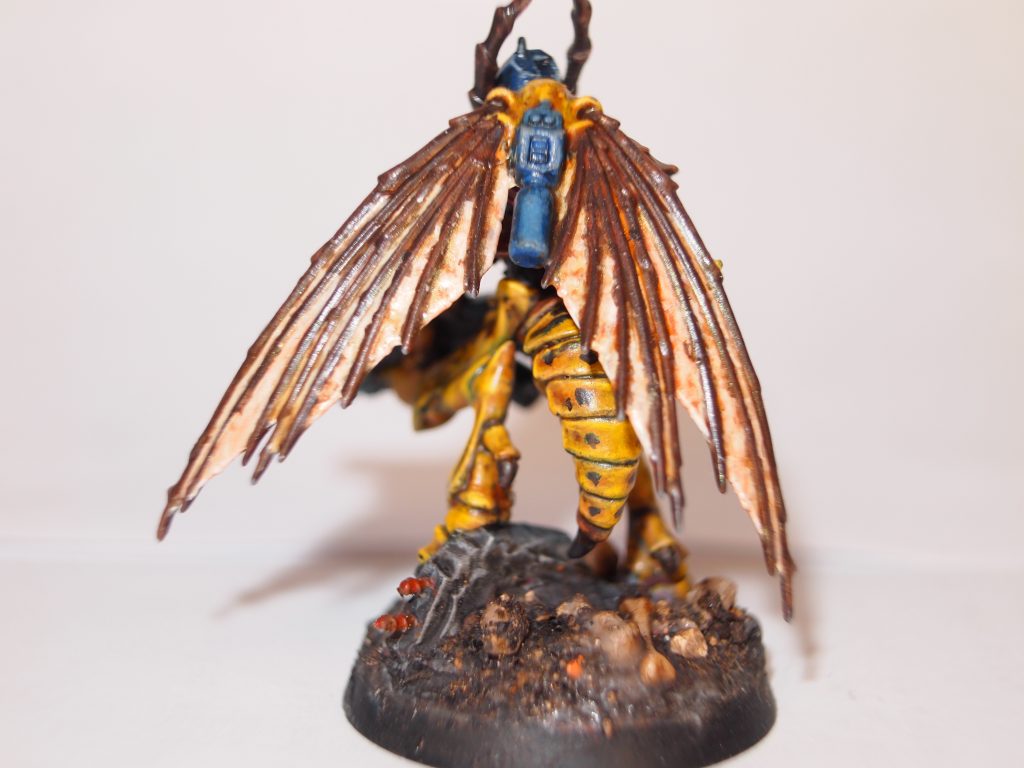
On the base I added some Krautcover Scenics “a tale of Grimdark” which is quite possibly the most popular basing mix ever. I couldn’t find it on their website but you might be able to get it from various online shops, it does have a habit of going out of stock though.
I also painted the rebar poking out of the concrete with a little rust effect and dry brushed white over the grey.
For the wing membranes I used a little Greenstuff World Colorshift metal – Royal Burgandy but it doesn’t really show up in the photos. I used gloss, matt and satin varnish to finish the model.
Overall I’m quite pleased with the paintjob. There are a few areas I think I can work on though. I’ve started to think that I could possibly go further with my highlights on my miniatures and am trying to work this in on any new ones I paint. I tend to look at each mini painted as a learning experience.
Photos – well they are a work in progress. The quality of some of them in this post are not where I would like them to be. I know I need better lighting but it is a dilemma as I don’t want to pay out for expensive equipment as the photography is a small part of my hobby and I’d rather spend money on new minis. I will try to get by with some lights that I plan to buy that are multi purpose. I’m very sceptical about a lot of the pricing of accessories in this hobby and some of the lighting I see advertised I think are way over priced.
Have you painted any Vespid Stingwings? Which colour scheme did you go for? Let me know in the comments.
Its been a while since my last post. Brain weasels have been misbehaving. Today though, I have a day off work so have been able to finish a project I started a couple of months ago.
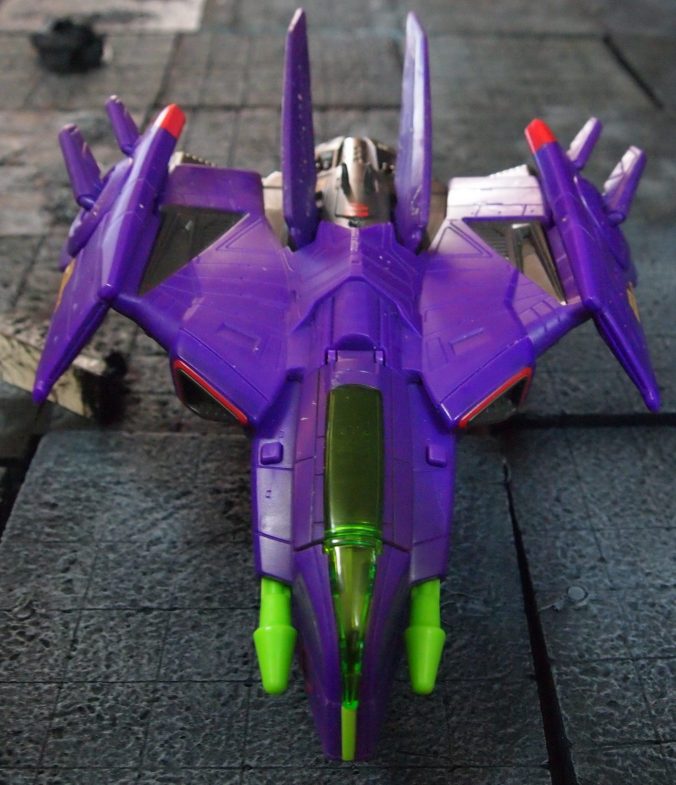
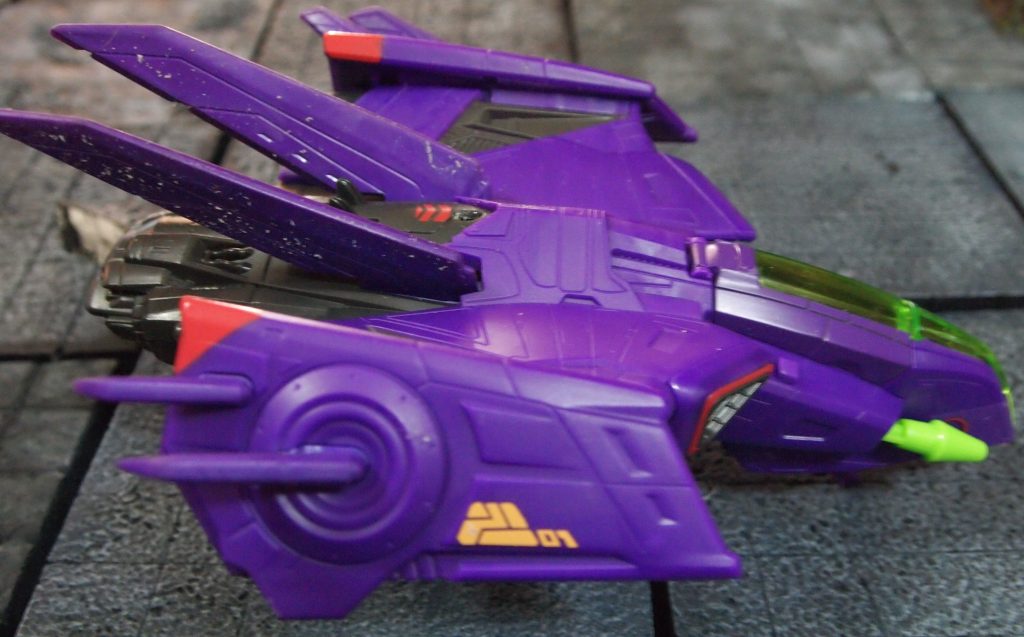
I’m not sure where I first saw the idea. It seemed to pop up all over the internet a while back, converting a kid’s toy for table top gaming, like Stargrave, 5 Parsecs from Home or any number of Role playing or wargames.
I’m always impressed by people who can see the potential of things like this for conversion or scratch building wargames stuff from odds and ends. One of the YouTube Channels I watch, Greig Johnson Making has some great examples. Greig just seems to have an eye for seeing the potential of all sorts of junk and stuff to be used in making amazing models and costumes.
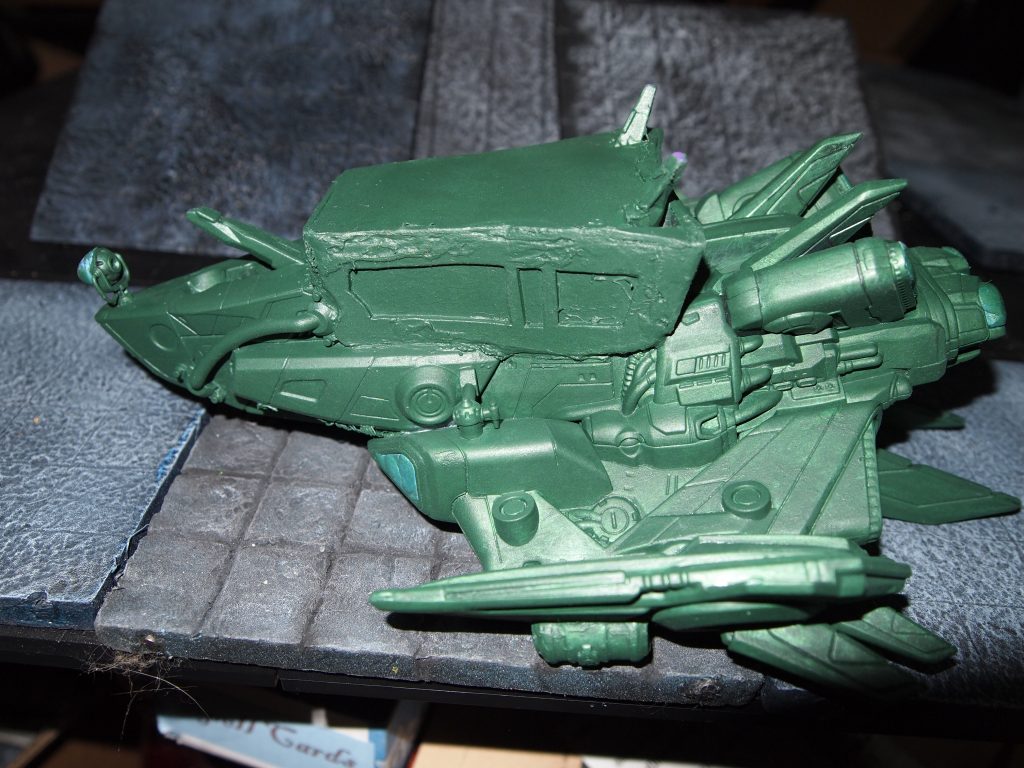
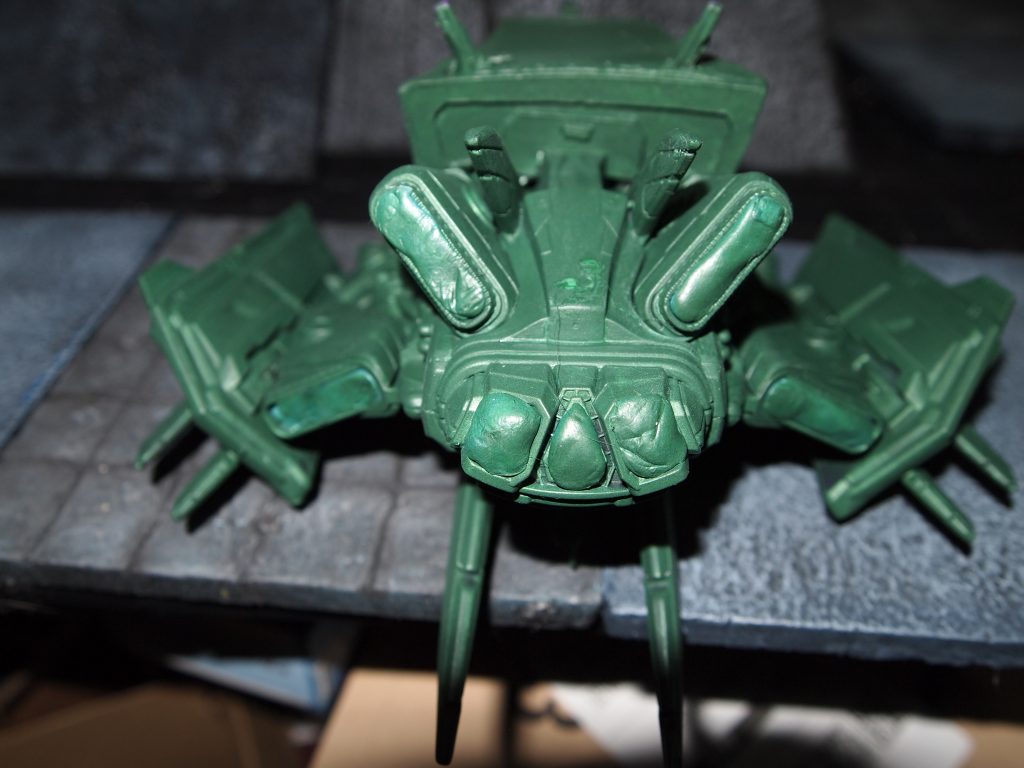
First step was finding a Buzz Lightyear Zurg ship cheap enough and managed to find one on Ebay.
Preparation
First steps were to glue the canopy shut as I wouldn’t be needing it to open and adding some stuff from my bits box to make the ship look a little different. I also made a mould of some parts from a Kill Team Into the Dark sprue that looked like they could be generic ship parts.
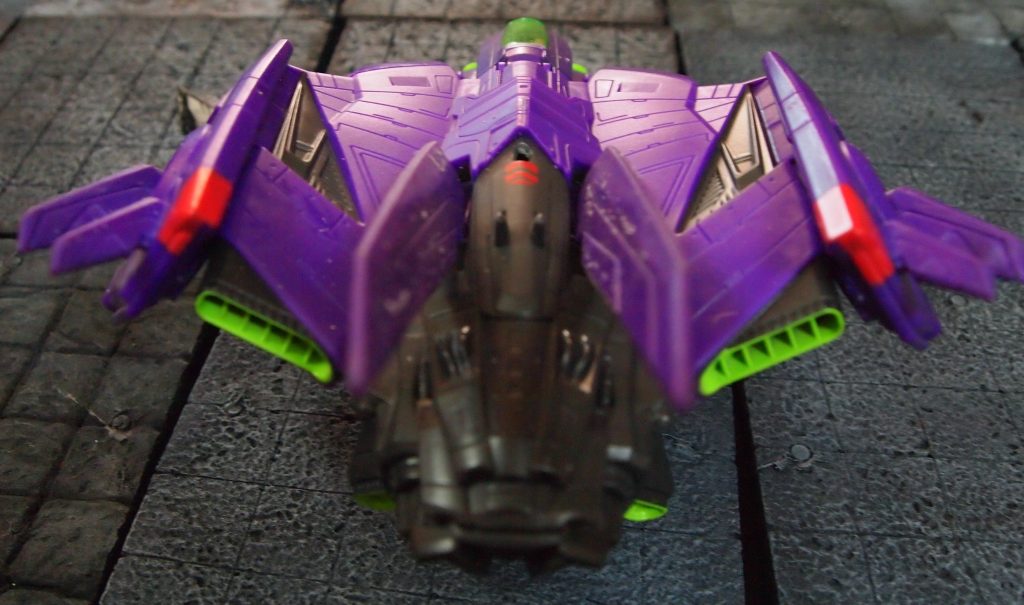
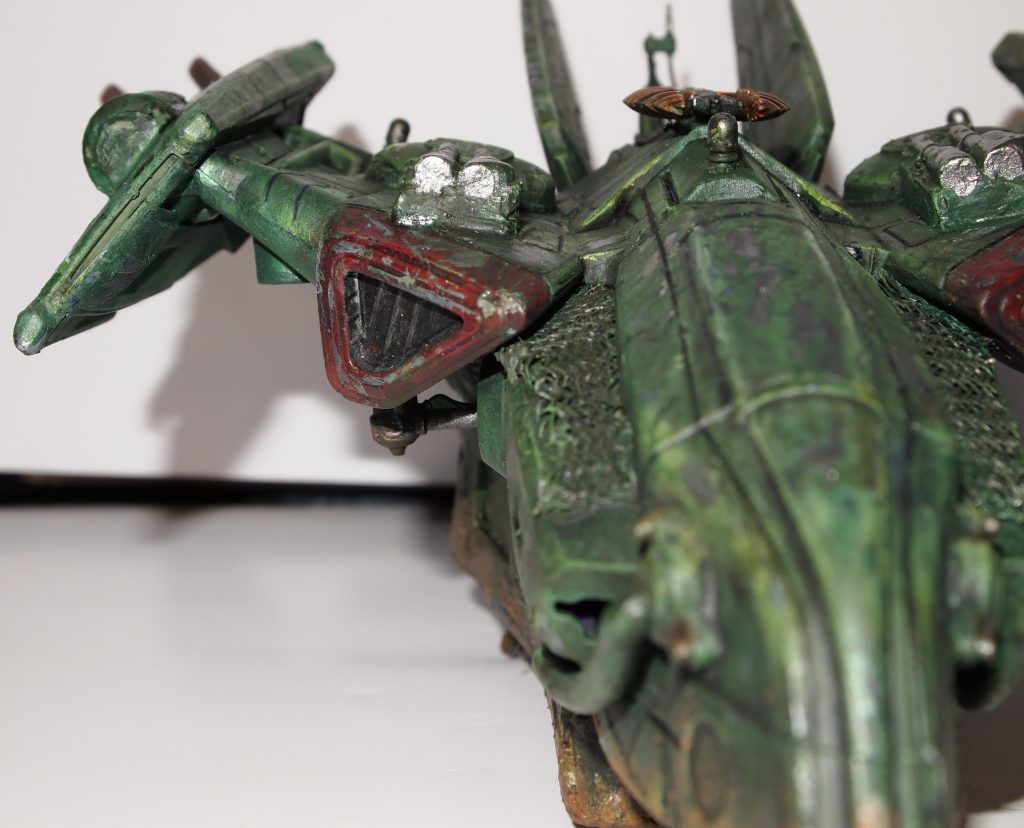
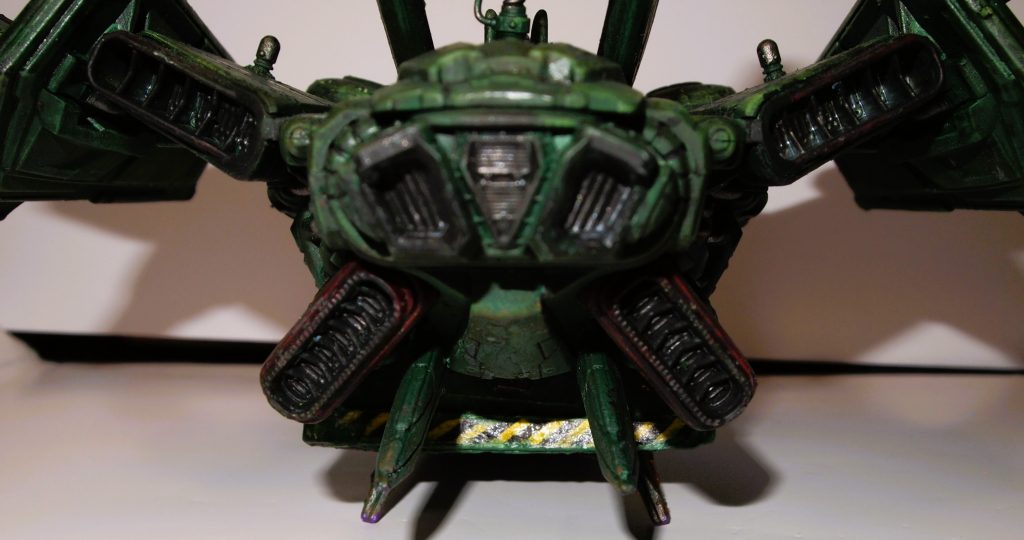
I didn’t think the ship looked like it would have room for more than a couple of crew so I scratch built a compartment from mounting board. It doesn’t have to look totally accurate scale wise just give the impression of having space for a Stargrave crew. The ship will really be set dressing so again it just needs to give the impression of being the crew’s ship. I also added some strips cut from an old tea strainer to top of the jet intakes. The effect didn’t quite work out but I decided to leave them on anyway after the hassle of cutting them and stabbing my fingers multiple times with bits of wire.
After priming the ship with my airbrush and some Vallejo Mecha black primer I painted the whole thing with metallic craft paint. I didn’t want to use up any of my model paints for this so chose the cheaper alternative, which is fine as not a lot of the metallic paint will be seen.
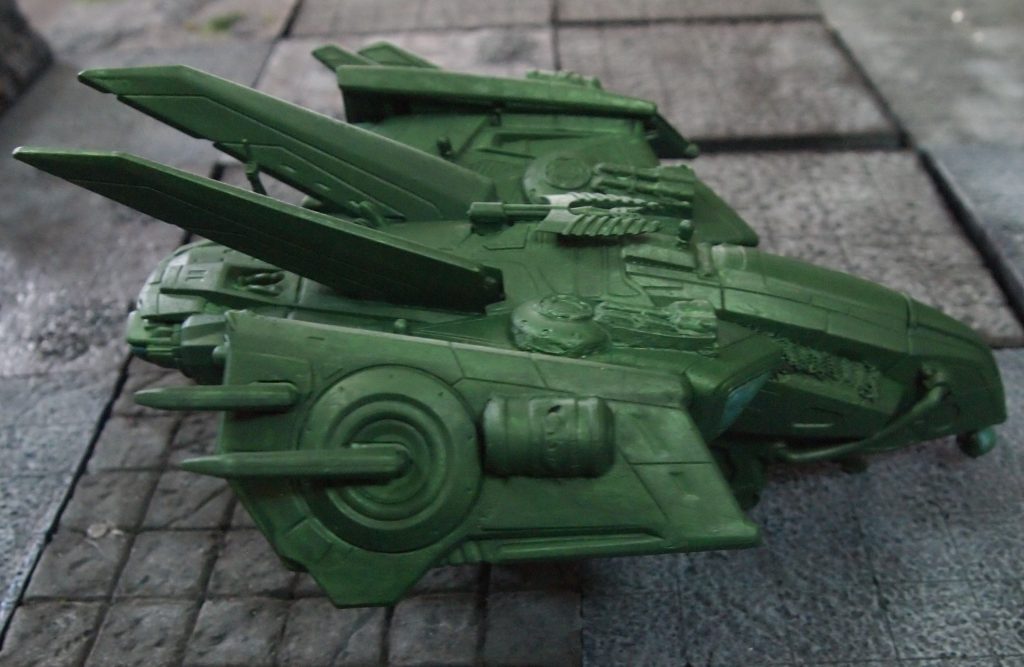
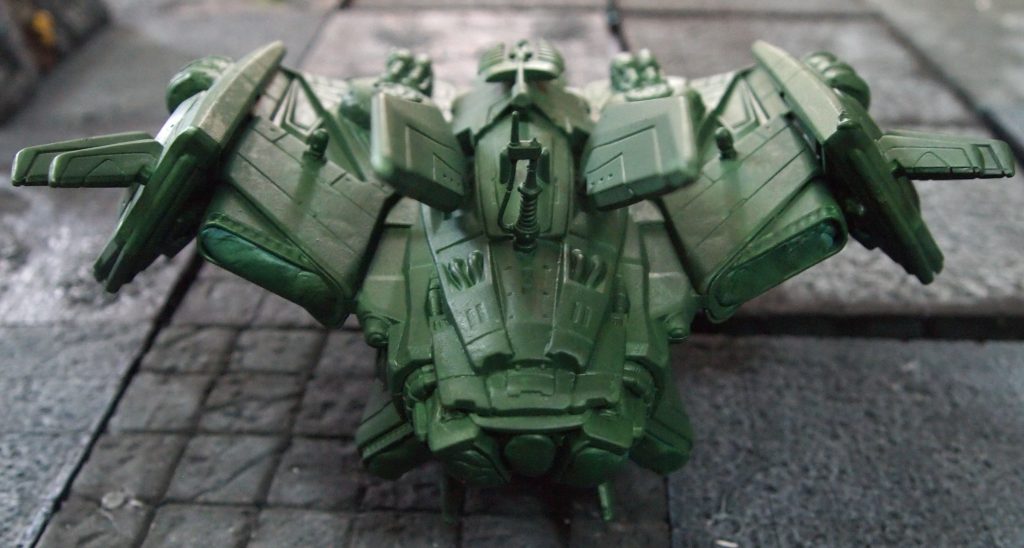
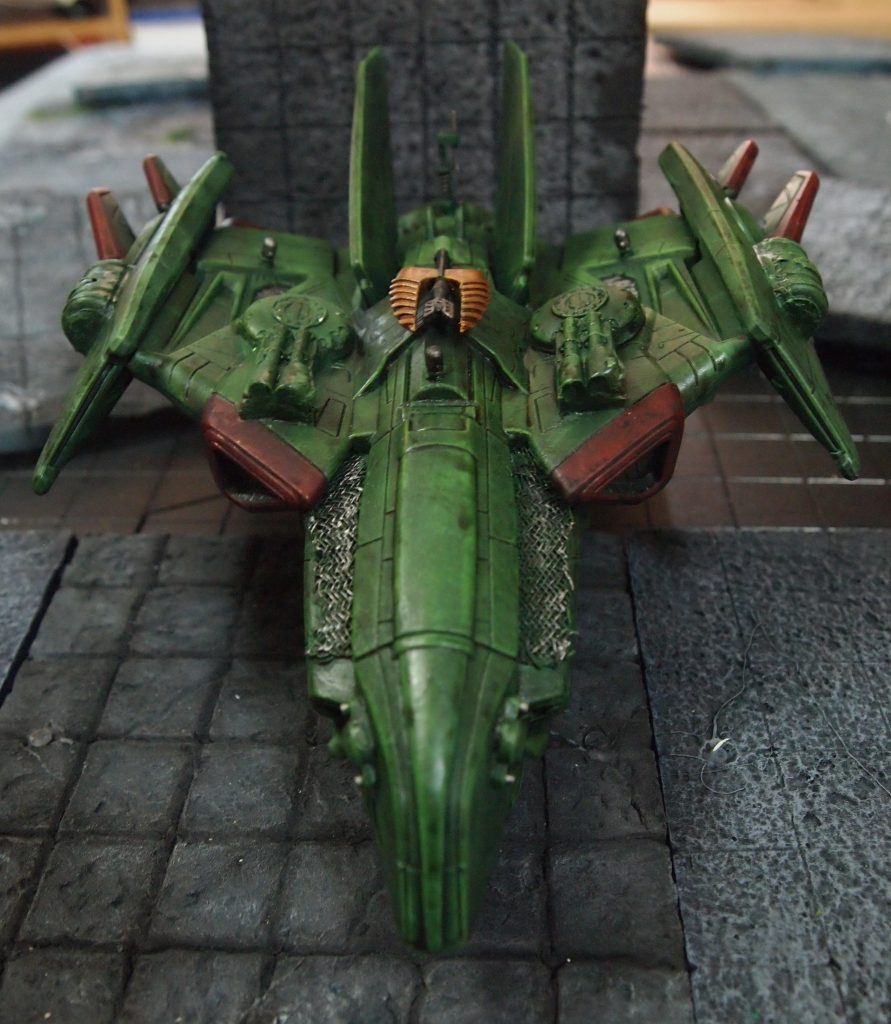
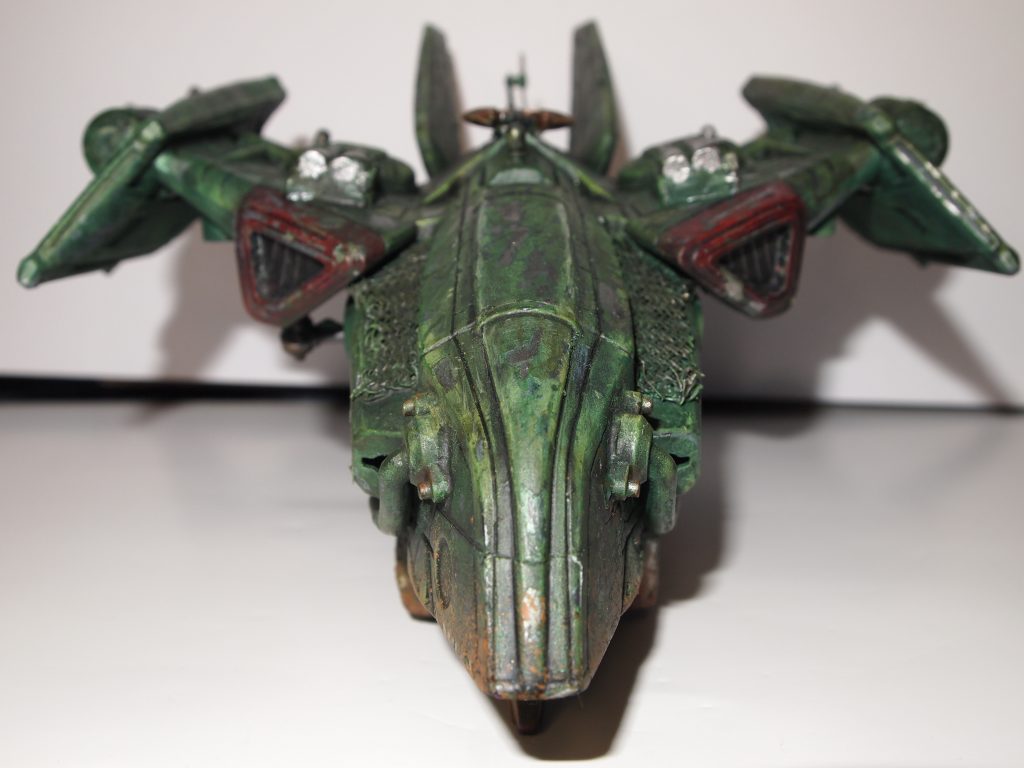
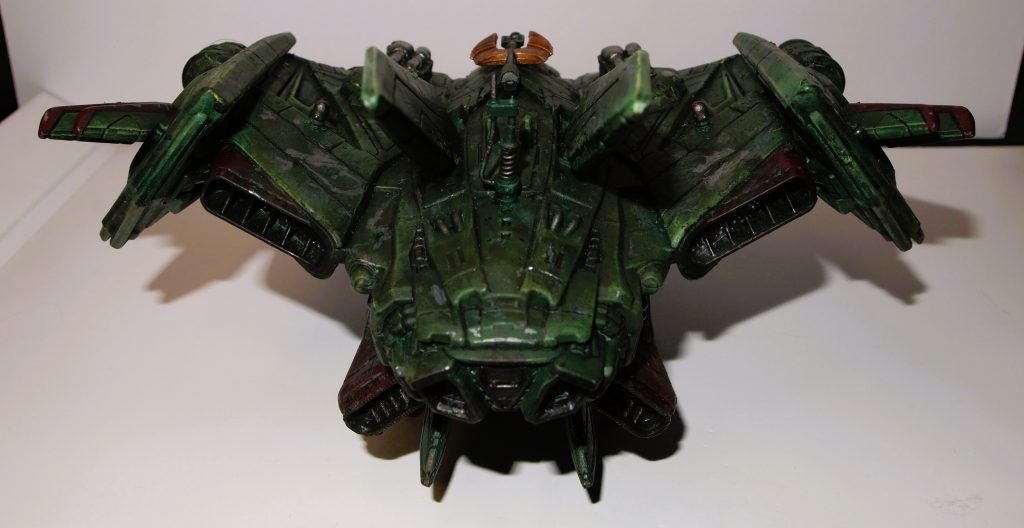
With the metallic paint dry I painted the whole thing with chipping medium and masked off the jet exhausts and intakes with poster tack, before airbrushing the whole ship with Army Painter Angel Green paint.
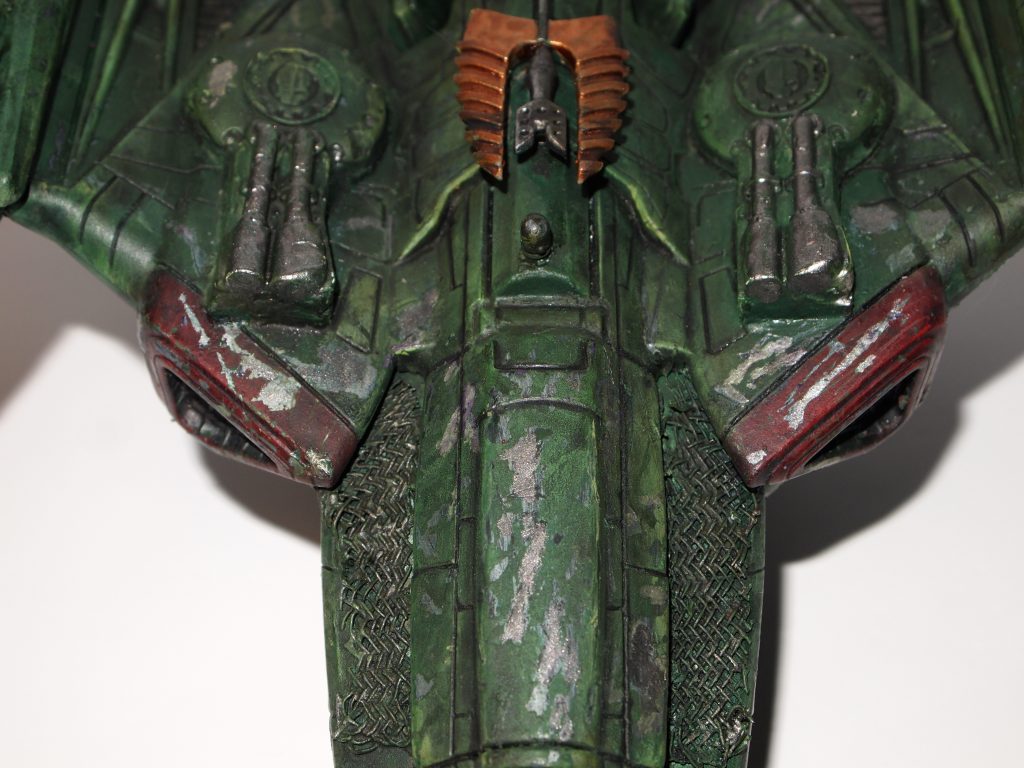
The next stage was adding some detailing with Two Thin Coats Beserker Red, Warpaints fanatic Weapon Bronze and Army Painter Gun Metal. Then I did a series of dry brushing highlights and washes to get the shadows and darken the panel lines.
I also tried adding some water slide decals with ‘print your own decals’ paper that is supposed to work with a normal printer. The result wasn’t great. The problem is any light colour tends not to have a lot of ink printed on to the paper and so becomes more or less transparent. More experimentation will be needed to perfect the process.
The finishing touches
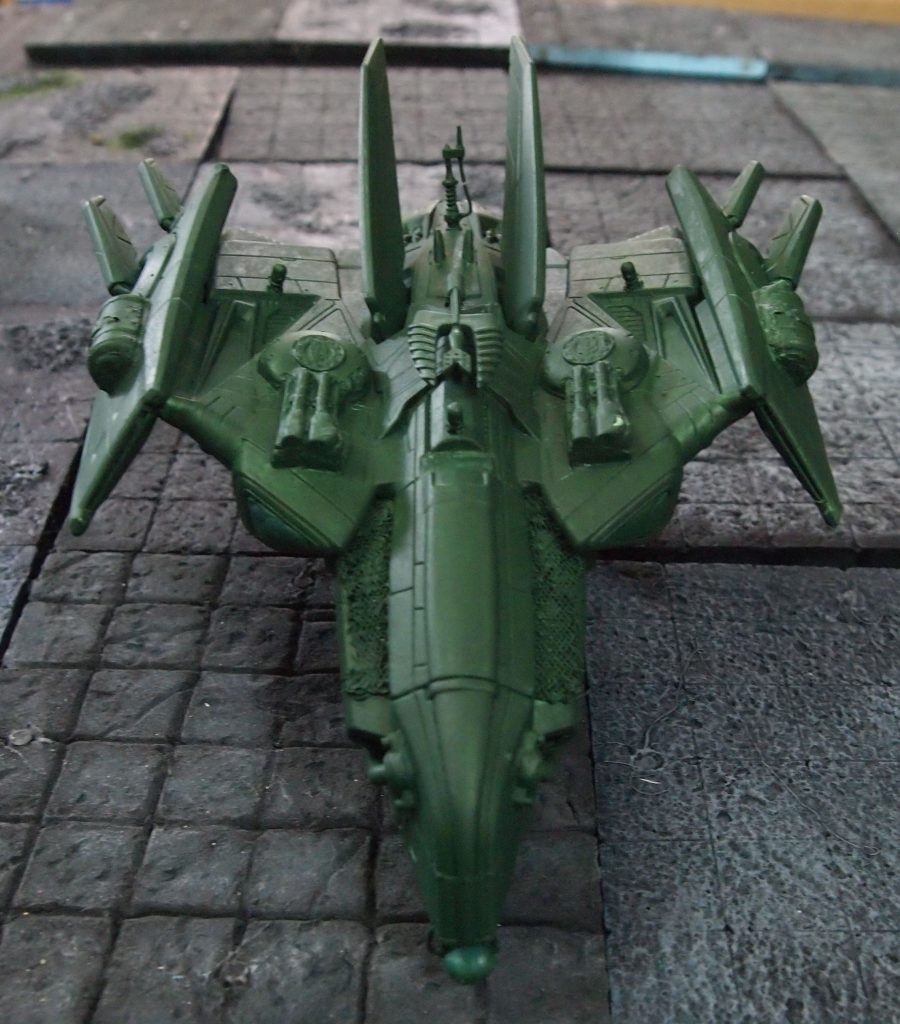
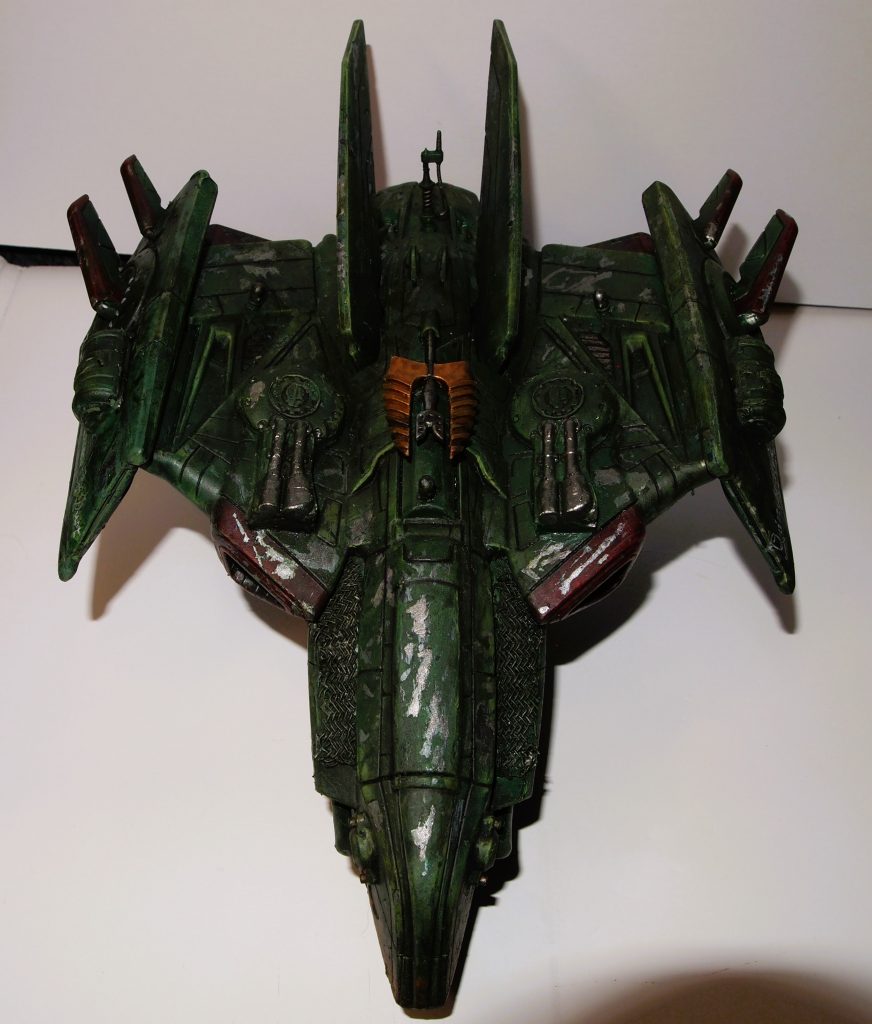
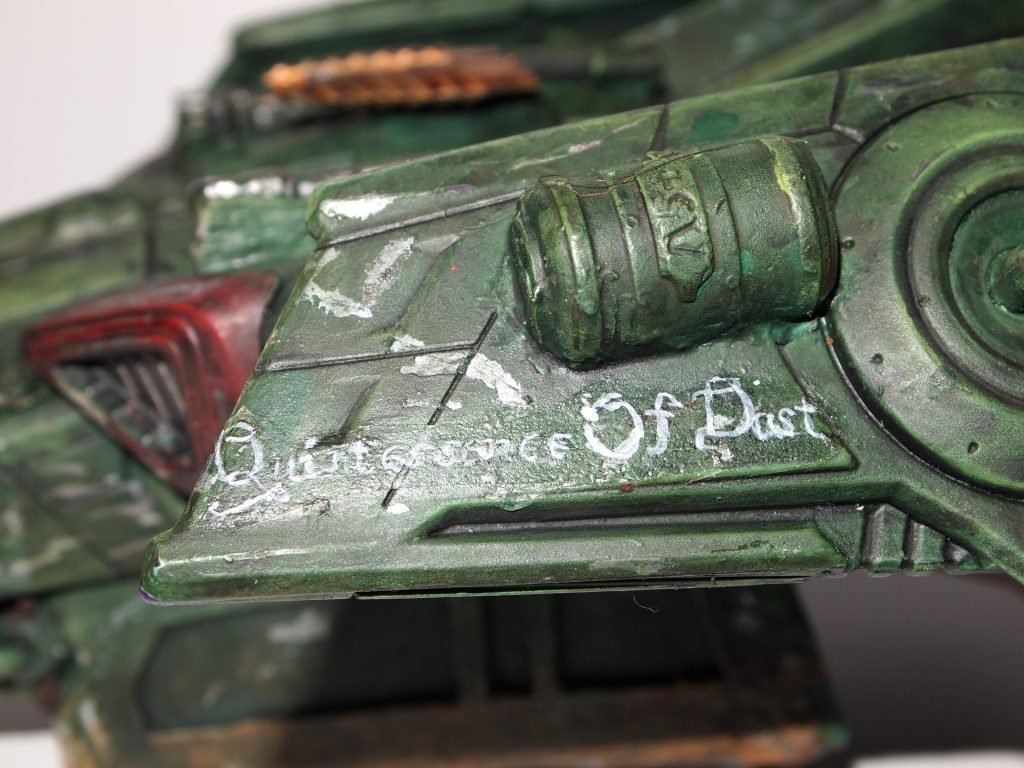
It was time then for the fun part, the grunging! I wet the areas where I wanted chips to the paintwork and using the wrong end of a brush chipped off paint. I then used some Green Stuff World Earth Liquid Pigment – Light Earth, which I added with a sponge on the bottom of the ship. I also painted over the ship’s name transfer with some Army Painter Warpaints Drake Tooth. I gave the whole ship an all over wash using Green Stuff World Dipping Ink – Zombie Dip, which is my favourite for adding a bit of dirt. And so the ‘Quintessence of Dust’ is ready for the table.
Final Thoughts
Overall I am pleased with the results although they are not exactly what I wanted. I think if I do something similar again I will add two coats of the chipping medium as some areas didn’t chip very well. I also might see if there are any generic space ship type waterslide decals to buy and add them later. Another thing I might do is add the missiles that I’ve currently left off. I’d cut them so that they fit flush with fuselage and make them look part of it. That is, if I can find them, I pinged them off somewhere in my lounge and haven’t seen them for a while. Some things don’t change much with age as this was the fate of many of similar darts and the like when I was a kid.
Have you done a similar conversion for your gaming? Or do you have any tips on cool effects you can use to use on similar models? Let me know in the comments.
[Update – I just posted a link to this post on Bluesky and was just looking through posts from people I follow and saw that Mr Peach had posted a video about doing the same conversion about an hour ago! Synchronicity or weird nerdy gamer psychic resonance? Who knows? Any way, to see how to do a similar project properly have look here!]
Major blunt eyed the patch of forest ahead with not a little trepidation. It just seemed to ooze malevolence. No airy bluebell wood in the spring here. This area promised pain and terror. And somewhere in there was the lost unit.
He looked back and was surprised to see the two privates of his unit standing behind him obviously wanting to get his attention but also not wanting to disturb his reverie.
“Yes?” he asked and Tobias Function stood to attention before speaking.
“Mmffffl flofffm dibl mmmffm fee!”
The problem with Private Function was that what came out of his mouth only sounded like English. You could half grasp that there were words being spoken, but not what they actually were. A brave and reliable soldier nonetheless.
Blunt looked over to Function’s best mate, “Translation Parts?”
“Yes sir, Major sir!”
“He was saying sir, that he has a bad feeling about the woods sir.”
Blunt suppressed a shudder. Private Function’s bad feelings were usually right.
“Nothing to worry about. Just a stroll in the woods. But if it makes you feel safer, load your muskets before we go in.” Blunt replied without much feeling.
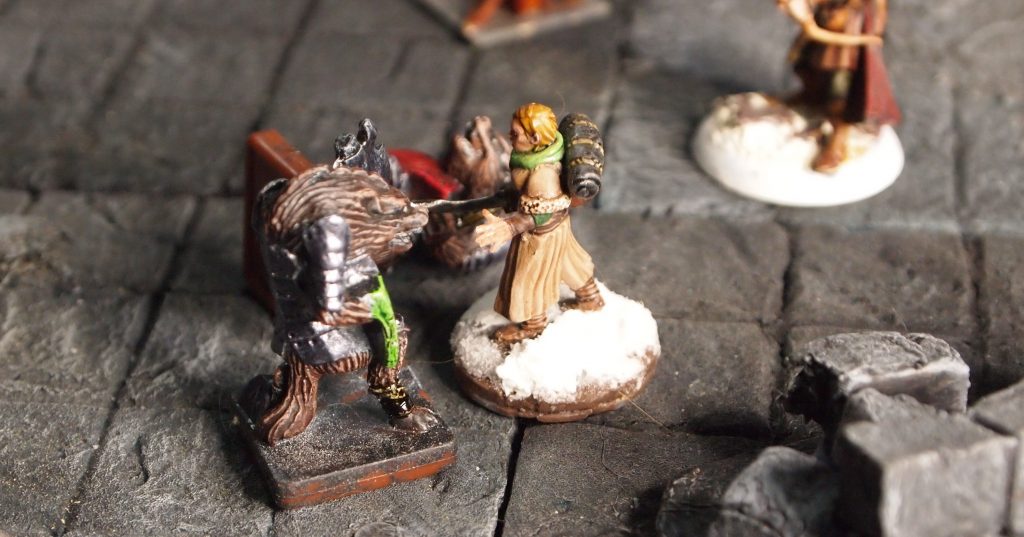
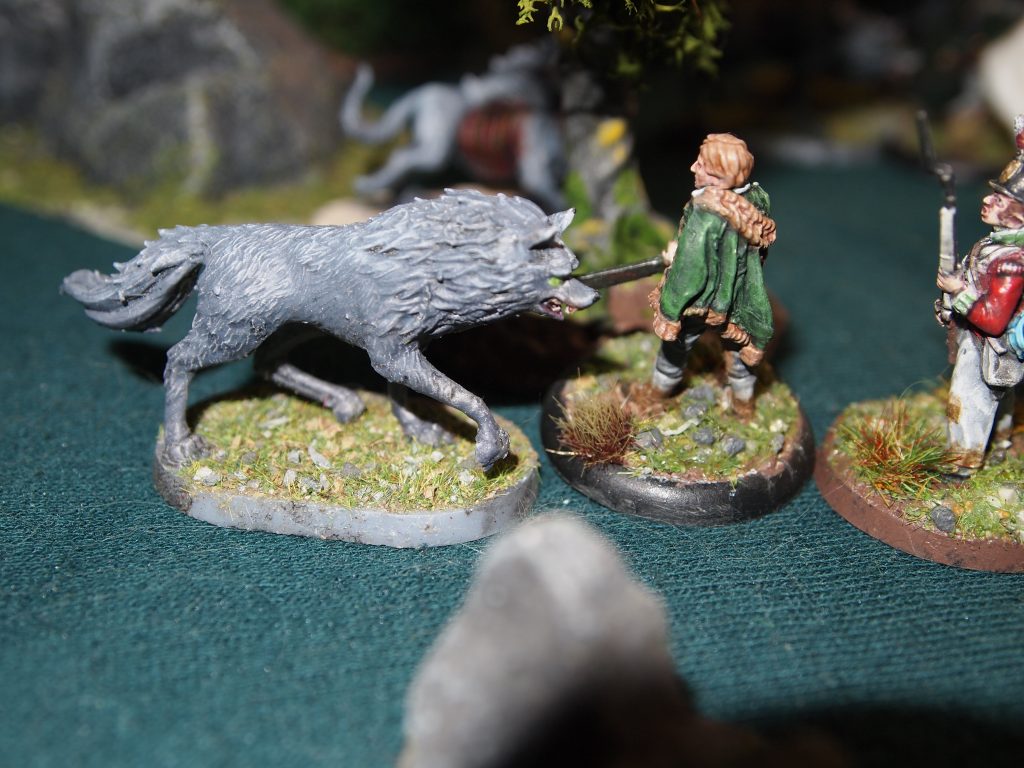
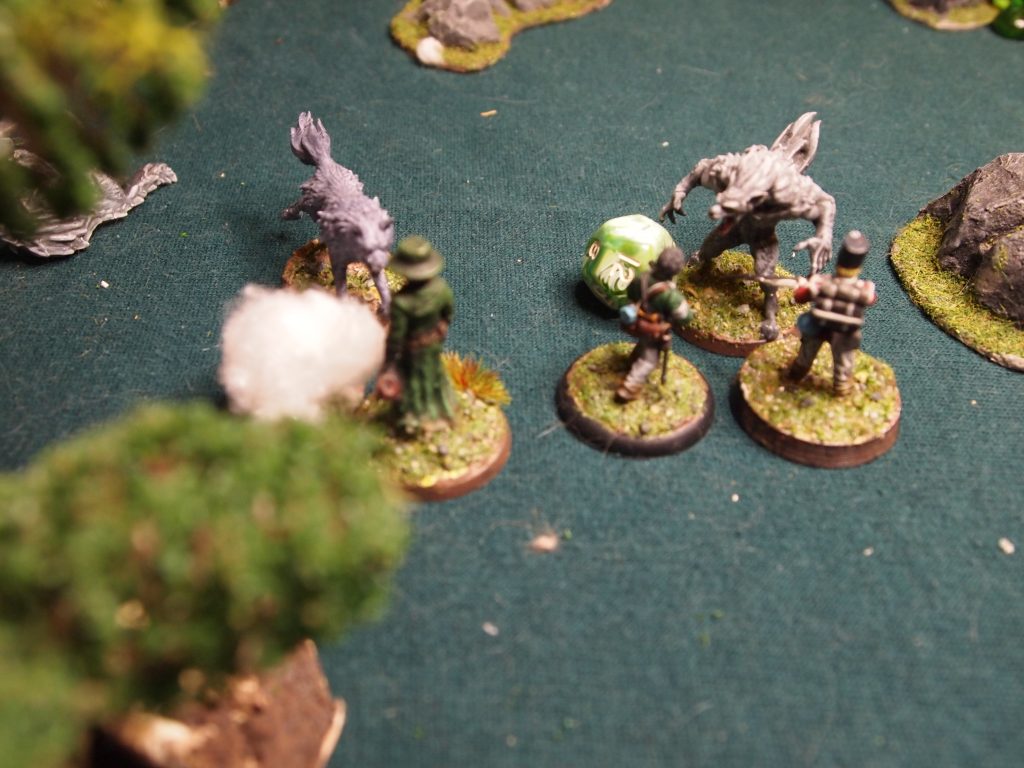
If you go down to the Woods today.
In this first solo scenario from the rule book, the unit are tasked with entering a woodland to find orders lost by a unit that had previously entered the woods and perished. The unit starts off in the forest after finding the remains of the missing unit and the sound of wolf howls coming from around them.
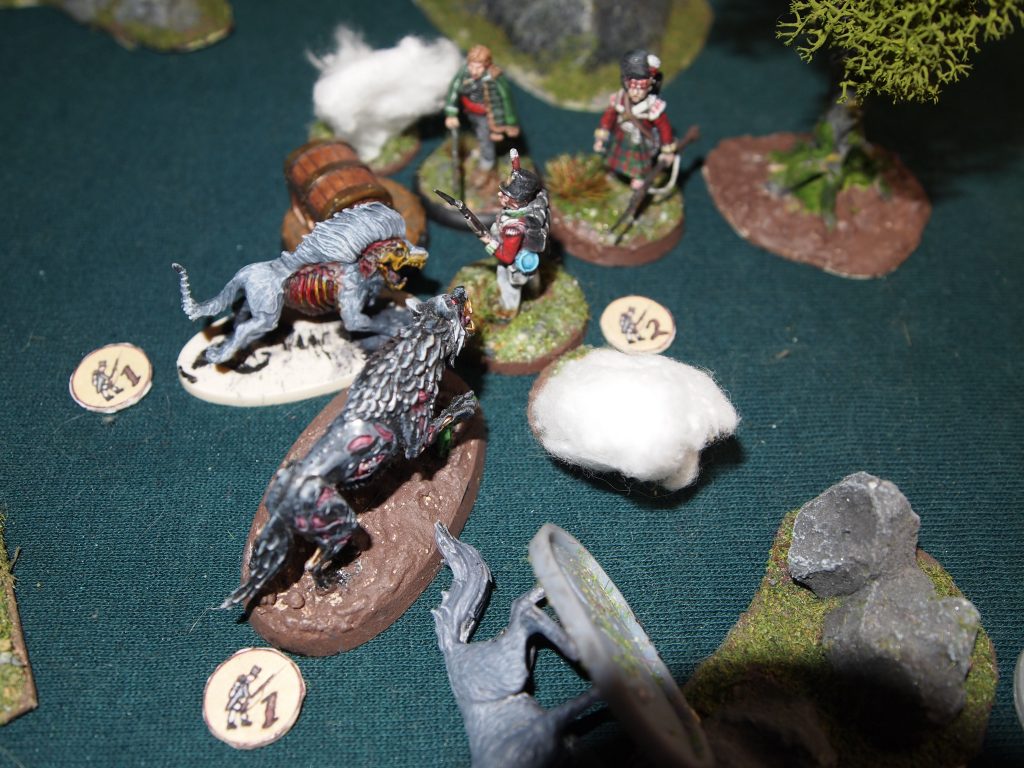
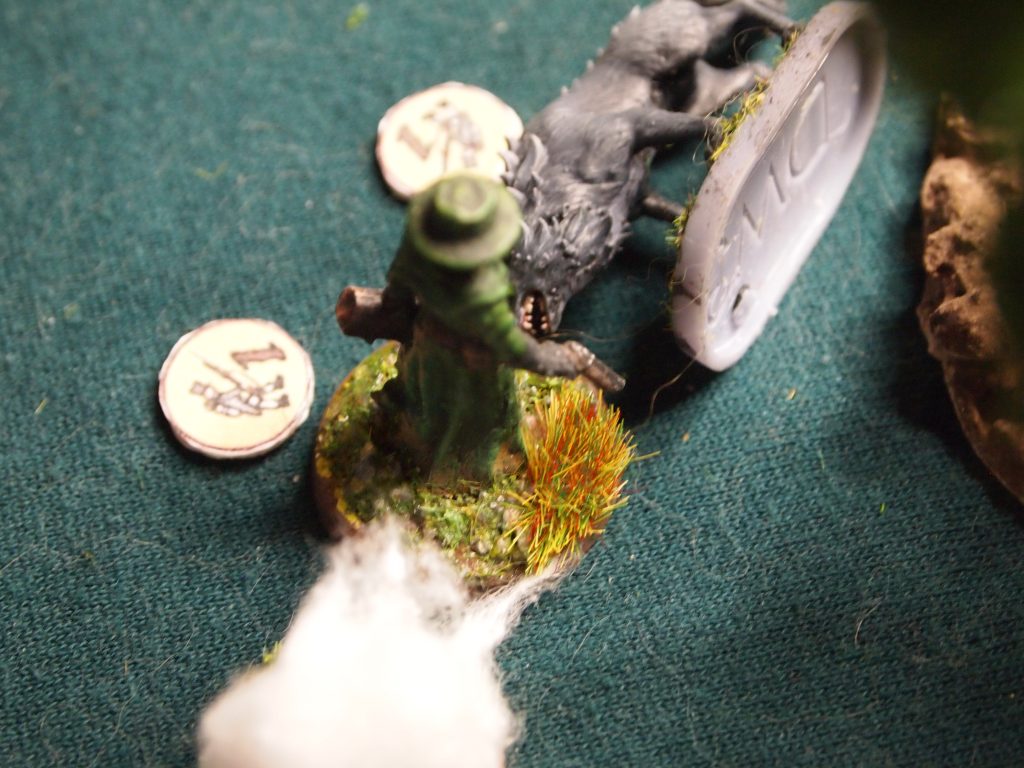
The Dark Wolf runs at Clarsha who dodges a bite and hits back with the butt of the volley gun smashing its skull and killing it.
A Dark Wolf attacks Mc Feegle, sinking its teeth into the highlanders arm. Mc Feegle tries to hit back but only succeeds in driving the wolf back.
Pvt Tobias Function takes a shot and hits, killing the Dark Wolf. Cpt William Sweet shoots at and misses a Werewolf. Dr Pestremus Sussorous seeing Mc Feegle’s bloody arm moves towards him readying a bandage and fires his pistol at a Dark Wolf but misses
At the end of the turn Maj Richard Blunt shoots his rifle at a Dark Wolf but misses and another wolf arrives at the edge of the woods.
Turn 2
Mc Feegle, Pvt Parts and Sgt Maj Clarsha all reload (though for Clarsha this was a bit pointless as the Volley Gun can only be used once per scenario – which represents that reloading 7 barrels would be time consuming).
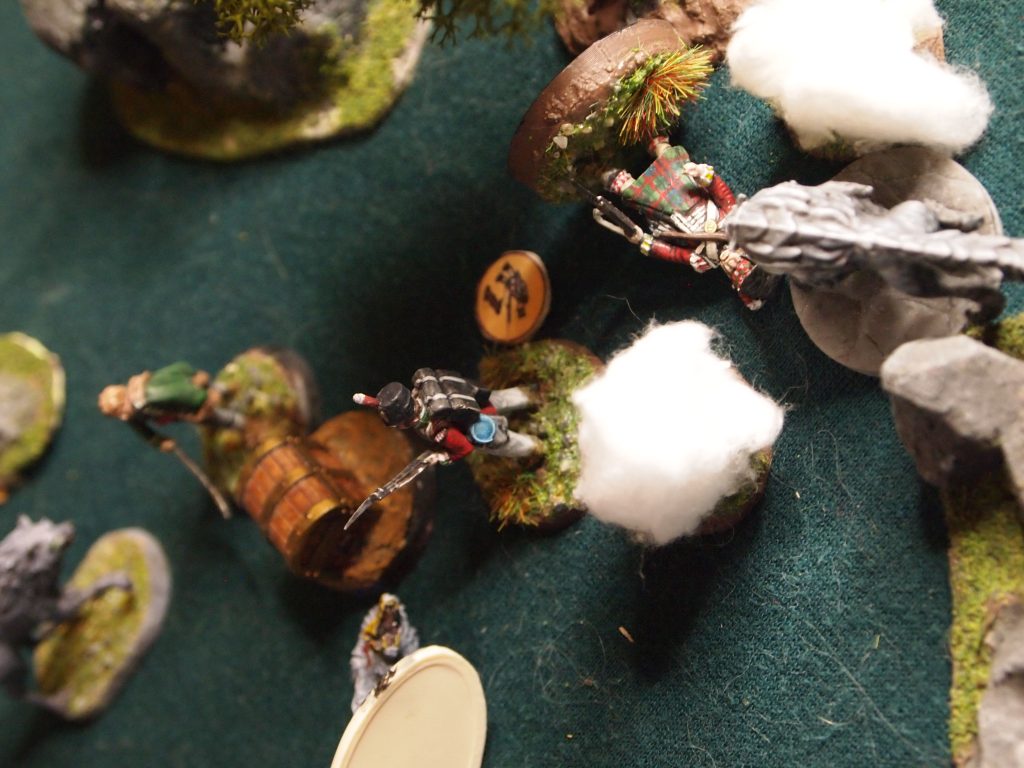
The Werewolf closes with Cpt Sweet rending him with its claws, sweet stabs back with his bayonet plunging into the Werewolf’s chest but sees that the bayonet hardly scratches the Werewolf’s hide. But he does push it back.
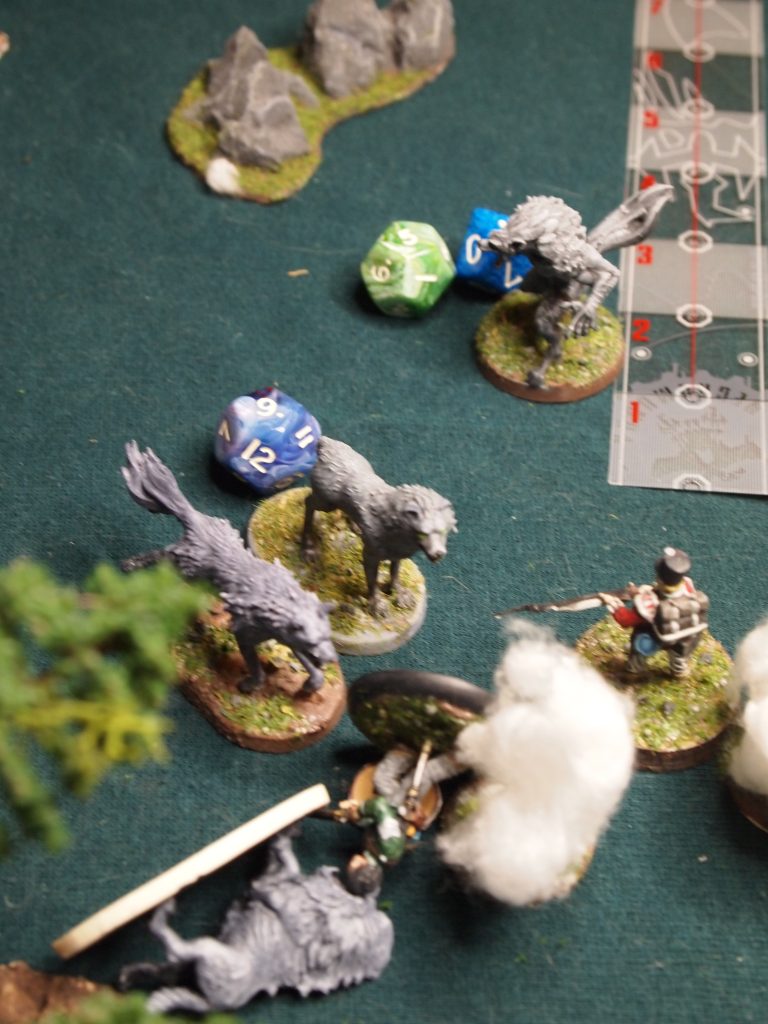
A Dark Wolf attacks Maj Richard Blunt who manages to sidestep.
A Dark Wolf attacks Mc Feegle who burns a fate dice to reduce the damage helping him to survive the attack. Mc Feegle now decides to move back rather than counter attack, leaving the Doctor on his own with a lot more wolf eyes staring at him than he would like.
Cpt Sweet burns the last fate dice to quick reload and manoeuvres putting some distance between him and the Werewolf, shoots his rifle, and luckily Cpt Sweet is one of the unit who has loaded silver shot and does some permanent damage which is enough to kill the beast.
Pvt Function reloads and sees something interesting (a clue marker) and moves towards it.
Maj Blunt reloads and ducks behind a tree. And Dr Sussorous reloads.
At the end of the turn 2 more wolves arrive at the edge of woods.
Turn 3
Function checks the clue marker and finds an ornate silver ramrod (this find adds another power dice to the fate pool) then moves to support Blunt.
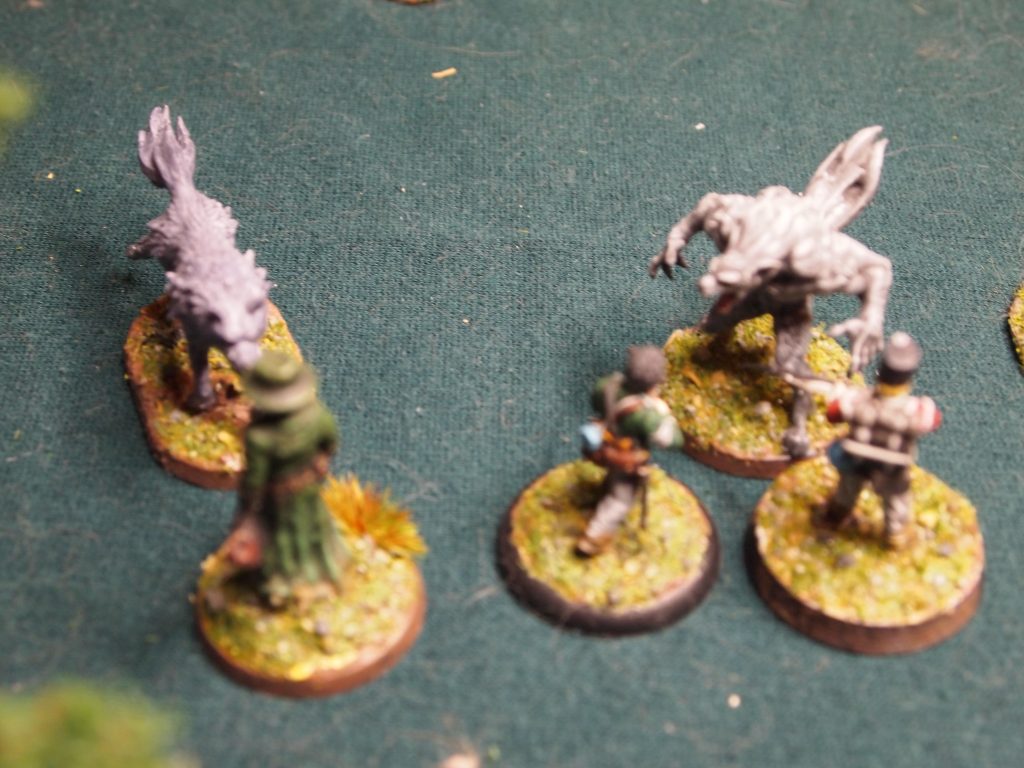
Parts also sees something and investigates a thicket. This clue marker is not as useful and reveals another Werewolf!
A Dark Wolf attacks Maj Blunt drawing blood, Blunt thumps it with his rifle butt causing it to back off.
A Dark Wolf attacks sweet who is overcome by his wounds.
Maj Richard Blunt shoots at a Dark wolf misses.
Mc Feegle shoots at a wolf, hits and kills it then moves back putting some distance from the wolves that were approaching him.
Dr Pestremus Sussorous shoots his pistol but misses.
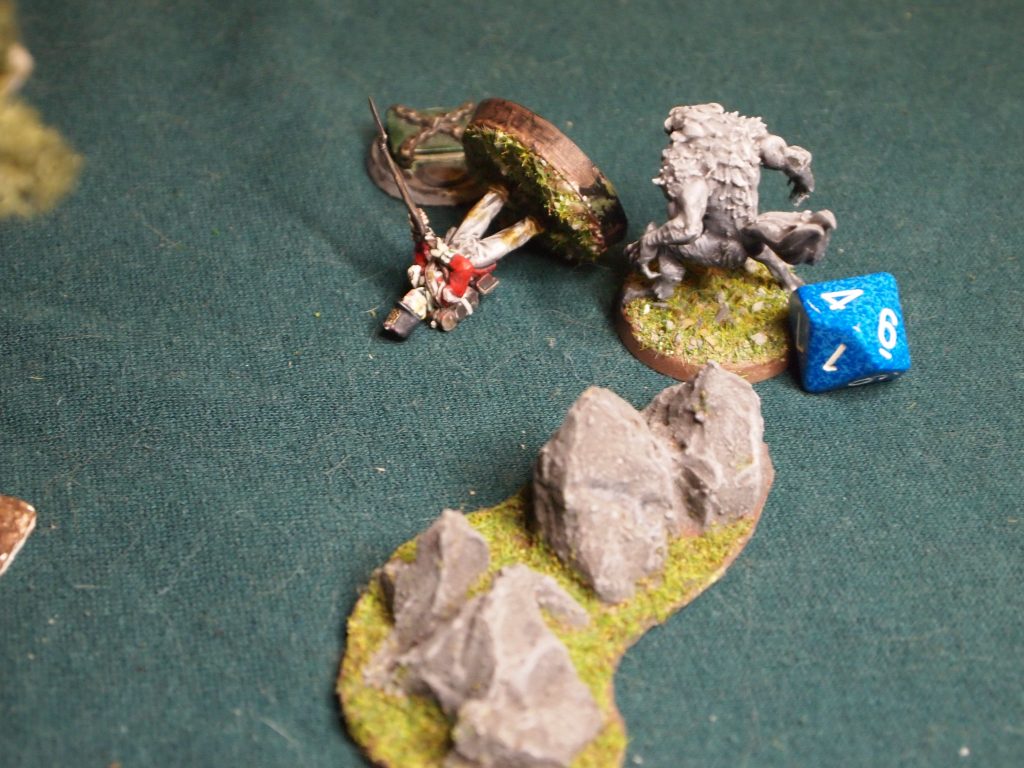
Clarsha attacks a Werewolf with his heavy cavalry sword but doesn’t even scratch the lycanthrope.
At the end of the turn another wolf turns up.
Turn 4
This turn continues with the unit trading blows with the Dark Wolves and mostly missing.
Near the end of the turn the units luck changes as Pvt Parts, who has loaded silver shot, fires at the Werewolf and hits leaving the werewolf looking badly hurt.
And at the end of the turn another Dark Wolf arrives.
Turn 5
A Dark Wolf attacks Pvt Function doing damage. Function then retaliates with his bayonet, killing the wolf!
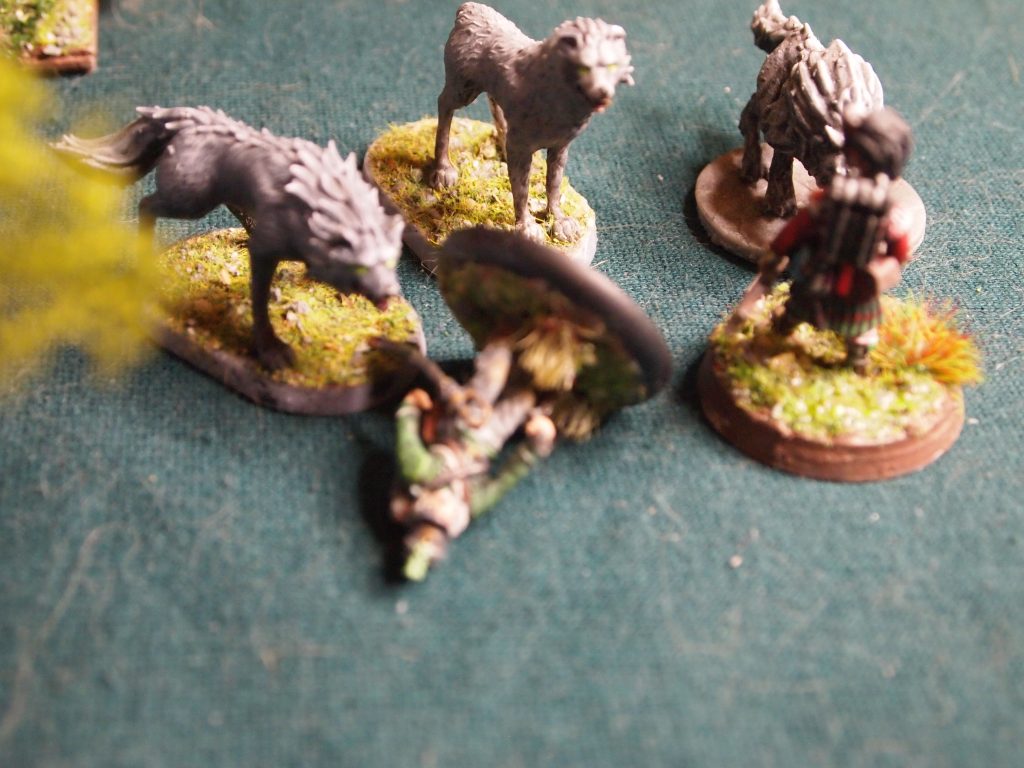
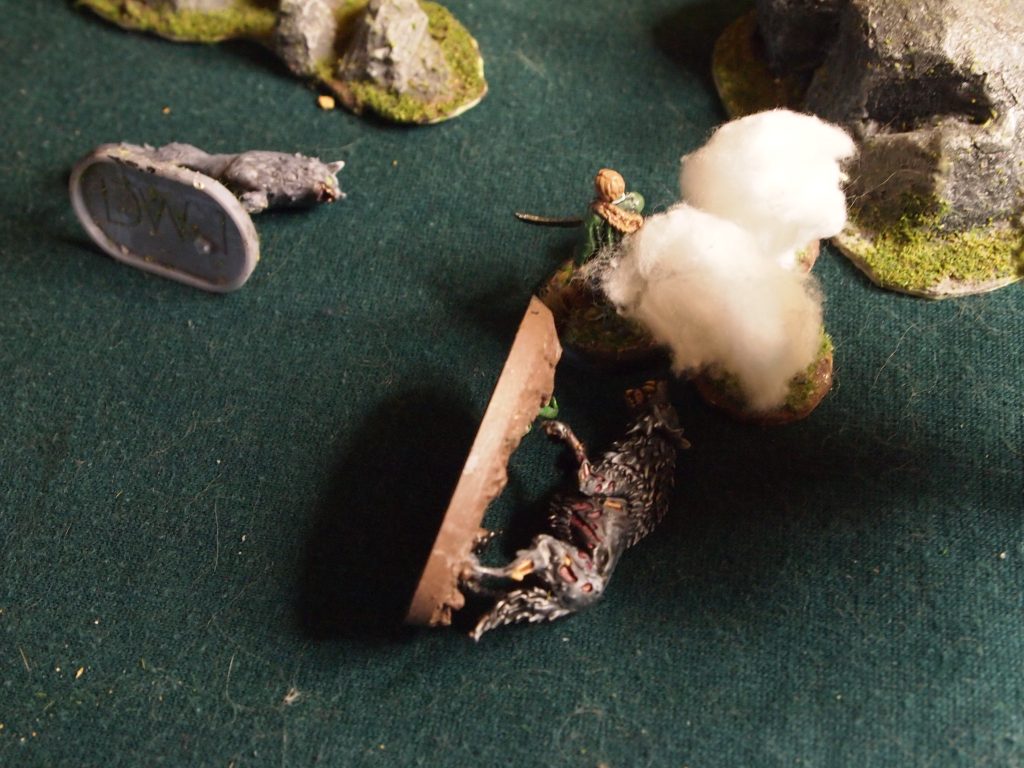
Following on from this a Dark Wolf attacks Mc Feegle reducing the highlander to 0 health and putting him out of the fight.
A Dark Wolf attacks Clarsha and takes the Sgt Major out of the fight.
A Dark Wolf attacks Dr Sussorous but misses. The Doctor stikes back with his sword stick killing the Dark Wolf.
At the end of the turn the roll to determine whether another Dark wolf turns up brings a bit of luck as the result is that nothing happens.
Turn 6
Maj Richard Blunt shoots at a Darkwolf but completely missies. Dr Pestremus Sussorous moves towards a clue marker as does Pvt Parts, who also reloads.
A Dark wolf moves in to attack Maj Blunt but misses. The Major retaliates doing a small amount of damage and the wolf moves back.
Now a wolf moves in to attack Pvt Function but misses. Tobias retaliates slashing with his bayonet. And the Dark Wolf backs off.
A Dark wolf attacks Parts but misses. Parts strikes back but does no damage. The Dark Wolf backs off.
Just before the end of the turn Function reloads.
At the end of the turn another Dark Wolf arrives.
Turn 7
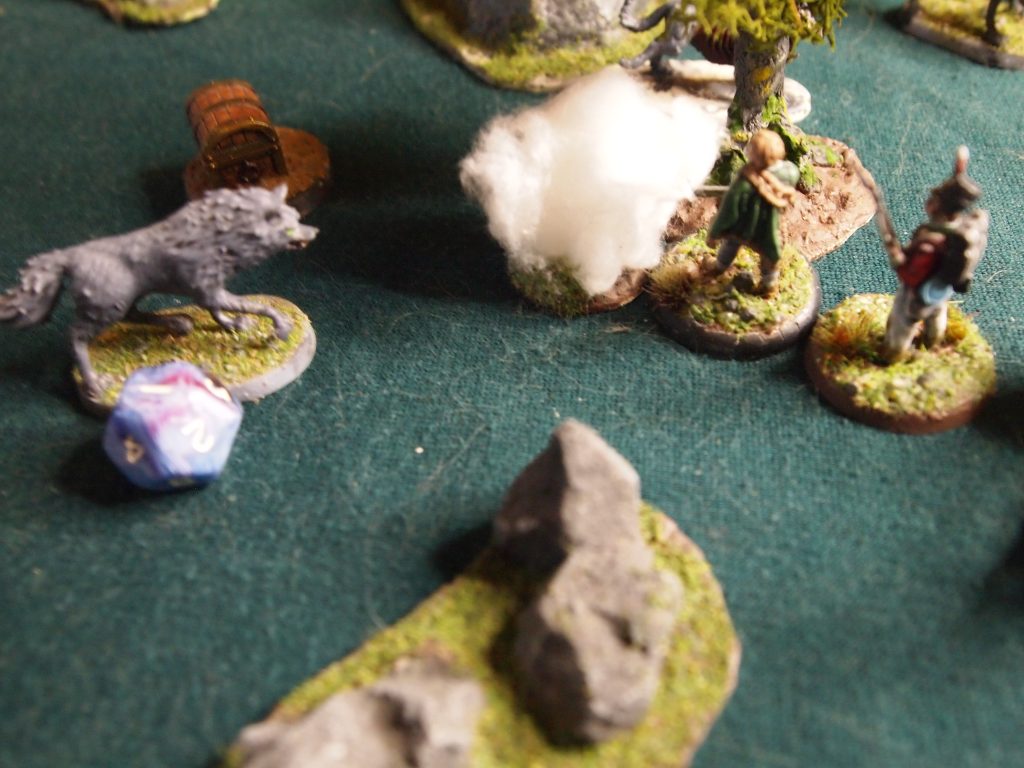
Major Blunt sees something in the leaf litter and investigates and finds the missing orders! Now the unit can leave the woods. With the orders found Blunt draws his pistol and shoots at a Dark wolf and kills it. And shouts to the unit that it is time to leave.
Function begins legging it towards the edge of the woodland.
Dr Pestremus Sussorous also notices something in the leaf litter and finds a bag of silver shot. Grabbing it he starts moving to the edge of the woods.
The wolves are not going to make it easy though, and a Dark Wolf attacks Maj Richard Blunt, but misses. Maj Blunt then hacks at the Wolf with his sword killing it.
The Werewolf attacks Pvt Parts rending him with its claws putting him out of the fight.
Turn 8
Pvt Function. Major Blunt and Dr Pestremus Sussorous all move off the table ending the game.
Post Scenario Stuff
After the battle, in campaign play, you roll on an injury and death table for each of your unit who were reduced to 0 health. For once the dice were with me and all my downed figures survived.
Thoughts and musings
I know I missed a few odds and ends, like reloads and strike backs but that’s fine and noted for next time.
I tried something different for this battle report and used a voice recorder as I went along rather than making notes with pencil and paper.
The plan was to then run the audio files through a text to speech app and edit that for the battle report. Well, it sort of worked, mostly. Some of the audio got garbled and some of it just failed to be transcribed.
Another thing I need to remember to do is to make a note of when I take a photo and set my camera to number the photos for the battle report, so when I note ‘photo 1’ then the filename of the image will tally with that.
My plan is to make the battle reports a little more ‘narrative’ but its only my second ever so still a learning experience.
Overall, I really enjoyed playing The Silver Bayonet and am looking forwards to another game. I can’t decide whether to continue the British Unit campaign or re-run the scenario with another unit.
If you’ve played this scenario let me know in the comments how your unit fared.