
A whole dump truck full of lateness is how late this one is! It was a bit of a pig to type up and I go by the rule that this blog should never be ‘work’ so if I get a bit fed up typing, I have a break and do something else (usually mini hobby related). Added to that, mental health has been atrocious so, yeh, very late.
In the previous visit to Isher’s Weapon Shop the party were trounced, to put it mildly. After the death and injury rolls, two were dead and three were badly wounded meaning they would miss the next scenario. As these were the two thieves and a thug they would be free to replace. I originally planned to replace the dead infantryman with a man at arms but changed my mind and hired a ranger instead.
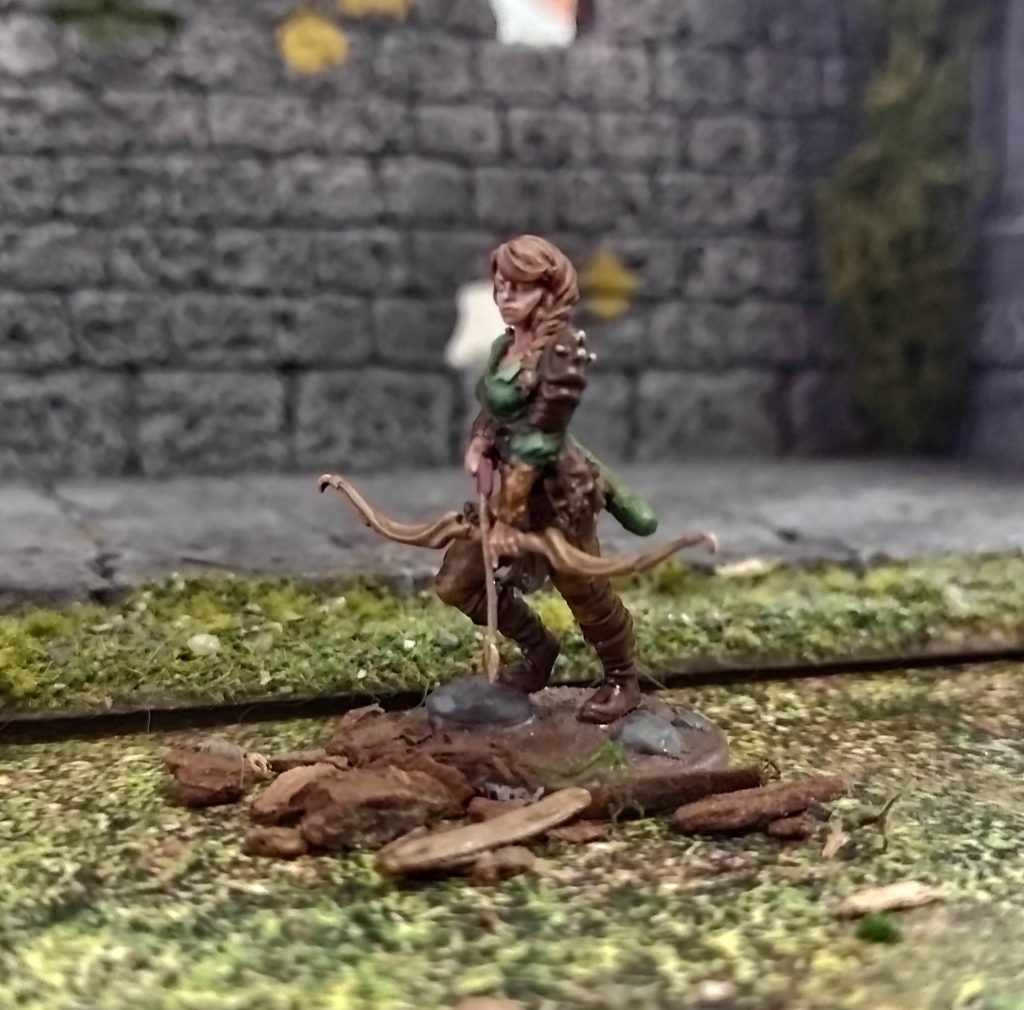
Introducing Thoroncencea. The miniature is a 3d print, a gorgeously sculpted miniature which I first bought as a pre-printed mini then found the stl for sale on MyMiniFactory, Lila, Elven Ranger by The Dragon Trappers Lodge.
The problem I’ve had though is that 3d printed minis can be very brittle especially on thin parts like the arrow and the bow. Though that might be a drawback of resin minis in general because I’ve certainly had similar problems with GW resin minis.
I find that polystyrene minis are a little more resilient but being a bit of a clumsy person I do seem to have more than a few minis with broken bits.
I’m going to bite the bullet and by some extra tough resin at some point to see if that helps. ABS-like resin (even the newish Elegoo ABS-like ultra) just isn’t doing the job.
The Lila stl files are very good value including two poses as well as with/without base, pre-supported, plus both the minis broken down into parts for kitbashing. The picture is the pre-printed one with the bow, arrow and hands replaced with home printed ones.
The thieves Daetier and kirgwaith are replaced by two more thieves called Daeda and Kirath. I didn’t want to change the minis so they do look uncannily like Daetir and Kirgwaith.
Going by the rules as written (or at least how I’ve read them) the party would only be able to replace those members who had died and would have to have carried on with less members but this seems a little harsh to me and so I’ve ignored the rules here. There are rules for a recovery room addition to your base that allows you to keep one member of the party member ‘spare’.
Pre game spells
Durnimlath successfully casts Familiar and Animal Companion. Mirhen is only successful with Animal Companion. So, both the wizard and the apprentice have a Snow Leopard companion.
Just to mention how the turns are structured, each turn is split into five phases. These are in order, for solo games,
The Wizard phase – in which the wizard can activate up to 3 soldiers within 3”.
The Creature phase 1 – this is for creatures with at least +5 Fight or 20 Health.
The Apprentice phase – Apprentice can activate up to 3 soldiers within 3”.
The Creature phase 2 – all other creatures can activate.
The Soldier phase – all other soldiers can activate.
For my revisit of the scenario there are no creatures that qualify for the 1st creature phase so that isn’t being used. I’m playing it that the warband are returning to ‘mop up’ the remaining gnolls now that they have defeated Borrock the ‘boss’ monster from the scenario.
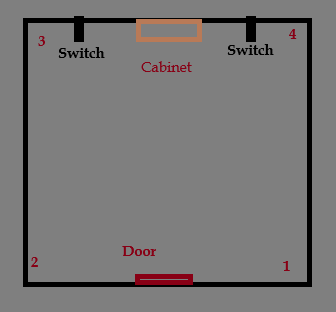
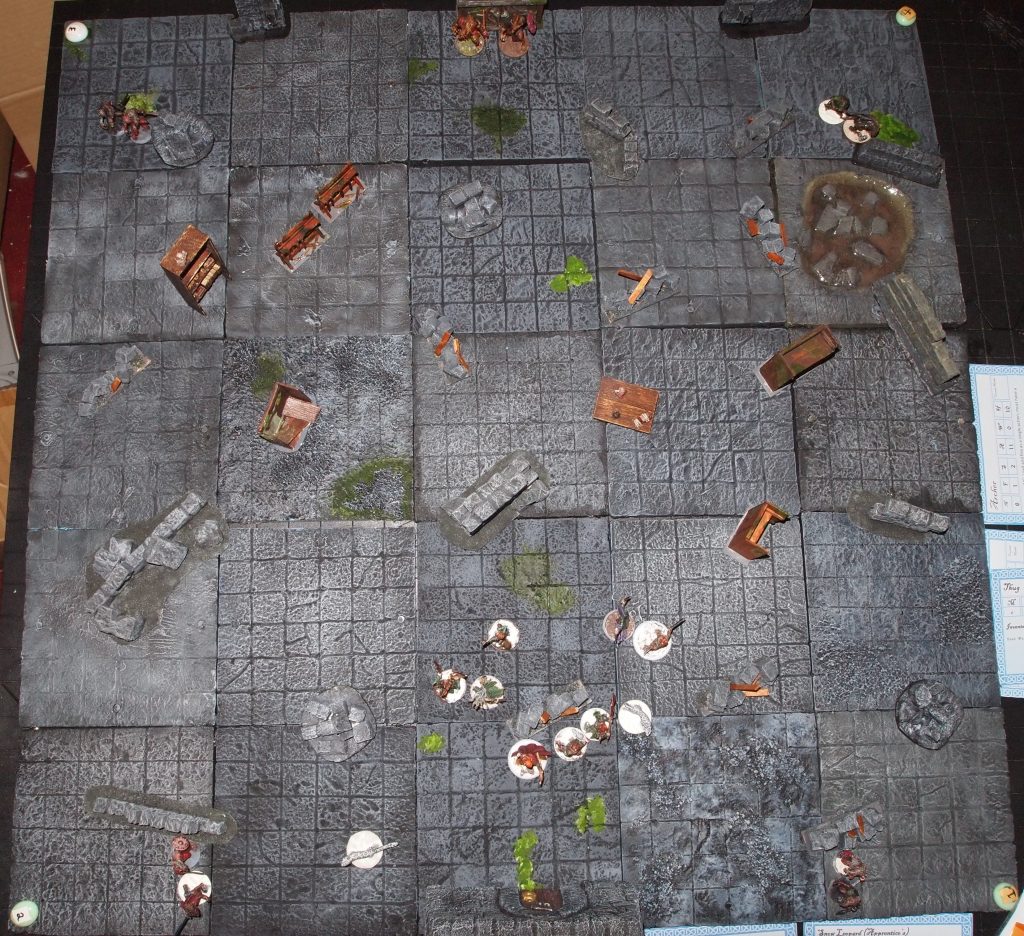
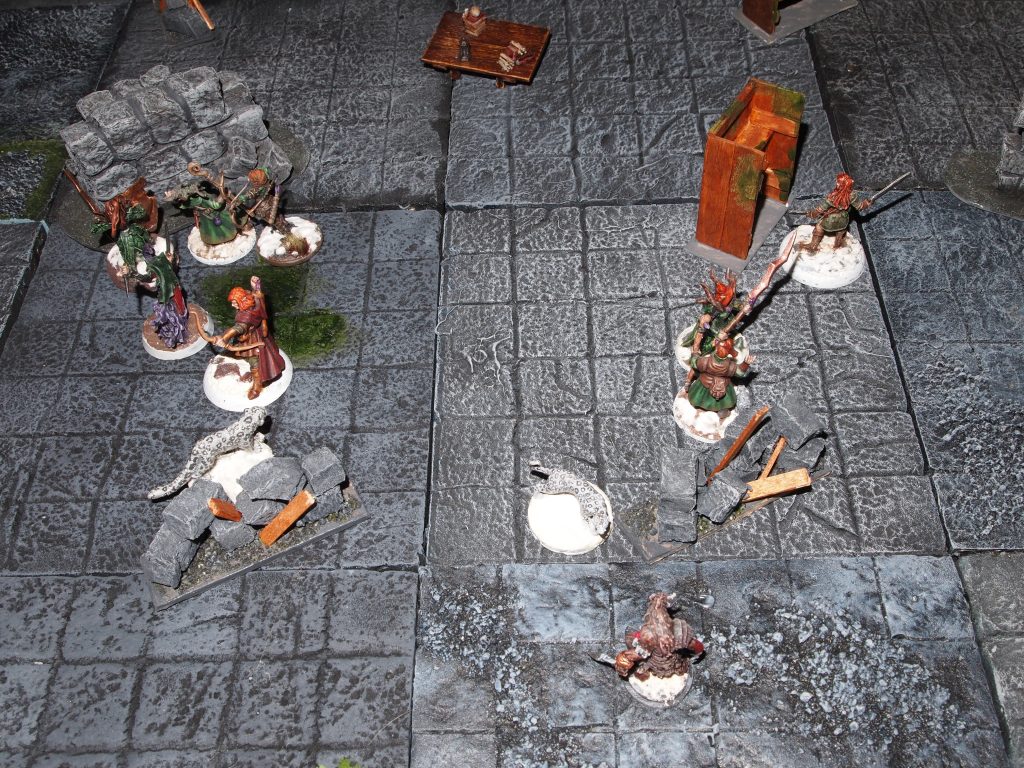
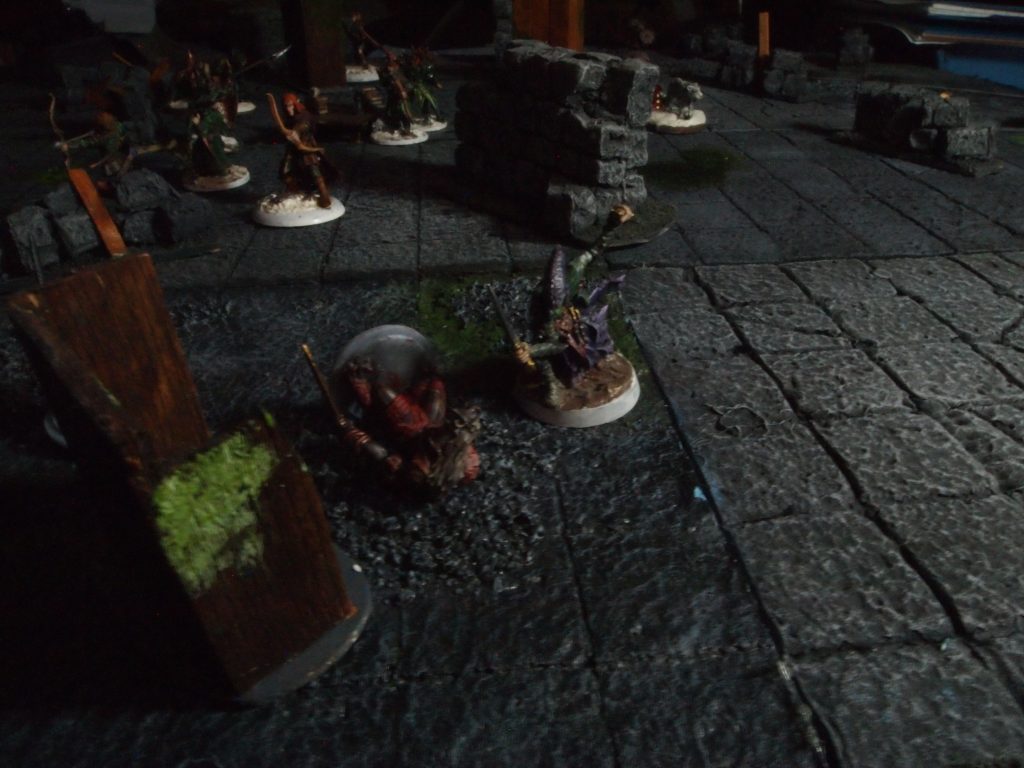
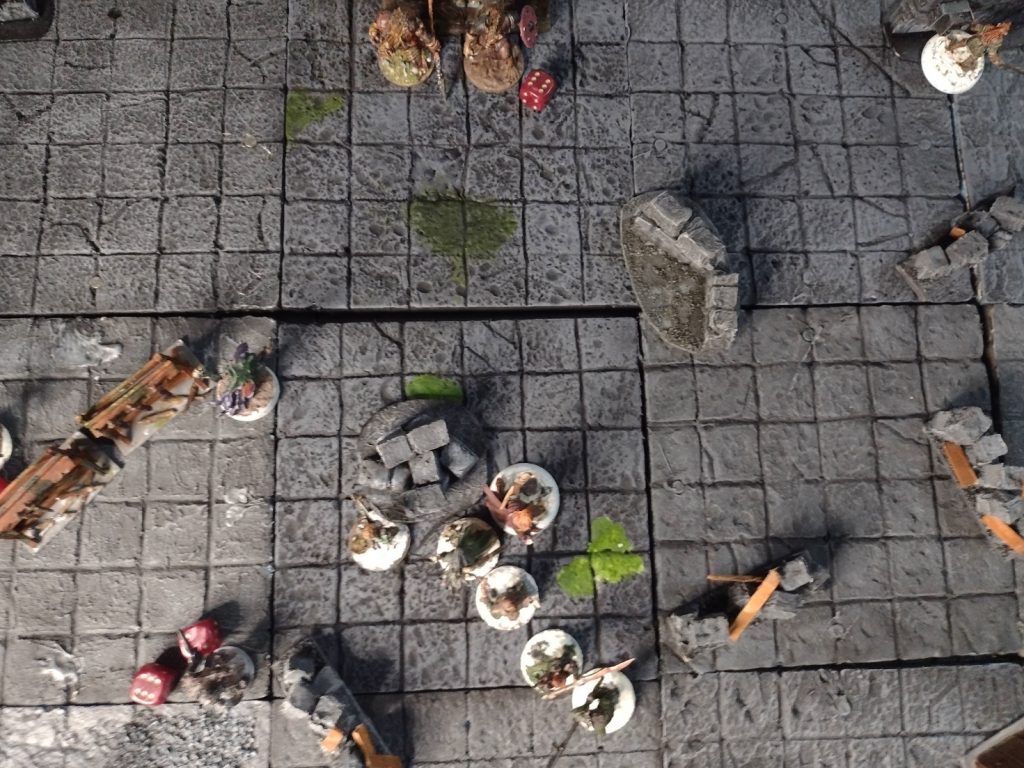
Here is a recap of how the table is set up. 1,2,3 and 4 are spawn points for random creatures during the game. I decided to reduce the frequency of this to the end of every other turn rather than every turn to make the scenario a little easier.
Turn 1
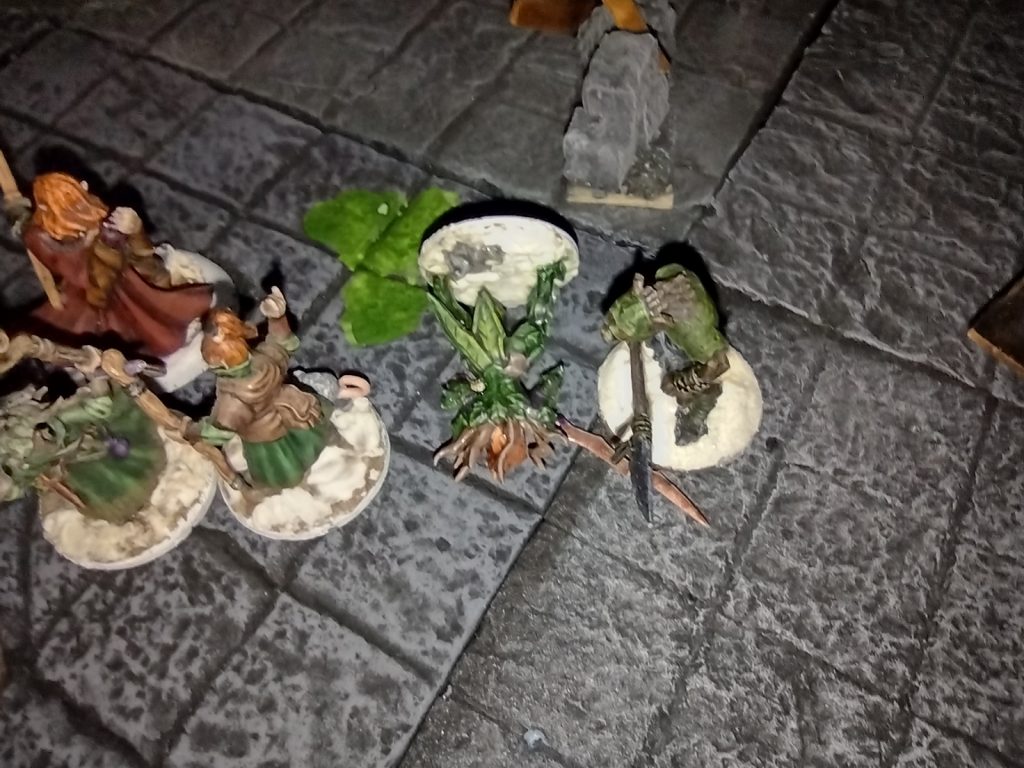
Thoroncencea moves towards the centre and shoots at a gnoll thug at 1, but misses. The wizard’s Snow Leopard moves towards the gnoll thugs at 1.
Naru Magol and Durnimlath move towards the centre and Durnimlath successfully casts Enchant Weapon on Naru Magol’s hand weapon, giving it a +1 to Fight.
Daetir and Kirgwaith move towards the centre. Mirhen and Galen Glim also move towards the centre and Mirhen successfully casts Enchant Weapon on Galen Glim’s two handed weapon.
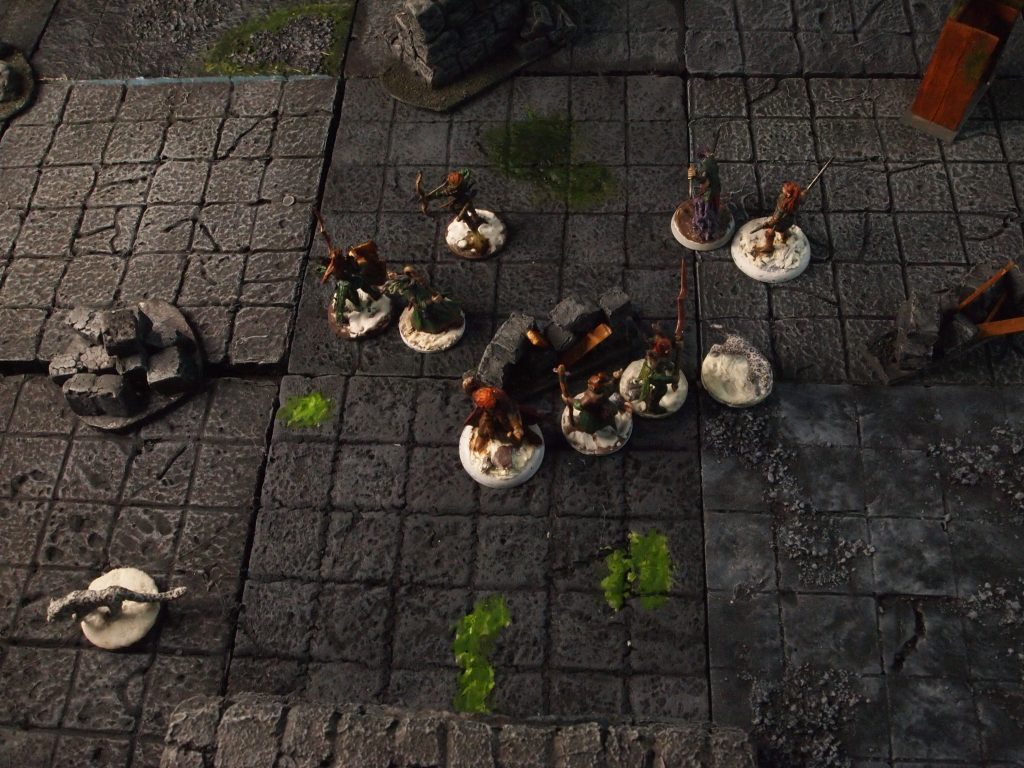
In the creature phase the gnoll thugs from 1 move towards the entrance, those from 2 move towards the wizard’s snow leopard. The gnoll thugs from 3 and 4 move towards the centre. Creatures that don’t have line of sight on a warband member move towards the centre in this scenario.
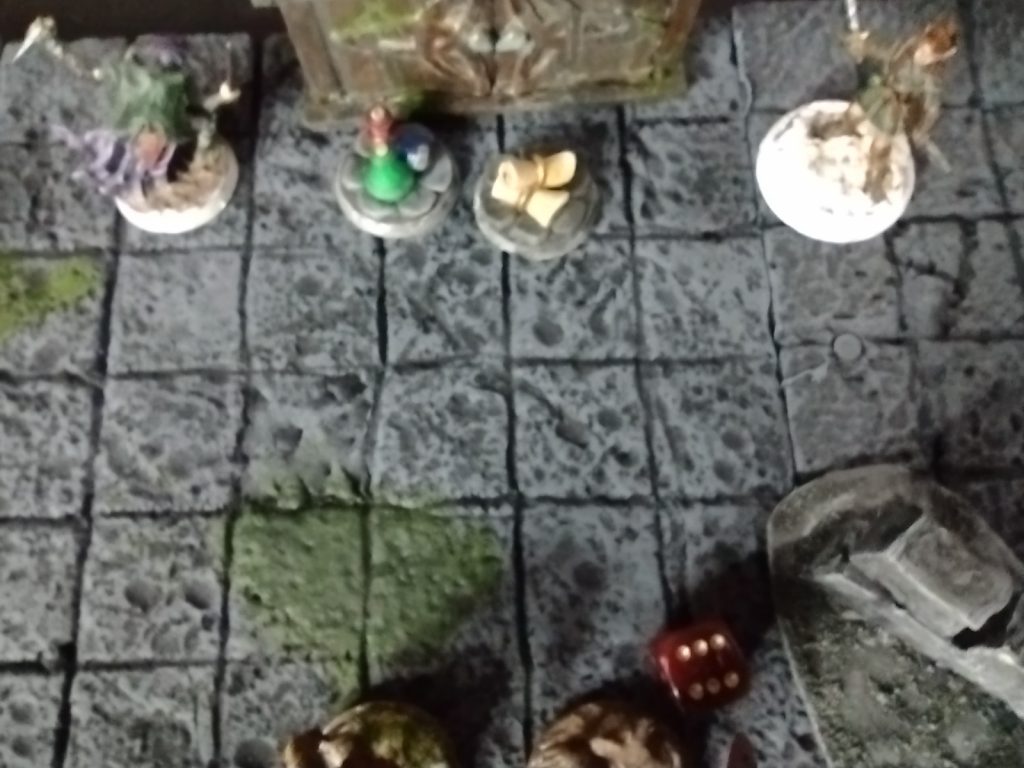
I decided that the two knights in front of the cabinet will stay there standing guard until any member of the warband moves within 6” (or so!).

Moving on to the Soldier phase. Brikolad shoots at one of the gnoll thugs from 1 but misses, and Mirhen’s snow leopard moves towards the gnoll thugs at 2.
Turn 2
In the wizard phase, Durnimlath fails in casting Enchant Weapon and moves to cover. Naru Magol moves to cover and Thoroncencea shoots at a gnoll thug but misses then moves to cover.
In the apprentice phase Mirhen casts Enchant Weapon on Daetir’s dagger then moves along with Galen Glim towards the centre. Brikolad takes aim at a gnoll thug and scores a critical hit killing it. First blood to Brikolad!
During the creature phase the gnoll thugs from 1 move towards the centre while those form 2 move towards wizard’s Snow Leopard and both attack. The 1st one hits doing 1 damage, the 2nd misses and is pushed back.
The gnolls at 3 and 4 all move towards the centre.
In the Soldier phase the wizard’s Snow Leopard attacks a gnoll thug doing 6 damage and pushing it back. Daetir moves up to wiz and Kirgwaith moves into cover.
At the end of the turn a Gnoll archer spawns at 3.
Turn 3
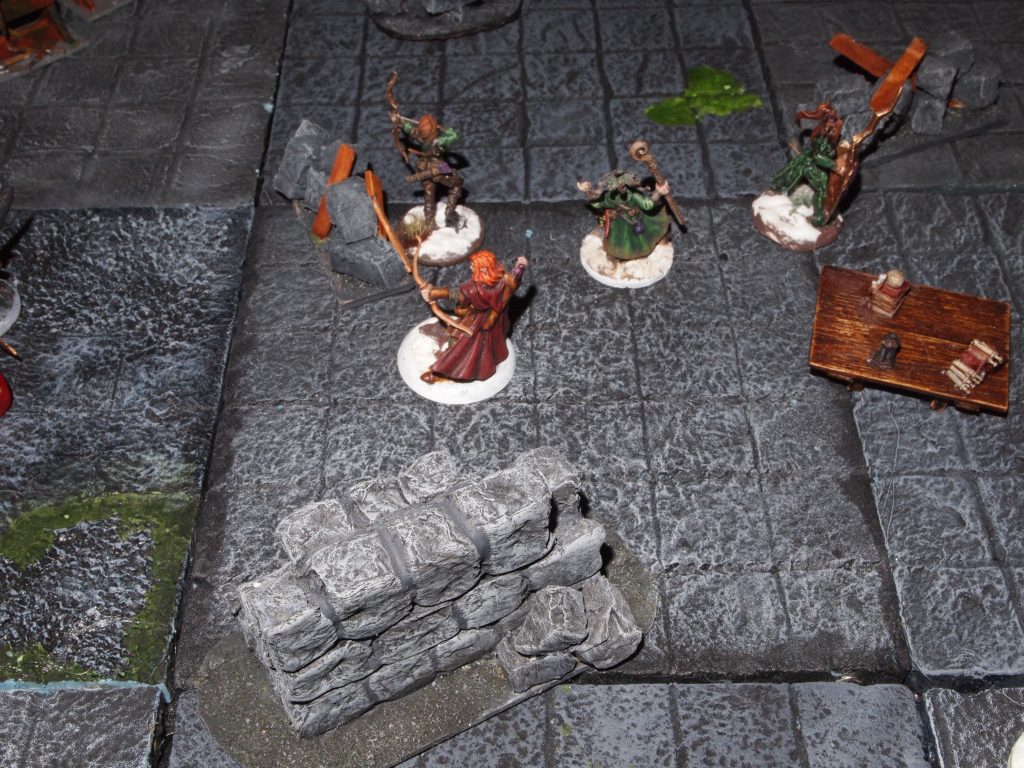
In the Wizard phase Thoroncencea shoots at a gnoll knight but misses and moves towards the cabinet. Durnimlath moves towards the cabinet and fails casting elemental bolt and takes 1 damage. Naru Magol moves up to support the wizard and Daetir moves towards cover.
In the apprentice phase Mirhen’s snow leopard and Galen Glim both move closer to Mirhen, Mirhen fails casting Bone Dart but takes no damage.
In the creature phase two gnoll thugs move to attack Mirhen’s snow leopard but the attack roll is a draw so no damage and both stay in combat.
Two gnoll thugs move towards Brikolad and the wizard’s snow leopard. Meanwhile two more gnoll thugs move towards Daetir and the gnoll archer moves towards the centre and shoots Naru Magol, hits but no damage gets through, perhaps the arrow was blocked by her shield?
In the soldier phase Brikolad shoots at a gnoll thug and kills it then moves towards Durnimlath. The wizard’s snow leopard moves to attack the gnoll thug that is attacking Mirhen’s snow leopard and does 6 damage. Kirgwaith moves to cover.
Turn 4
Naru Magol moves to protect the Durnimlath who successfully casts Elemental Bolt at a gnoll knight but does no damage, then moves towards the cabinet. Brikolad moves up to protect Durnimlath and shoots at a gnoll thug doing 7 damage.
In the apprentice phase Mirhen casts Enchant Weapon on Galen Glim but fails taking no damage, then moves towards Durnimlath. Galen Glim moves up to protect Mirhen.
Mirhen’s snow leopard attacks a gnoll thug but misses and takes 5 damage.
In the creature phase a gnoll thug moves and attacks the wizard’s snow leopard but loses the combat roll and takes 7 damage and is killed. The gnoll thug’s buddy also attacks the wizard’s snow leopard doing 6 damage.
Another gnoll thug moves and attacks Daetir but loses the combat roll, takes 5 damage and is killed. A second gnoll thug attacks poor Daetir but also misses, takes 2 damage and is pushed back.

A gnoll archer shoots at Brikolad, misses and moves closer to Brikolad.
A gnoll thug moves to attack Naru Magol scores a critical hit and does 12 damage taking out Naru Magol.
The last of the gnoll thugs to activate moves to attack Galen Glim and does 6 damage.
On to the soldier phase. The wizard’s snow leopard attacks a gnoll thug, hits, but no damage gets through its armour.
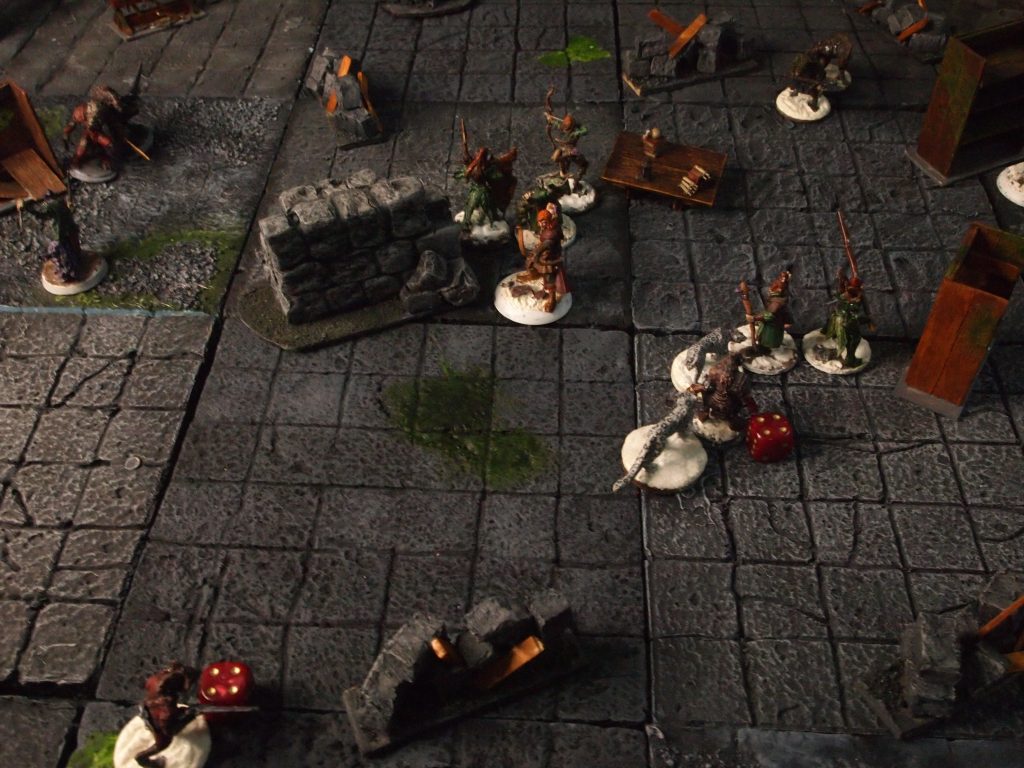
Daetir and Kirgwaith both move and then dash heading towards the levers.
At the end of the turn a gnoll thug and a gnoll archer spawn at 3.
Turn 5
Durnimlath casts Bone Dart at a gnoll knight, hits, but no damage gets through, then moves to cover.
Thoroncencea shoots a gnoll archer and does 6 damage, then moves to protect Durnimlath.
Brikolad shoots a gnoll thug but misses and also moves to protect Durnimlath.
In the apprentice phase Mirhen fails to cast Bone Dart and takes 1 damage. Galen Glim attacks a gnoll thug doing 2 damage and pushes the gnoll thug back, then moves to protect Mirhen.
In the creature phase a gnoll archer shoots Daetir but misses and moves towards him along with a gnoll thug. The other gnoll archer shoots at Thoroncencea and does 4 damage then moves into cover.
Two gnoll thugs attack both snow leopards but don’t do any damage and the last of the gnoll thugs moves to attack Galen Glim but no damage gets through.
In the soldier phase both snow leopards attack gnoll thugs and do 6 and 4 damage.
Daetir and Kirgwaith continue moving towards the levers.
Turn 6
First up, in the wizard phase Galen Glim attacks a gnoll thug misses and takes 7 damage. Taking her down to 0 and off the table!
Brikolad shoots a gnoll thug but misses and moves nearer the cabinet. Thoroncencea shoots gnoll thug, scores a critical hit and kills it, then climbs a pile of bricks. Durnimlath fails to cast bone dart and takes 1 damage then moves towards cabinet.
In the apprentice phase Mirhen casts bone dart at a gnoll thug doing 8 damage then moves towards the cabinet.
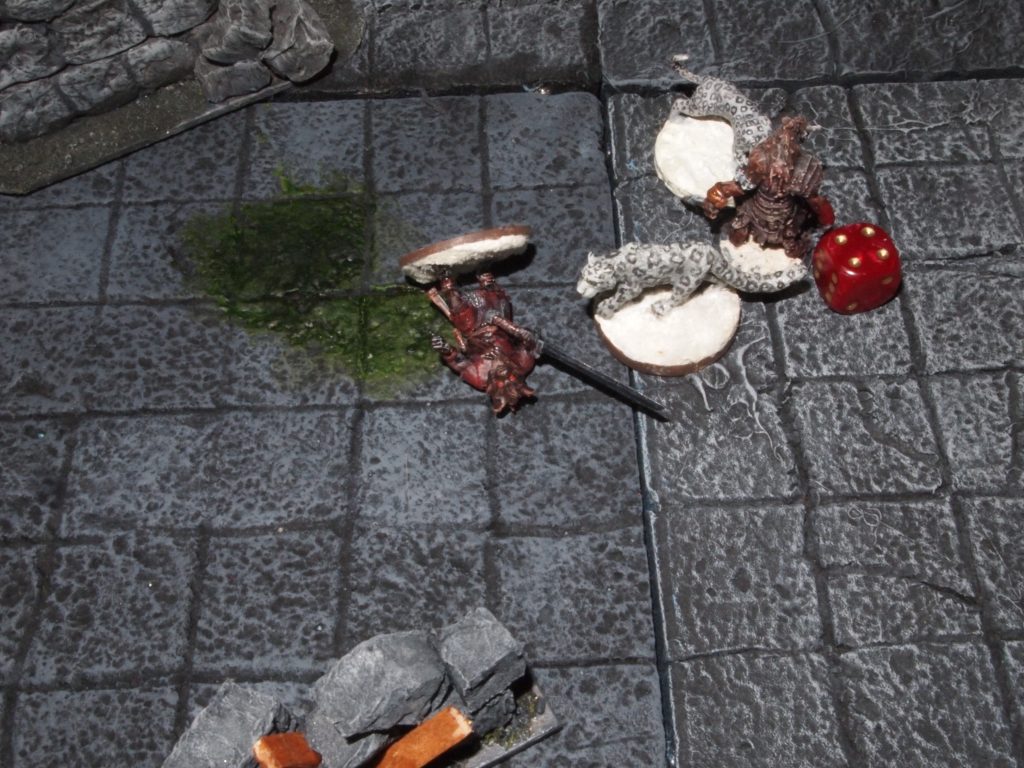
In the creature phase a gnoll thug attacks the wizard’s Snow Leopard doing 3 damage which is enough to take it out of play.
Then another gnoll thug attacks Mirhen’s snow leopard scores a critical hit also killing it. 2 more of the warband are now of the table!
A gnoll archer takes a shot at Durnimlath but misses. The other gnoll archer and a gnoll thug move towards the centre.
In the soldier phase Daetir and Kirgwaith both move to the levers.
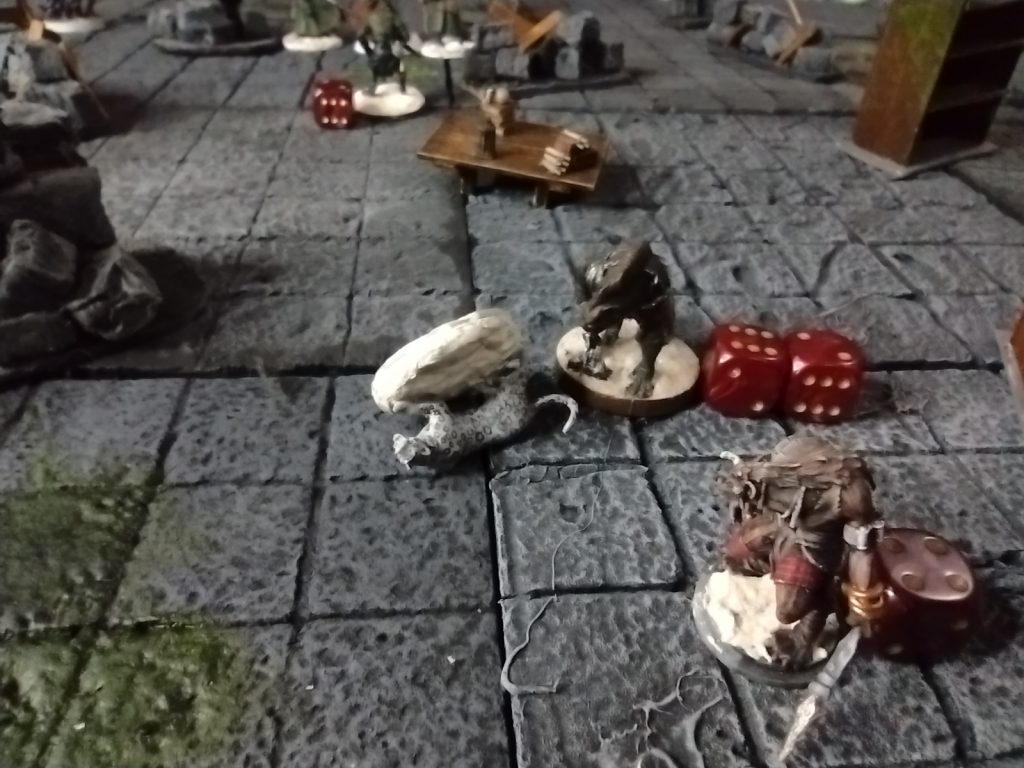
At the end of the turn another gnoll archer spawns, this time at 1.
Turn 7
Durnimlath is forced to go hand to hand with a gnoll thug and amazingly rolls a crit does 15 damage killing it. A lucky melee kill for Durnimlath! Thoroncencea shoots at a knight but misses. Brikolad uses his steady hand ability, hits and does no damage.
In the apprentice phase, Mirhen casts bone dart at gnoll knight successfully, but fails the ranged combat roll so it’s a miss!
In the creature phase a gnoll thug and a gnoll archer move towards the centre, the archer, now having line of sight shoots Thoroncencea, hits, does 7 damage which takes Thoroncencea off the table! Another gnoll archer shoots at Daetir but misses.
Now the gnoll knights guarding the cabinet see the warband as a threat and begin moving towards Durnimlath.
In the soldier phase Daetir and Kirgwaith both operate the levers, opening the cabinet and spawning two loot tokens! Then both move towards the cabinet.
Turn 8
Durnimlath fails to cast heal and ironically takes 1 damage which removes her from the table.
Brikolad begins moving back towards the entrance.
In the apprentice phase Mirhen casts bone dart but fails the ranged combat roll so misses and begins moving towards the entrance.
In the creature phase a knight moves to attack Brikolad and does 7 damage. The other gnolls all move towards the centre.
In the soldier phase Daetir and Kirgwaith move and pick up loot tokens.
(I remember taking photos for this and the following turns but could I find them? Of course not!).
Turn 9
In the apprentice phase Brikolad attacks a knight using his furious attack ability, does 2 damage and elects to move back.
Mirhen moves into cover.
In the creature phase the two gnoll archers shoot Daetir and Kirgwaith, both miss.
In the soldier phase Kirgwaith and Daetir move to cover.
Turn 10
In the apprentice phase Mirhen moves towards entrance and Brikolad attacks a knight but misses.
In the creature phase a gnoll thug attacks Kirgwaith but loses the roll takes 7 damage and is pushed back.
The gnoll archers shoot at Daetir and Kirgwaith again but still can’t land a shot.
The knight attacks Brikolad loses the combat takes 4 damage and is pushed back.
A gnoll thug moves in to attack Brikolad, scores a critical doing 14 damage and Brikolad is down and off the table!
In the soldier phase Daetir and Kirgwaith both move and dash heading for cover and nearer the entrance door.
Turn 11
Mirhen moves and dashes heading towards door.
In the creature phase a gnoll knight and a gnoll thug both move towards Mirhen.
A gnoll archer moves towards centre as it can’t see any of the warband, while a gnoll thug moves to attack Daetir but does no damage. The other two archers shoot at Daetir and Kirgwaith but mss again!
In the soldier phase Kirgwaith moves further towards the door and Daetir attacks the gnoll thug the combat roll is a draw Daetir takes 6 damage and gnoll thug takes 5, killing it.
Turn 12
Mirhen makes it to the door and leaves the workshop.
I called the game at this point rather than spend more turns with Daetir and Kirgwaith heading towards the door. Cheating a bit but not grossly so after all there wouldn’t have been much fun in it.
Post Game
The warband got a total of 200xp and Brikolad’s separate xp came to 30.
Injury rolls
Brikolad – badly wounded misses next game.
Naru Magol – full recovery.
Galen Glim (who I realised I was using the wrong mini for!) – badly wounded miss next game.
Thornconcea- full recovery.
Mirhen – badly wounded, misses next game.
Durnimlath – full recovery.
Loot
I chose the ‘sword of wounding and healing’ and with the other loot token got 100GC plus a grimoire with the Familiar spell in it which I sold for another 200GC.
Blunders.
Table size should have been 2.5′ x 2.5′ rather than 3′ x 3′
Critical hits are only for warband not creatures.
Also I’ve been doing damage wrong. I’ve been rolling for combat, adding any bonus from the fight stat and then taking the number on the dice (not the total combat roll) and using that as the damage (plus any bonuses to damage) but re-reading the rules I should have been taking the combat roll result and adding any damage bonuses to that. All works out really as I was doing this for both warband and creatures.
Before the next game I’m going to put some thought in how I take notes and take photos for the battle report. I did try using a voice recorder for another game but as I like to have some music or a podcast going on in the background it did make some of the recordings a little hard to hear and also would mess up using a direct voice to text app. Ideally I would type up the bat rep as I was playing but that would mean juggling a laptop as well as dice, rule books etc. Making a note of where I took a photo rather than leaving it to memory (progressively unreliable at my age!).
Hope you enjoyed and pop back for the next one.
Have you played this scenario? How did you get on? Did you find it hard or a breeze? Do you have an tips for juggling playing the game and making notes for a battle report? Let me know in the comments, or just say hi if you want. TTFN!
Leave a Reply