
In which the witch Durnimlath Gul leads her merry band of elves in to the depths of the frozen city and wishes she hadn’t…
Finally, I found some time to play some Frostgrave. The scenario is the first of the solo and cooperative scenarios presented in the ‘Perilous Dark‘ supplement. Perilous Dark is a great supplement for Fostgrave that presents rules for playing Frostgrave solo and cooperatively, as well as lots of tips and ideas for creating your own solo or co-op scenarios. My notes definitely got confused at times so there are some inconsistencies in the following report so please excuse them.
The scenario involves the warband pitting themselves against wispy but deadly Vapour Snakes and crossbow weilding constructs as they move towards a door to a wizards workshop in the city of Felstad.
The Party’s Background
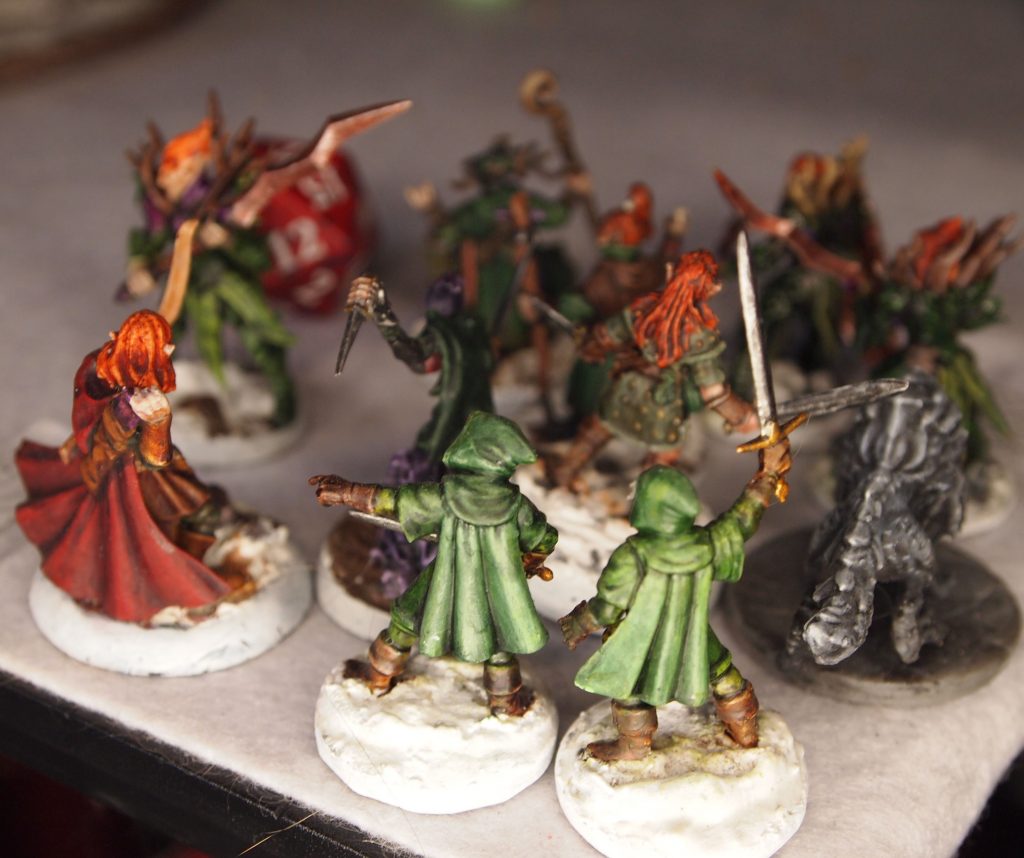
Durnimlath Gul, together with her trusty apprentice Mirhen and a group of loyal soldiers, has inadvertently stepped through a portal near their forest home, Farran Wood and found themselves transported to another world. The portal has delivered them to the outskirts of a strange frozen city.
With the portal only working one way Durnimlath now needs to search for another portal or means to return home.
The spirits of the group are at first low but are soon raised a little as they find a nearby inn selling a wine, that is not as good as the fine elven wine of their homeland, is nonetheless passable.
The inn keeper seems not at all suspicious of the strange coins that Durnimlath hands over, excepting gold as gold with a smile. The inn is like many in there own world and they soon learn that the strange city is named Felstad and they also hear tell of an old wizards workshop that might contain items of magical power.
Hoping that a portal or means to create one will be found among the frigid buildings, Durnimlath leads her party into the streets of Felstad.
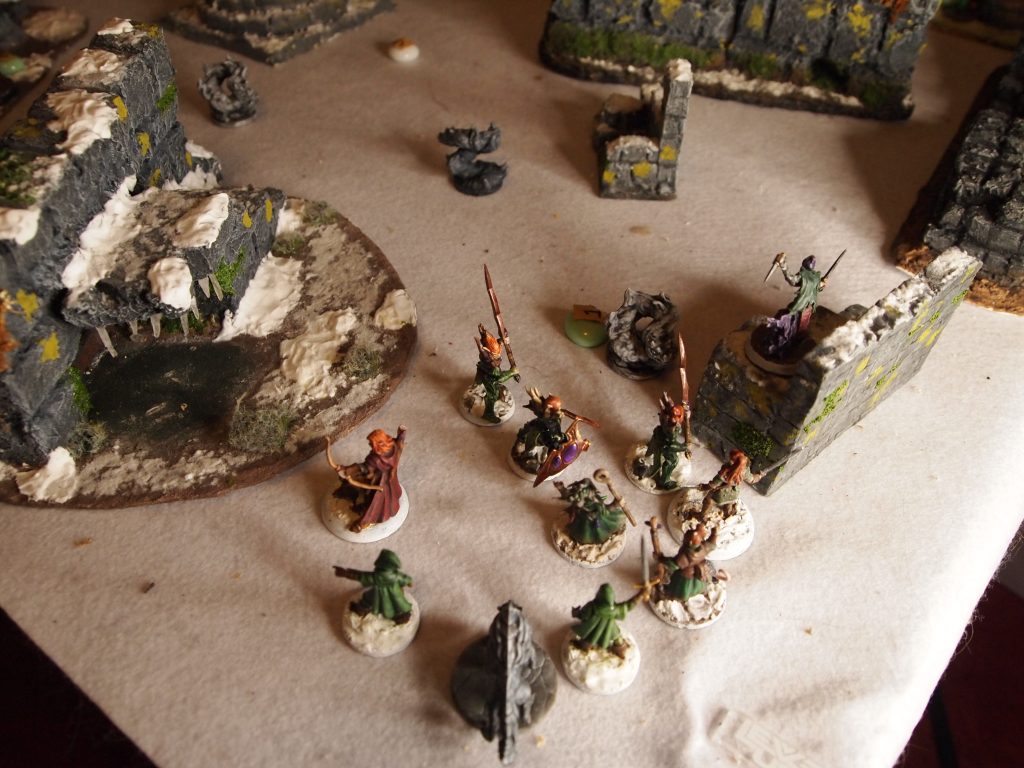
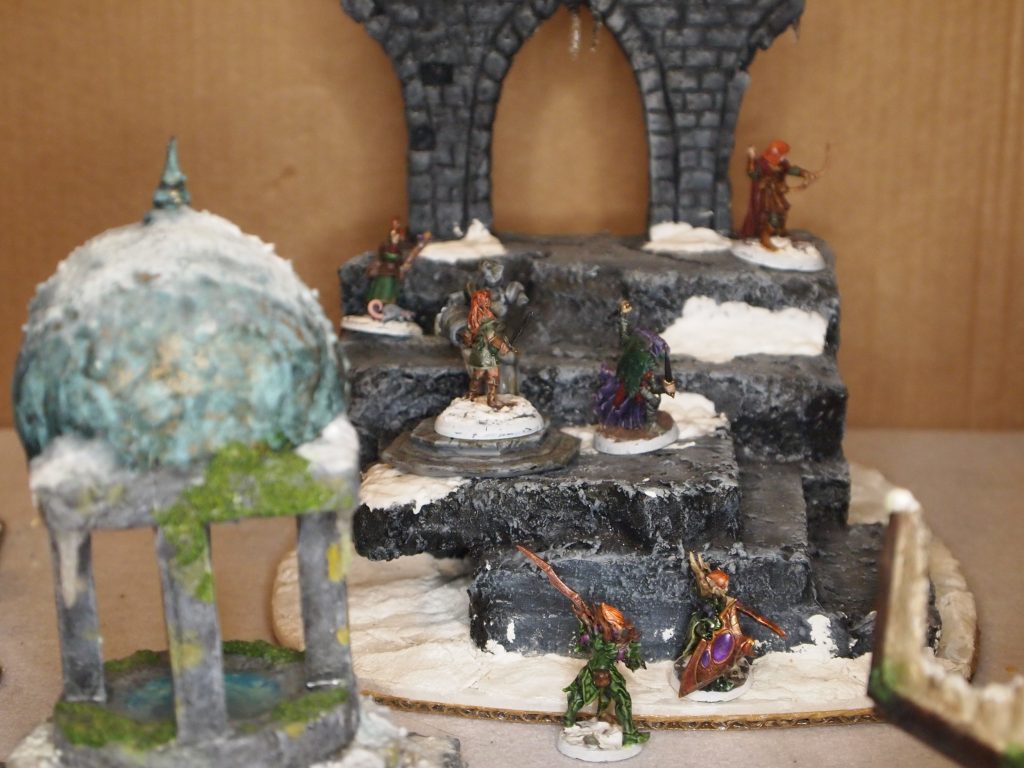
Setting up the table
The party start in one corner of the table, which is a bit comfy but will sort out as soon as they start to move.
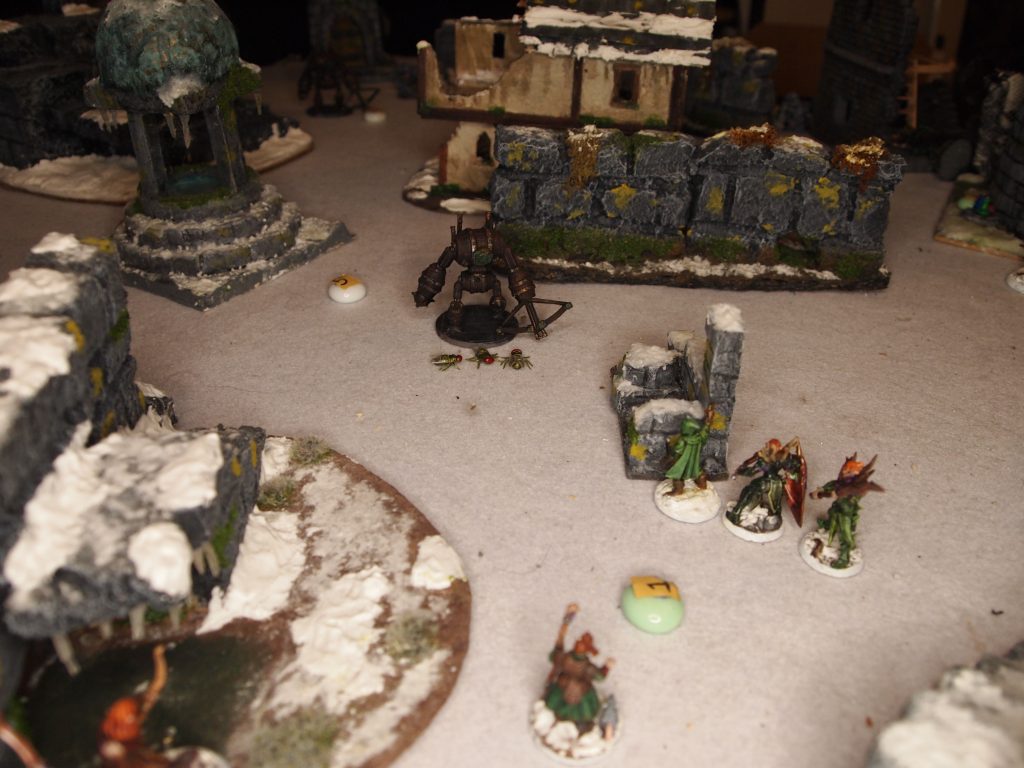
A door on the opposite corner to where the party start is guarded by two crossbow wielding constructs. Exiting through the door is the goal of the scenario.
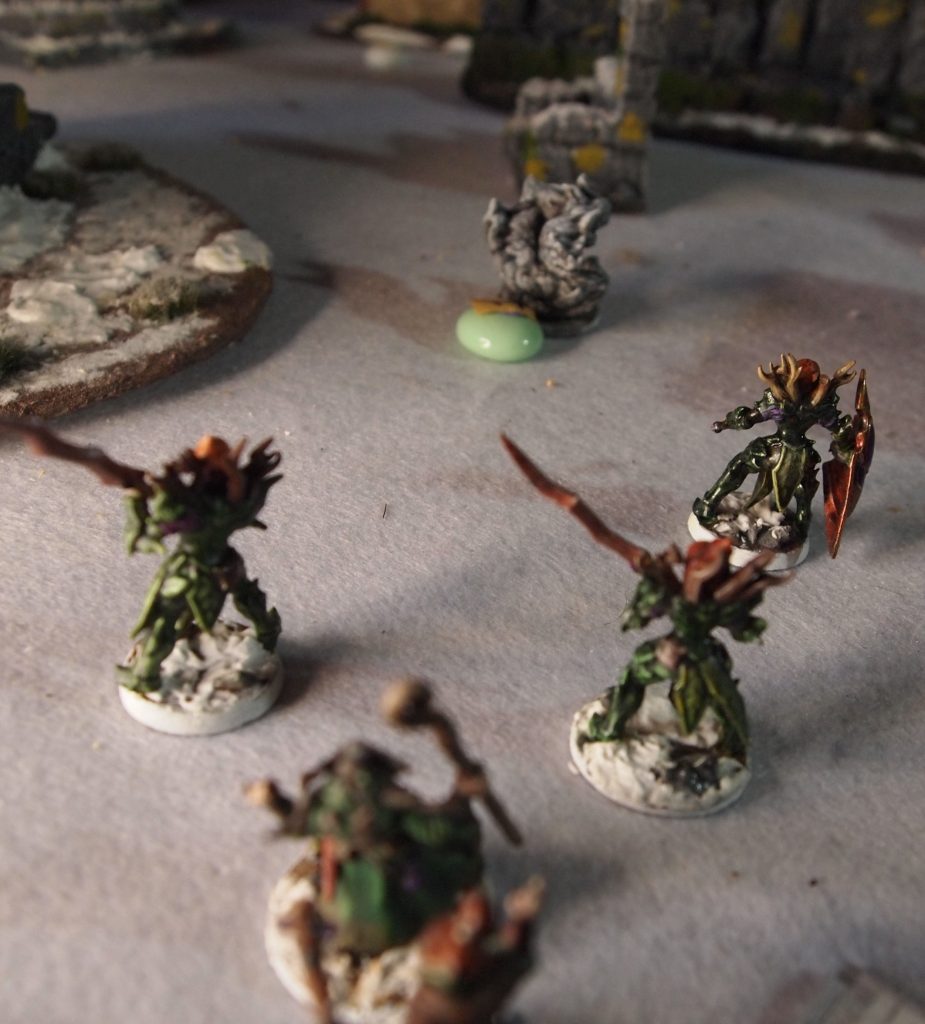
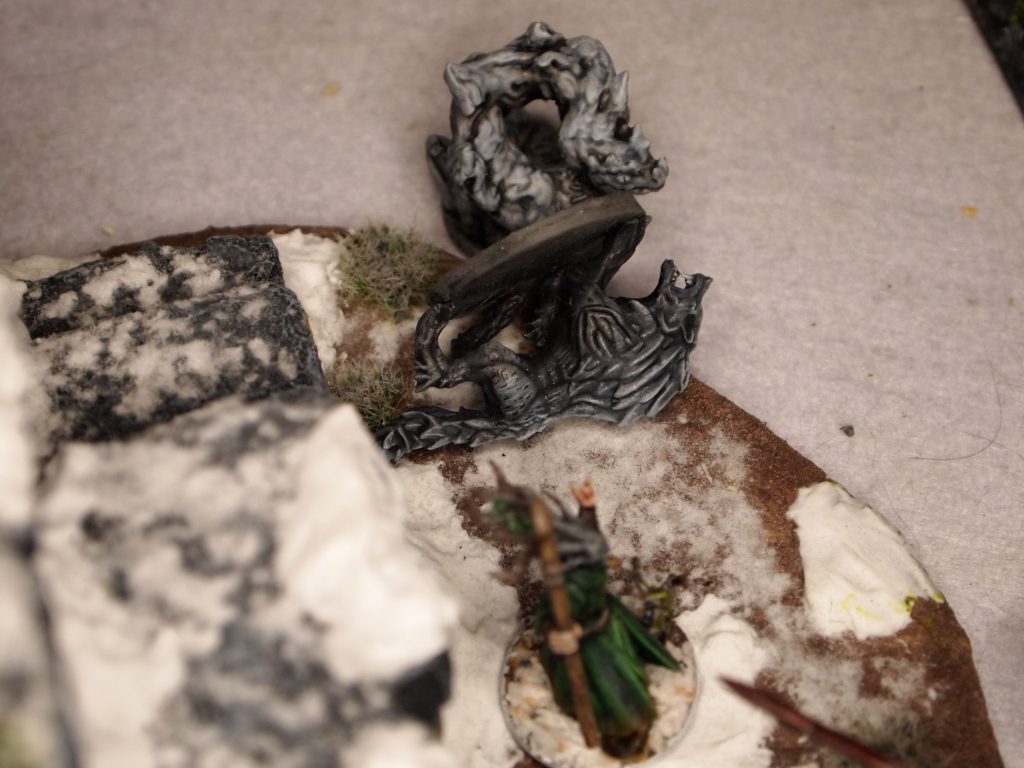
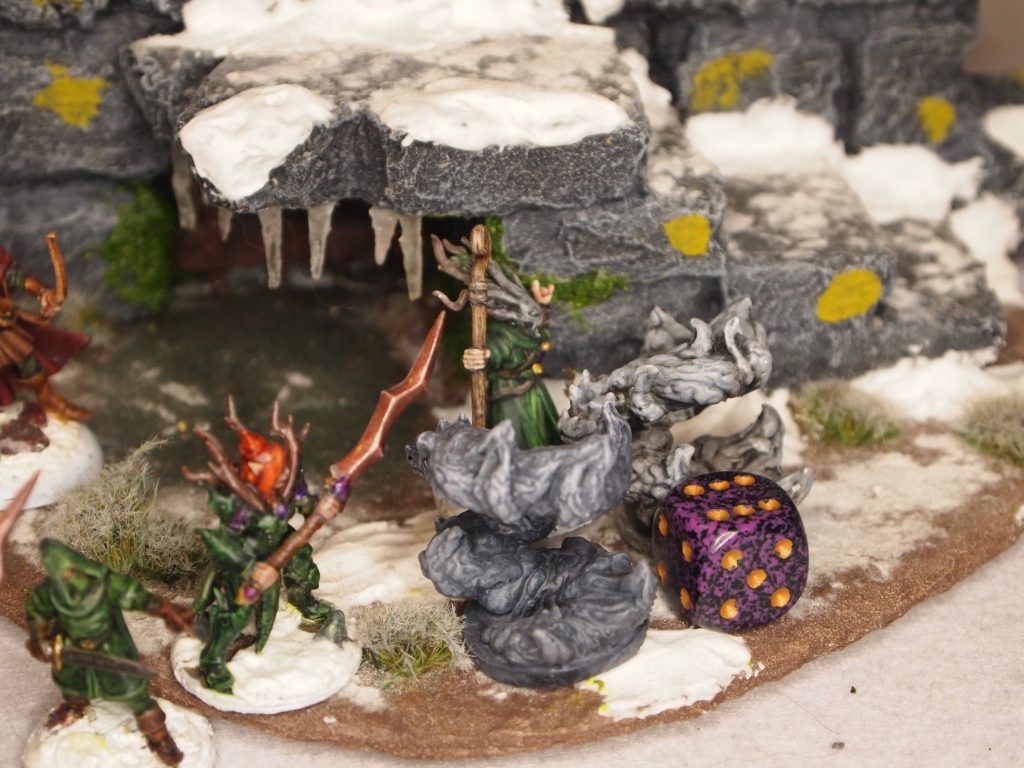
Five spawn points are placed on the table, one near each corner and one in the centre. Additionally, two treasure tokens are placed near the two corners that are not the party start point or the exit. A Large Vapour Snake is placed at each spawn point.
Each turn of the solo game is split into four phases, the Wizard phase, Creature phase 1, for creatures above a certain health level, the Apprentice phase, Creature phase 2 for all other creatures and the Soldier phase for any soldiers not activated in either the Wizard or Apprentice phase where up to three figures can be activated if they are within range.
I won’t list the phases in this report and just summarise each turn. I’ll also for each first appearance of a figure link to the relevant section in my previous post about the warband.
Some spells are cast out of game so both the wizard and apprentice try and cast a few. Both successfully cast ‘Familiar’, and the wizard casts ‘Summon Animal’ for a wolf to join the party for the game, and the apprentice casts ‘brew potion’ for a healing potion. I decided to use the optional critical hits rule that automatically wins a combat on a natural 20 .
Turn 1
Durnimlath Gul, Naru Magol the Knight and the two infantrymen Gurth Bor and Galenglim all move towards the Vapour Snake that is directly in front of them. None of them have enough movement to engage.
Durnimlath Gul casts Enchant weapon on Naru Magol’s sword but fails. In Frostgrave failing a spell causes damage to the caster, the greater the failure the greater the damage. Durnimlath is reaonably lucky and only loses one point of health here.
Mirhen casts Bone dart at the Vapour Snake but fails and takes a point of damage. Kirgwaith and Daetir. The thieves spot a suitable wall that offers higher ground to spy out the terrain and move towards it. Daetir has enough movement to climb the wall.
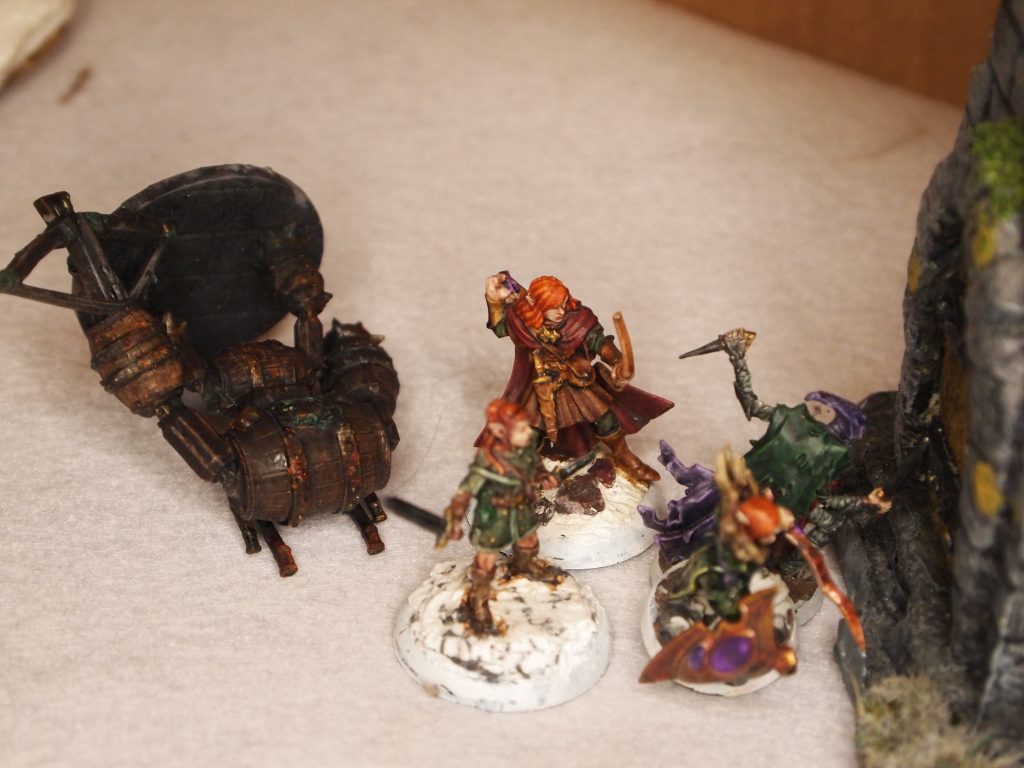
Most of the monsters on the table have no line of sight to the warband so make random moves, but three of the Vapour Snakes do see the warband and move towards them. The closest Vapour snake moves to attack Naru Magol. In Frostgrave both figures roll when combat is initiated with the winner having the chance to inflict damage. The Vapour Snake wins the combat but luckily the Knight’s armour blocks all the damage.
Turn 2
Gurth Bor and Galenglim move to support Naru Magol and Galenglim attacks the Vapour Snake, but it wins the combat and two points of damage get past the infantryman’s armour.
Durnimlath Gul casts Bone Dart at the Vapour Snake but it fails and she takes one point of damage.
Naru Magol now attacks and wins the combat rolling a natural 20 and kills the snake. First blood (or first some sort of smokey stuff) to the warband!
A Vapour Snake moves to attack Gurth Bor wins the combat and does 6 damage.
Serethgaur the thug, attacks the Vapour Snake and wins but no damage gets through the armour
Turn 3
The wolf attacks the Vapour Snake but the snake wins and does a significant amount of damage killing the poor pooch.
Durnimlath casts bone dart but fails the casting roll but not by enough to take damage. Mirhen is more successful casting heal on Gurth Bor.
Meanwhile, Naru Magol attacks rolling a critical hit and killing a Vapour Snake.
At this point I see that I have blundered with Durnimlath being a little isolated. A Vapour Snake moves in and attacks but is the one who takes the damage.
Another two Vapour Snakes are however both successful and reduce the wizard to 0 health.
Turn 4
Mirhen attempts to cast an elemental bolt but fails and takes damage.
Seregthaur attacks a Vapour Snake and does a small amount of damage. Galenglim then finishes off a Vapour Snake.
Snake attacks Sereg and kills him. Snake attacks Galenglim but dies in the process.
Now one of the Ballista II constructs has moved into line of sight uses its heavy crossbow, targeting Naru but misses.
Brikolad the archer targets a smoke snake and finds out that arrows do very little damage to them.
Gurth Bor attacks a smoke snake and her sword destroys it.
Turn 5
Mirhen casts plague of insects on the Ballista II which will lessen its effectiveness for and fighting shooting, she needs to empower the spell for it to succeed so takes damage. The spell is helpful for Brik as he is the target for its next attack which misses.
Unfortunately the Ballista II then makes a willpower test and the plague of insects is no longer effective.
Brik shoots his bow at the Ballista II and hits, but its armour stops the damage.
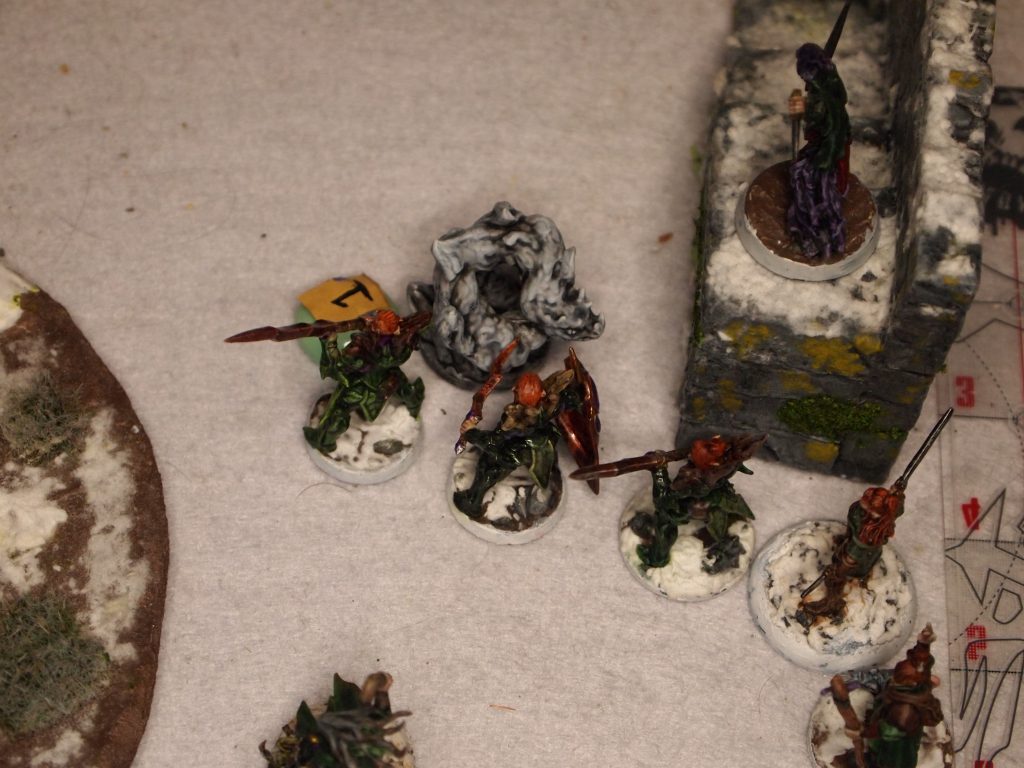
Daetir sees some treasure and moves to secure it. Picking up the treasure spawns another Vapour Snake, though only a small one.
Turn 6
Mirhen casts heal but fails and takes damage. The Ballista II shoots its crossbow at Naru Magol whose armour protects her from damage.
The remaining members of the warband continue moving towards the door using any cover they can find.
Turn 7
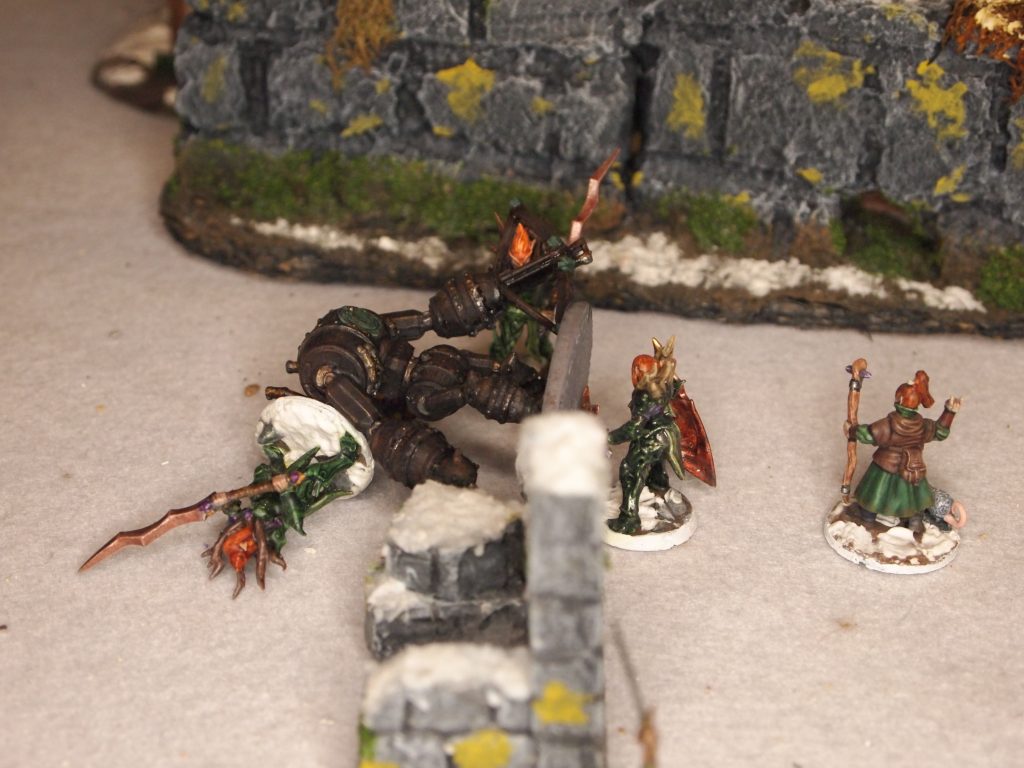
Both the infantrymen and the Naru Magol attack the Ballista II. The Infantrymen don’t fair well both failing to win the combat, Galenglim being reduced to 0 health. Naru Magol is more successful and wins the combat with a critical hit and doing damage.
Mirhen casts heal and empowers the spell to make it successful so takes some damage.
The Ballista II retaliates and attacks Naru but loses the combat and is destroyed.
Brikolad who has a small smoke snake moving towards him moves up some stairs and shoots at the small vapour snake but misses.
Turn 8
Mirhen casts heal again but fails and takes damage. The small vapour snake attacks Mothorm wins the combat and does damage. Mothorm retaliates and wins the combat doing a small amount of damage.
Brikolad takes advantage of the small vapour snake’s distraction and moves to pickup some loot. This also spawns a small vapour snake.
Turn 9
Not wanting to risk another failed spell as her health is low, Mirhen drinks her health potion.
Another large snake now has line of sight on the warband and moves towards them.
Brikolad shoots at the nearest small vapour snake reducing its health by 1.
Turn 10
Mirhen casts bone dart at the small smoke snake and the 1 point of health is enough to reduce it to 0 health.
Turn 11
No combat takes place this turn as all the warband move to find cover and continue their progress towards the exit door.
Turn 12
Brik moves into position to shoot at the second Ballista II but misses.
Turn 13
Brikolad is now in line of site of both the Ballista II and a small smoke snake both of which move towards the warband. The Ballista II shoots at Brikolad but misses. The archer retaliates and does some damage, then moves back into cover.
Kirgwaith moves to attack the small vapour snake and and reduces its health.
Turn 14
Mirhen casts bone dart at the Ballista II but fails and takes damage. The Ballista II takes aim at Mirhen skewering her and leaving her with 0 health.
The small vapour snake attacks Kirgwaith and and reduces the thief to 0 health.
The last large smoke snake attacks Daetir but loses the combat and takes damage from the thief.
Brikolad moves and shoots at the Ballista II but missies. Naru Magol attacks the large vapour snake, wins the combat and does damage. Gurth Bor follows this up with an attack on the large smoke snake finishing it off.
Turn 15
Ballista II moves to attack Mothorm, loses the combat and takes damage from the thug.
Naru Magol attacks the construct but loses the combat and takes damage.
Turn 16
Balista II attacks Naru Magol but loses, takes damage and is destroyed.
The warband now move towards the door and make the roll to open it and leave the table.
Post Game
In campaign play figures reduced to 0 health are not necessarily dead (maybe they are mostly dead? Cue Miracle Max quote!). You get to roll on either a table for the Soldiers and/or a table for the Wizard and Apprentice.
Durnimlath Gul and Mirhen, Galenglim and Gurth Bor all made a full recovery! Seregthaur unfortunately succumbed to his wounds but Mothorm was only badly wounded so will be able to join the warband again after recovering for one scenario.
Experience wise Durnimlath Gul gains 2 levels with some xp left over in the bank.
I then rolled on the loot table for the two loot tokens recovered and the warband is now 40 gold crowns richer, has a curse scroll and a pair of gloves of strength.
So all in all not a bad outcome.
Wait I hear you say (or maybe it is my conscience) didn’t you forget some stuff? I realised that I missed out a few things. Firstly, Vapour Snakes should have spawned at the end of each turn after the third. Ah well, I’m not too worried about missing that as Joseph McCullough has stated that he made the scenario a little more difficult than intended. So I sort of balanced it a bit without realising.
Also I missed out some situational modifiers for combat, particularly for when there are more than one figure attacking another, which I need to re-read and shooting modifiers for cover and the like, which I completely forgot, but as they were not used for the monsters or the warband that is a balance of sorts.
I plan before playing the next scenario is add names to the bases of the minis, so I don’t confuse the two infantrymen, two thugs and the two thieves. I think I may also try using a voice recorder app for the notes. Juggling, rule books, camera, minis, dice, pencil and notebook got a bit chaotic at times so anything that helps will be welcome.
What do I think of Frostgrave now I’ve played my first solo scenario? I love it! It played a little slowly but that was my bad decision of writing my first ever battle report on my first time playing the game. So there was lots of note taking (much more than I really needed) and checking the rule book. Next I need to paint up some minis for the next scenario and decide on which advances Durnimlath is going to take.
Leave a Reply