
Recently while hunting for hobby related videos on YouTube I found
Selrahc Games and some great videos about making terrain with corrugated cardboard.
I have a terrible habit of holding onto cardboard packaging, after all, its bound to be useful for something someday, right? I’m still fairly new at terrain building so I’m still learning and trying out new techniques is very useful.
Making terrain from something that was likely going to end up in the recycling bin is a very appealing. I’ve mostly been using XPS foam which I really like, but, while you can get good deals on it, is not cheap. You also end up with a lot of off cuts, which I tend to hang on to rather put in the bin. I have some plans to make some terrain pieces from off cuts at some point so will write about that when I do.
I wanted to try out the method seen on Selrahc Games and decided to make a small cottage which would be useful for Silver Bayonet, D&D or a other games.
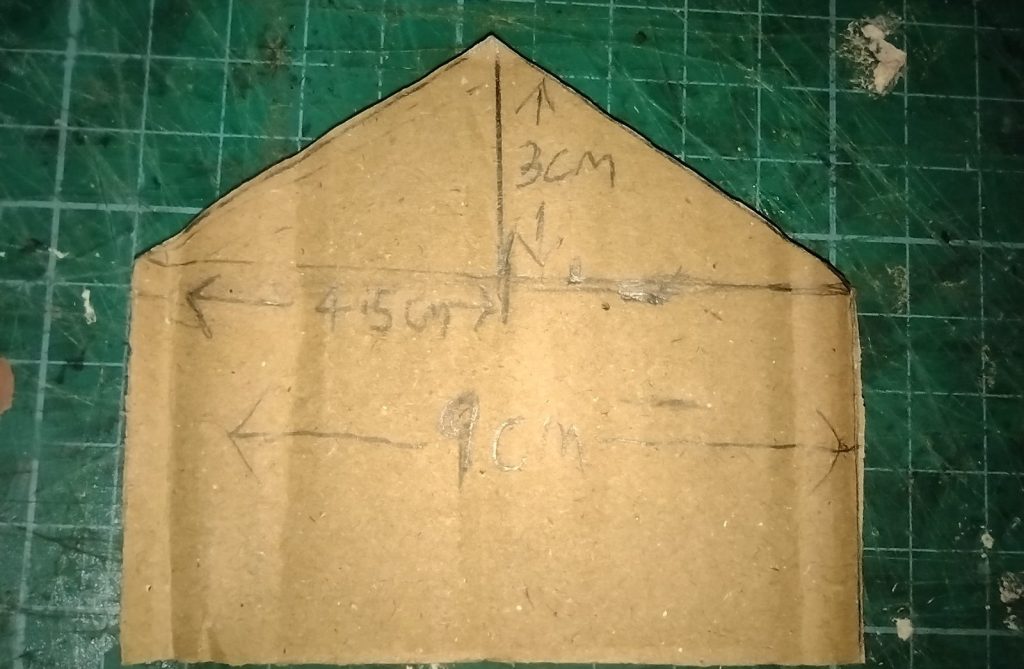
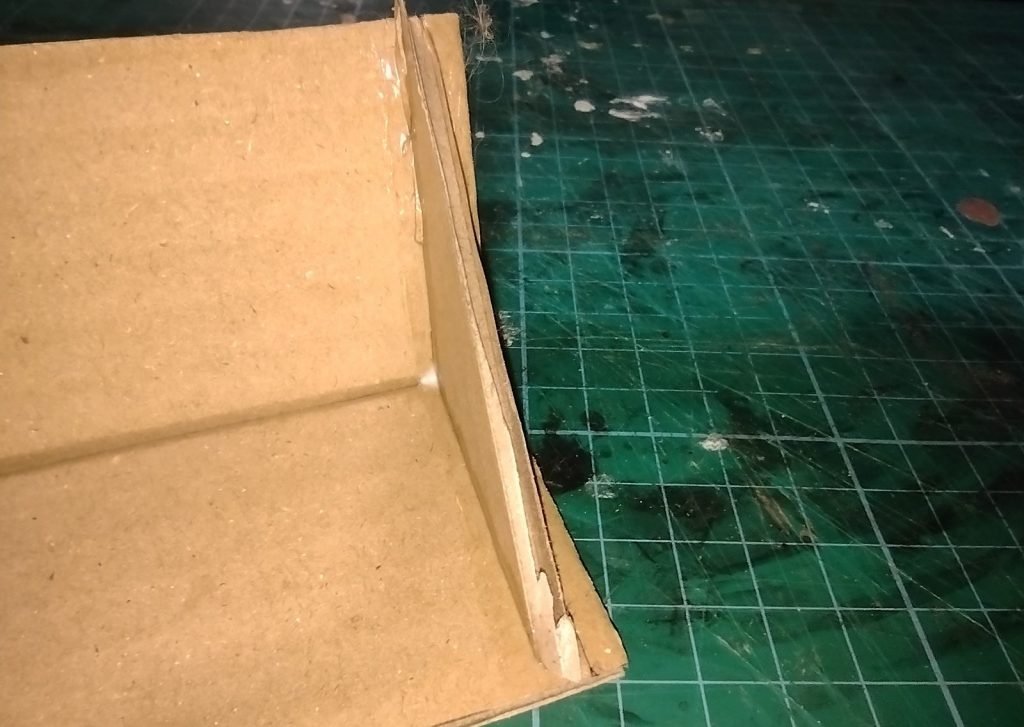
To start off I made a rough template for the ends of the cottage. This will be a guide for getting the height of the walls and the pitch angle and rise of the roof.
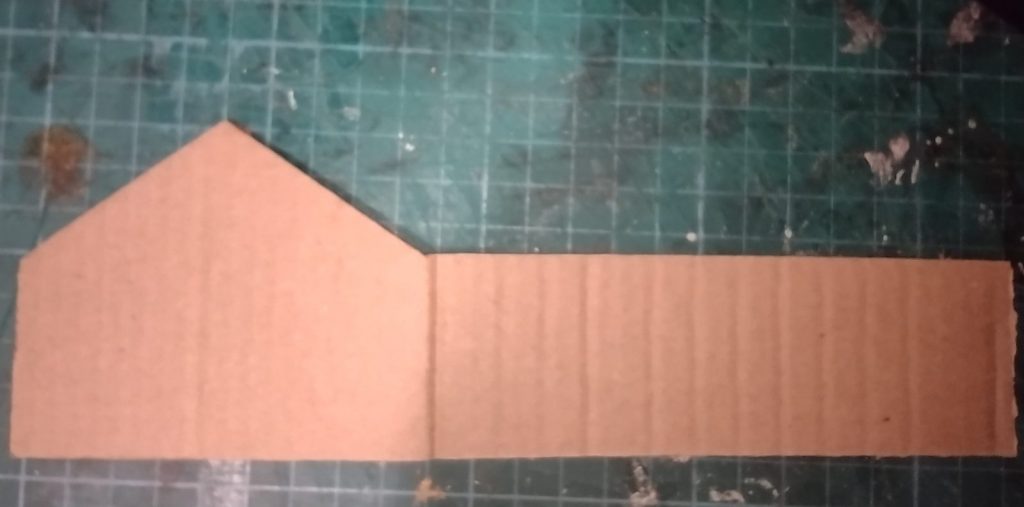
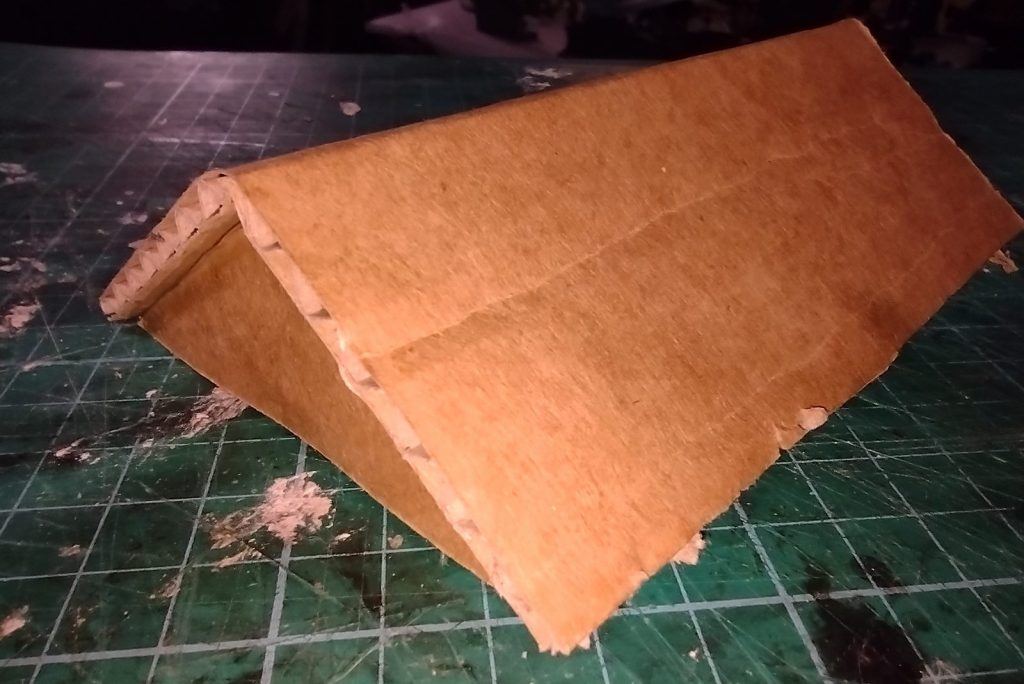
Next, using the template I drew out then cut out two pieces of card, one for each side and end of the cottage.
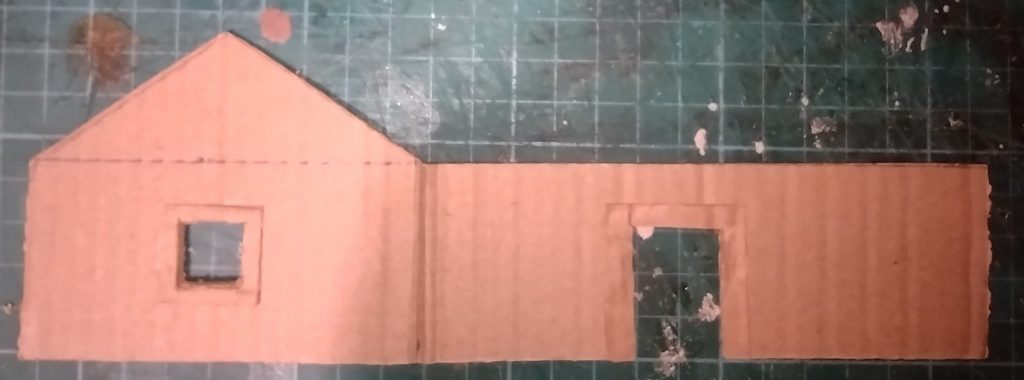
The cottage will of course need a doorway and windows so these were added to one of the pieces.
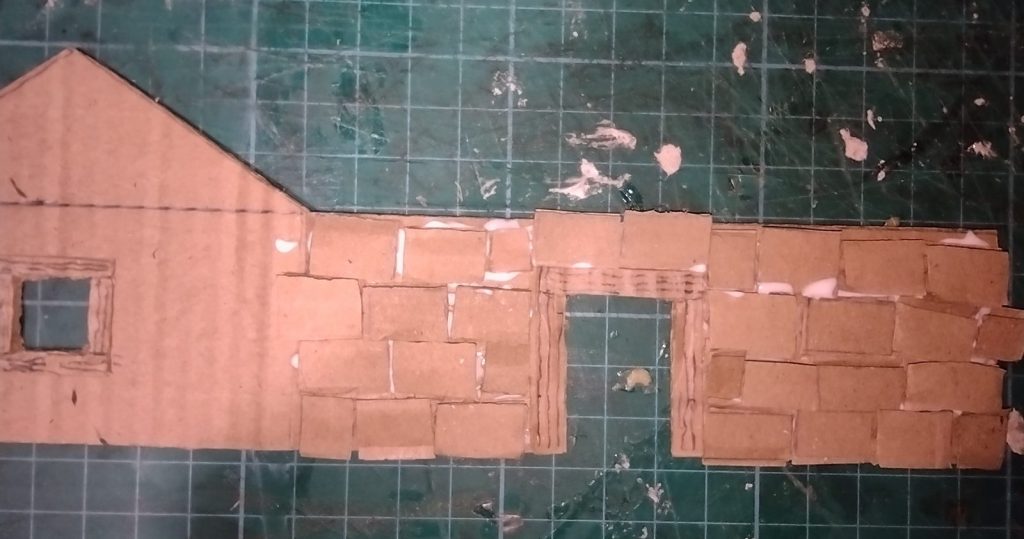
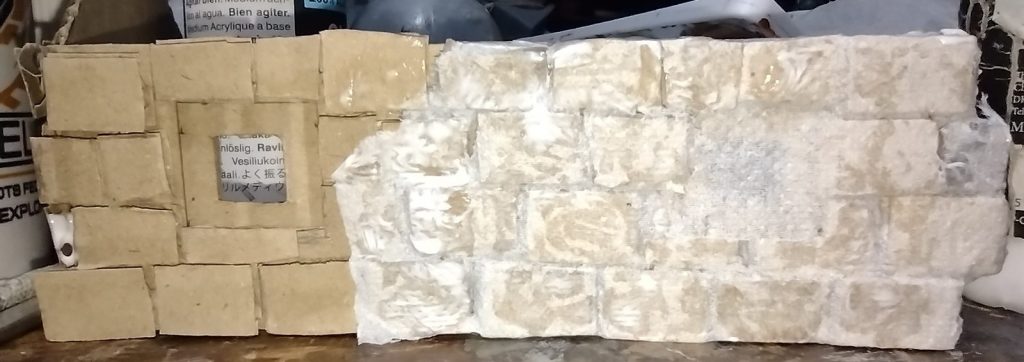
After cutting cardboard strips and cutting these again to the size I wanted for the bricks, the individual bricks can be added to the wall of the cottage. I use a quick setting wood glue, in preference to standard ‘school glue’ PVA, but either will work. PVA has one of those smells that always takes me back to primary school and making stuff with ‘sugar paper’. Actually why is it called that, I’ll look it up, the hive brain is sure to know.
This next step is the bit that I think really makes this method work. Over the bricks covered with glue, you add a layer of tissue paper, bog roll works really well. As the tissue develops small wrinkles as you add it it will give the bricks texture.
For the roof I added pieces to get the shape and help keep the roof in place. My plan is to have the roof be removeable so that miniatures can be easily placed inside.
With both the pieces added and the glue dry the roof is ready for the next stage.
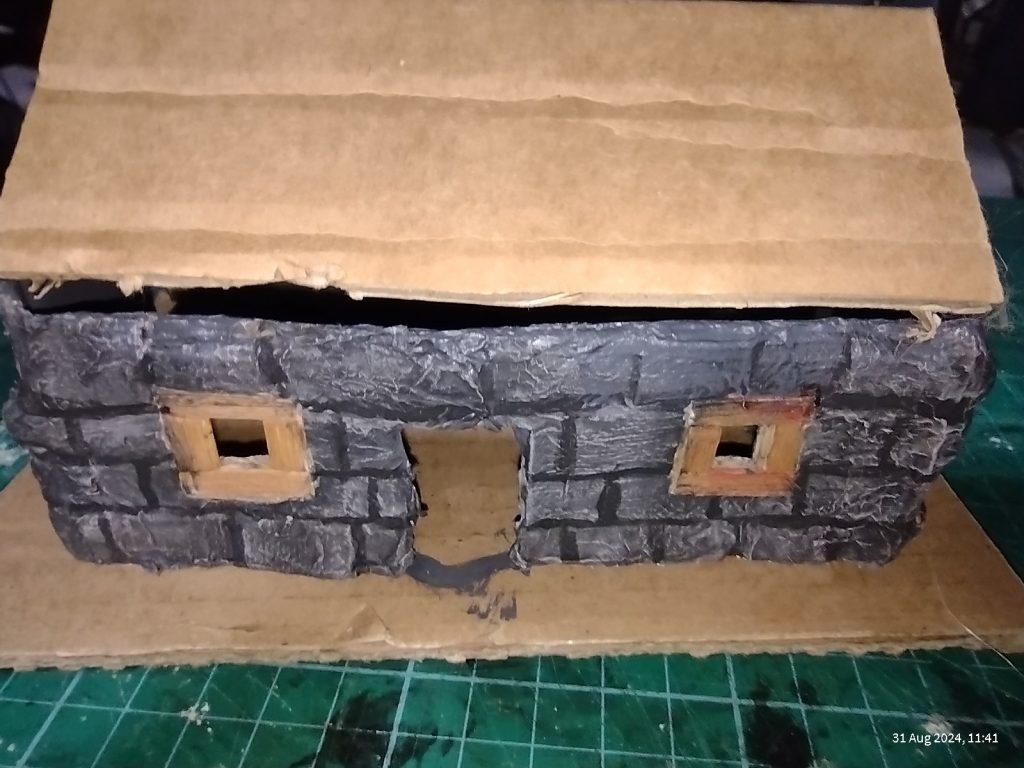
I then painted the walls dark grey, the dry brushed a lighter grey and then added some bits of wooden coffee stirrer for the window frames.
For the roof I was planning to add roof tiles made from thinner card but I had a change of mind.
What I wanted was to model thatch. I considered making it from cardboard but found a couple of great videos on YouTube one from The Crafting Muse and one from Miniature Wizardry about using jute twine or as I’ve always called it hairy string, to make the thatch.
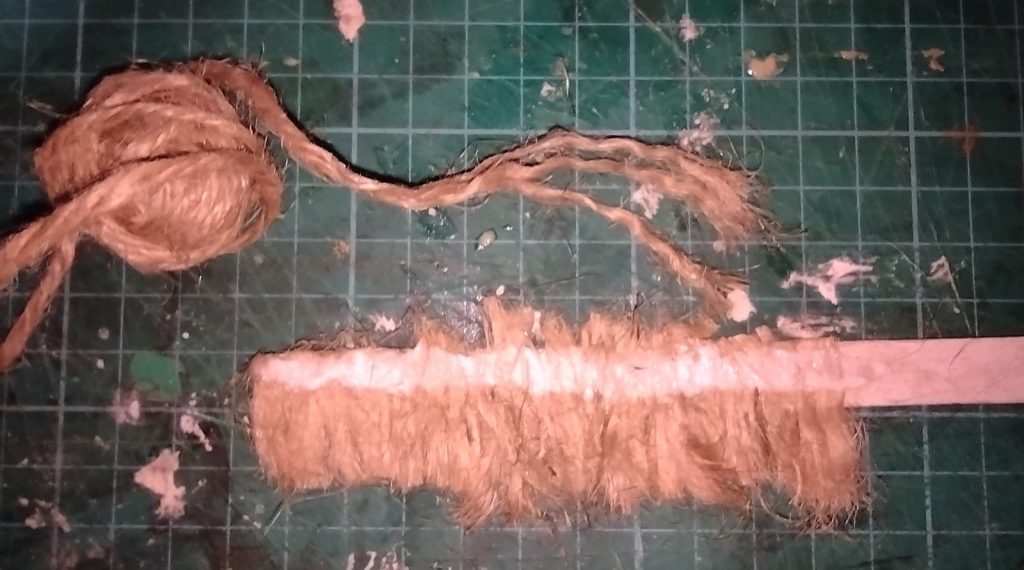
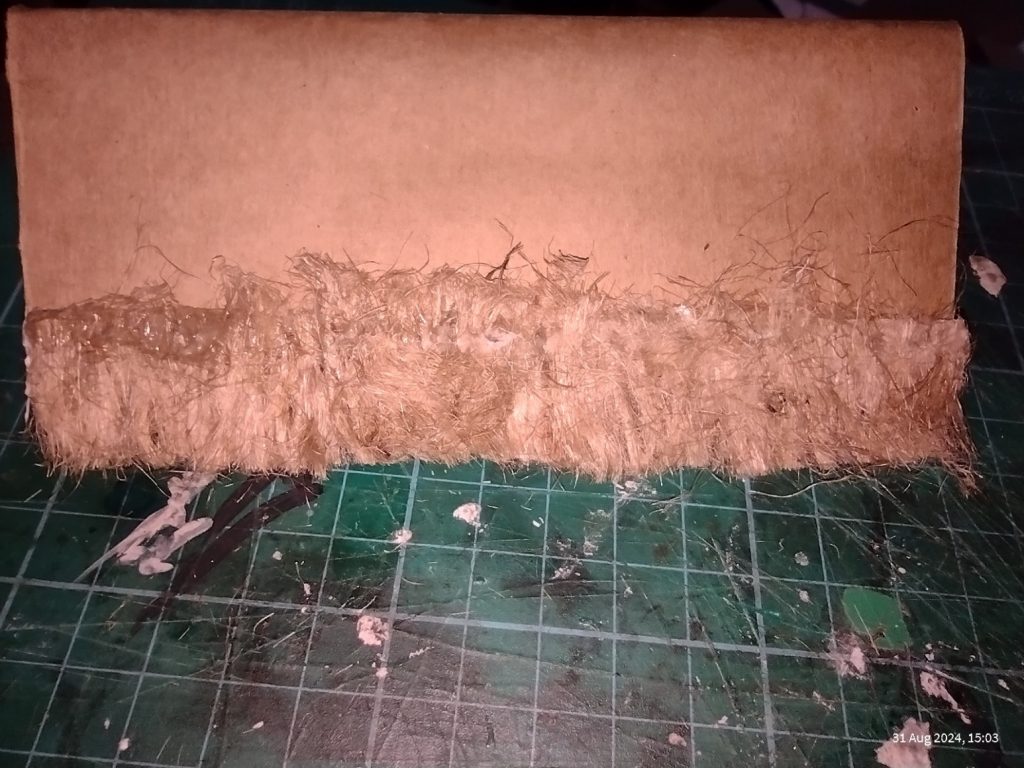
The twine is unravelled and then glued to strips of cardboard with more wood glue. You want the cardboard strips to be about half the length of thatch.
Starting with the bottom most part of the roof the thatch strips are added. You want the thatch to extend below the roof a little.
This part of the build is messy and time consuming, but sort of satisfying.
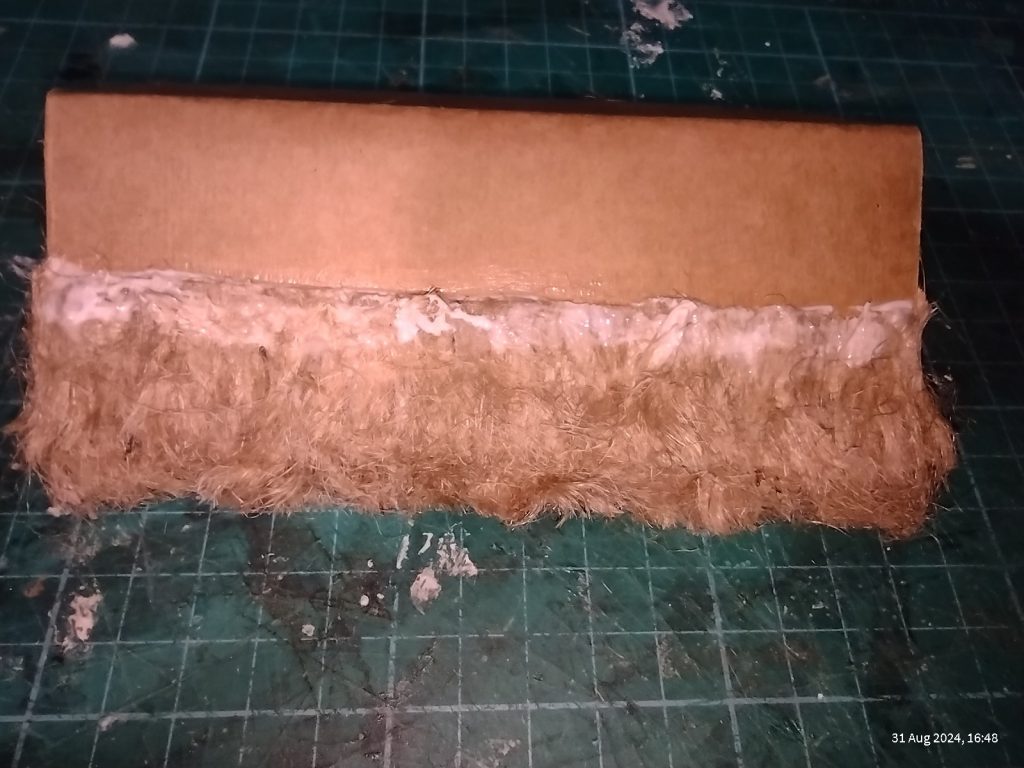
More strips are added until the roof is covered. The last strip is twice the width of the others so that it can be folded to fit on the roofs peak.
For the ends of the roof I just dabbed on some glue and added small bunches of twine to cover the corrugations.
It was also about this point that I found out about plumbers hemp from another video about making model thatch roofs from LNR Models

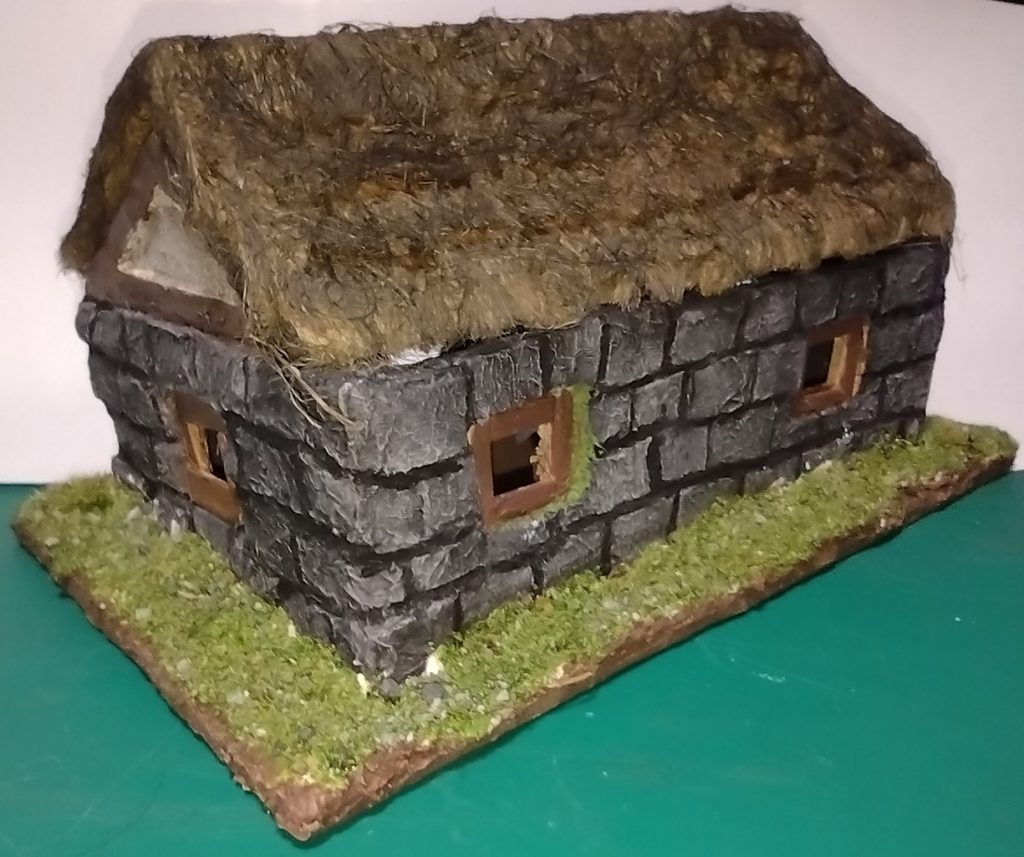
And that was more or less it. I gave the thatch a brush over with some black acrylic ink to age it and added some of my basing mix, a melange of Games workshop static grass, Geek Gaming Scenics Foam scatter – Mid green I think, Some old GW gravel, ‘play pit’ sand and some tarragon.
Overall I am quite pleased with the result. The thing I would change for the next time I use this method, is the size of the bricks and to use cardboard with smaller corrugations as the cardboard I used had quiet large ones and this made some of the bricks a little weak.
What do you think? Is this something you would try for your own gaming table? Do you prefer xps foam for terrain building? Let me know in the comments.
Leave a Reply