Month: August 2024

Zombie Kit Bash For Silver Bayonet

This post is a bit out of sequence as I haven’t finished writing my review of Silver Bayonet. This was a fairly quick and basic kit bash but I am very pleased with the result.

The Zombie Head

First I took a head from the Victrix French Napoleonic Infantry 1807 – 1812 box and cut away the majority of the face. Then I took a skull from the Citadel Skulls box, a worthwhile purchase that is incredibly useful.
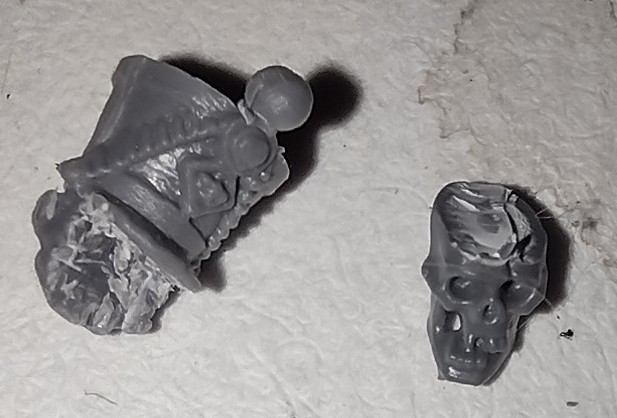
miniature french infantry head and citadel skull cut to fit together

It took a couple of tries to get them to fit together well and it pays to be cautious with the removal of plastic, a little at a time.
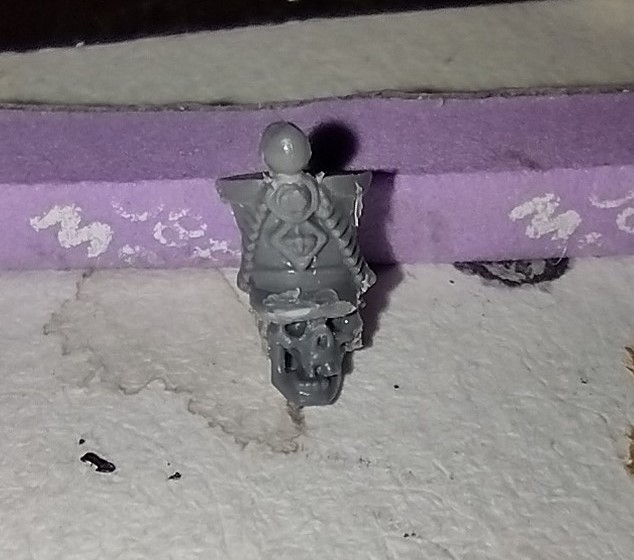
French infantry shako with skull face miniature

Next I added the head to a body and gouged some rips in the trousers, first making a shallow cut and then using the tip of the scalpel blade to lever the plastic out a little, then cutting some nicks into the edge of the ‘rip’. I also added some more ‘rips’ to the waistcoat. I added a right arm that had an open hand and for the left arm cut away a rifle that was held in the hand. The bayonet from the rifle I cut off and stuck in the neck under the skull. The left arm was crooked so I cut in at the elbow joint and opened it up, using the rifle to partly fill in and support the gap.
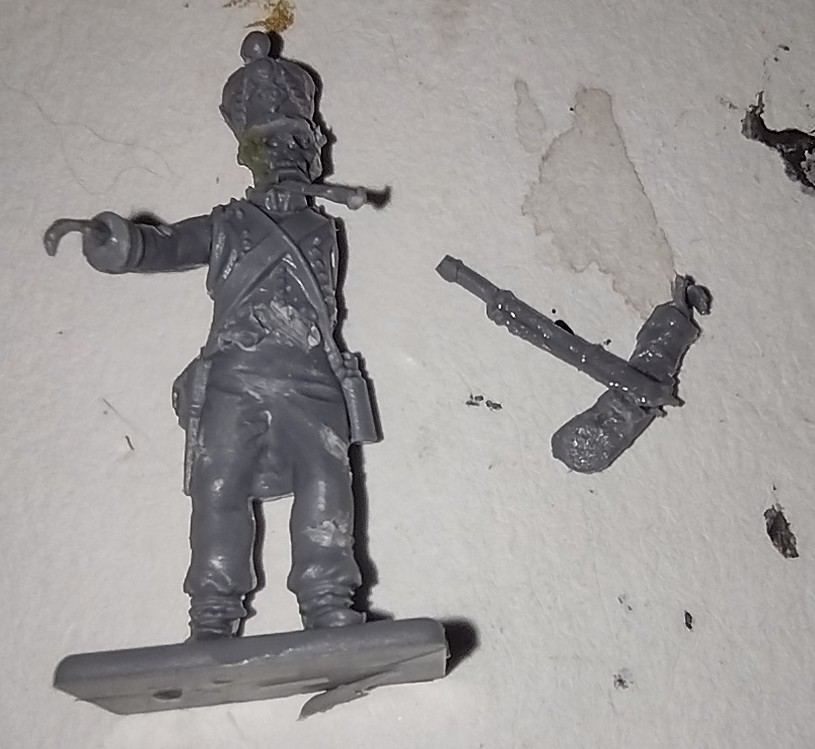
I then trimmed off the excess bits of rifle and used some sprue goo to smooth out the join in the arm. I also used some Green Stuff World Green Putty – Acrylic Modelling Filler to tidy up the join between the skull and infantry head. I prefer this putty for gap filling and small jobs. I’ve not had much luck with liquid green stuff from GW as the pots dry out really quickly and I end up throwing away about 90% of the pot.
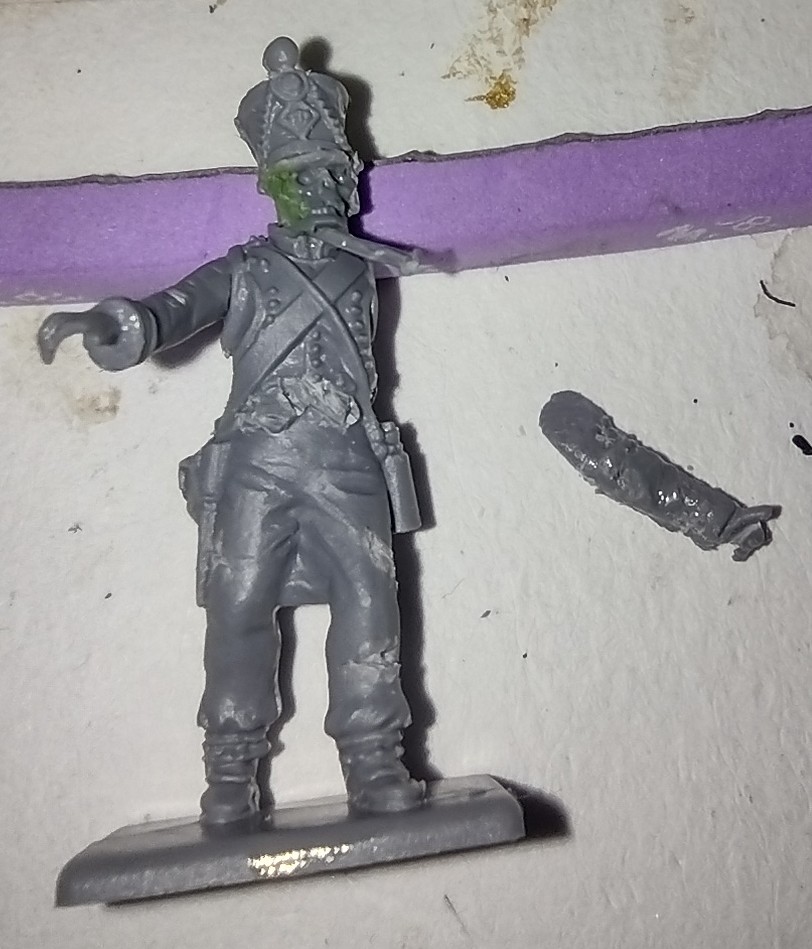
When the sprue goo had set I attached the arm and when the glue had set primed the mini and added a thinned down black wash. I then added a base and my go to basing mix of sand, all purpose filler (known as spackle in the US) and basing gravel. I also cut the right foot from the base and give it a twist to look like the classic zombie foot drag inspired by Peachy’s The Silver Bayonet review which has an excellent kitbash idea for making some zombies similar to this (round about the 23:49 mark).
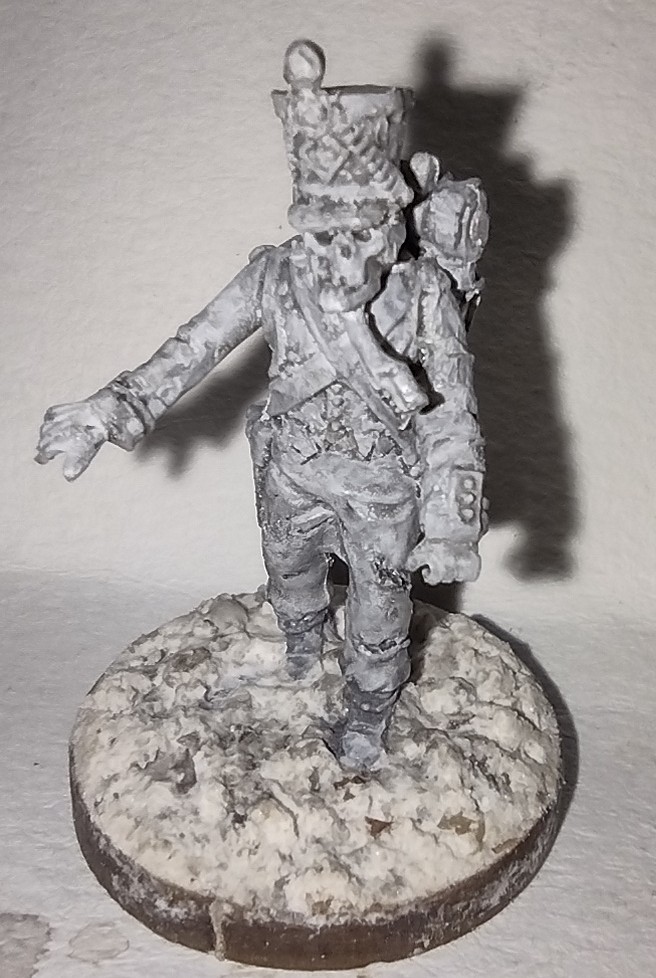
Finished miniature of a zombie Napoleonic french infantryman

With all that dried I gave the mini a final drybrush of grey all over then a zenithal white dry brush before painting with Army Painter Speed Paint 2.0. Then an all over wash with a mixture of Two Thin Coats Necrosis Green and black Vallejo Game Wash Dipping formula, which I think has been discontinued but you may be able to find it. I bought it as it was a big 200ml pot for a reasonable price. I go through so much black wash that buying in the small bottles is expensive. Then added my basing mix; Games workshop static grass, Geek Gaming Scenics Foam scatter – Mid green I think, Some old GW gravel, sand (I bought a bag of ‘play pit’ sand years ago for topping off cactus pots – more sand than I will ever possible use) and some tarragon, it was Greig Johnson in one of his marvellous make videos who mentioned using dried herbs and I have had a jar of tarragon for possibly over 25 years and I don’t like tarragon for some reason. It won’t win a Golden Demon but I hope that if there was a ‘Manky Demon Award’ that I’d at least get into the second round. Looking at it now I might add a bit of gloss varnish in places on the muddy bits of the base to make it look sticky.
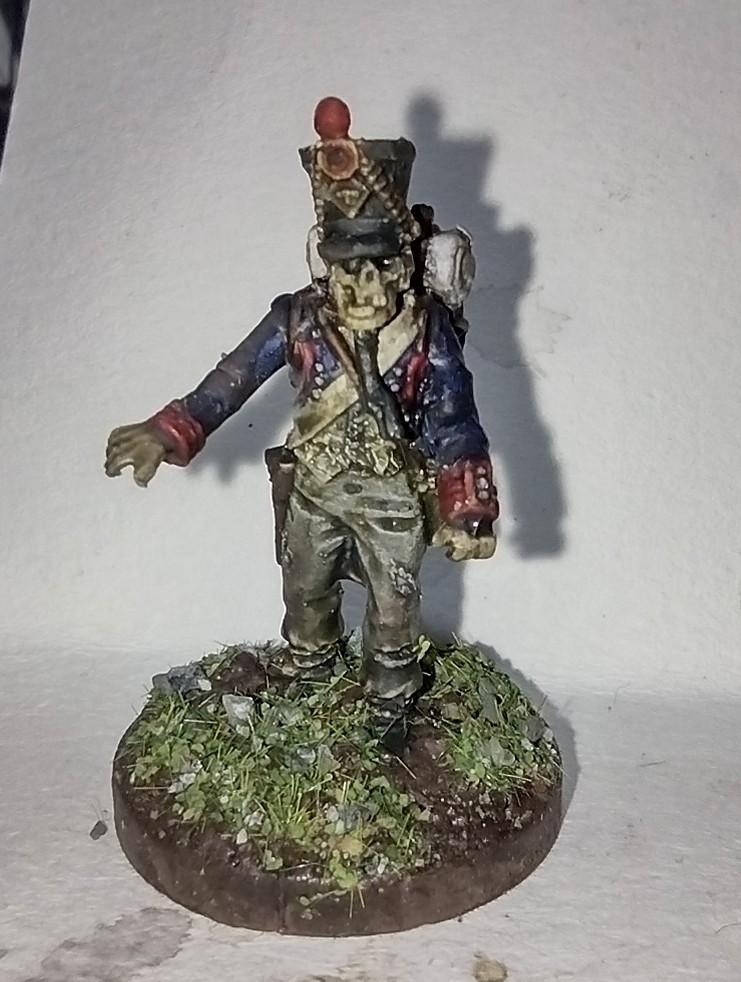
Napoleonic French zombie miniature

Miniature Painting: Glazing – driving me crazy!

(or Miniature painting: the awful truth of glazing)

One of my weak areas with miniature painting is getting the smooth transitions between shade, mid-tone and highlight.

I started painting miniatures back in the 80’s. My first attempts were awful. I had a set of AD&D Grenadier miniatures Halflings and left over enamel paints from painting model aeroplanes. So the results of some very garishly painted halflings with just basic flat colour. It wasn’t until a few years later when I started buying Citadel Miniatures and reading White Dwarf that I developed a better style of painting which essentially was prime, base coat and dry brushed highlights. This changed little apart from the addition of adding washes when Citadel/Games Workshop released their first line of acrylic inks.

Over the years I’ve tried to blend paint on the miniature with a small amount of success but it was only a couple of years ago when I picked up the miniature painting hobby again after a long break that I started looking online for painting guides.

The beginner painter of today has such a huge resource of tutorials out there on the internet which is incredible.

One technique that people use to smooth the transition between shade, mid tone and highlight is glazing.

With glazing the basic idea is to paint the mini with shade, mid tone and highlight and then thin the mid tone so that it has less opacity and paint layers of this over the top. This has the effect of evening out transition.

A practical demonstration

I haven’t had a lot of luck getting it to work so I thought of a little experiment that might give me a clue of where I was going wrong.

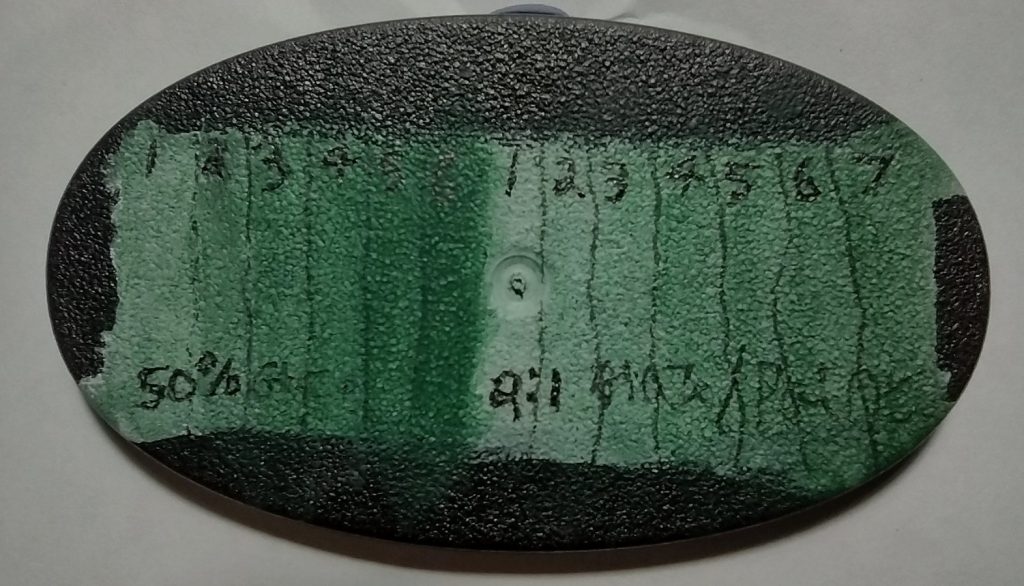
I painted a block of primer onto a spare miniature base divided up the base and painted layers progressively over the primer.

The first section I went with a 50/50 mix of paint and Vallejo glaze medium as advised by the bottle. Some people are champions of dilution with water but I wanted to use the glaze medium.

Then I repeated the process with a 2:1 glaze medium to paint mix on the other side of the miniature base to see how a greater dilution would look.

The results

a  miniature base with successive layers of thinned paint

This rather inelegantly does shows how the process works, and unsurprisingly that you need far more layers with the greater dilution. It also gives me a bit of a hint as to how many layers of glaze are needed.

I think that that was where I was going wrong, being far to impatient and expecting to see a big difference with two or three layers of glaze.

I also did a similar test using Monument Hobbies Newsh to see how that would work and it was more or less the same although Newsh is a little more viscous than the glaze medium.

The big drawback is the time you need to wait for the layer of glaze to dry before adding the next layer, the glaze/paint mix does stay useable on the palette for a fairly long time but still is going to be drying out as you are waiting for the layers to dry. You can use a wet palette, but I find that the drawback of wet palettes is that they dilute the paint and taking the control over the dilution out of your hands.

The second test

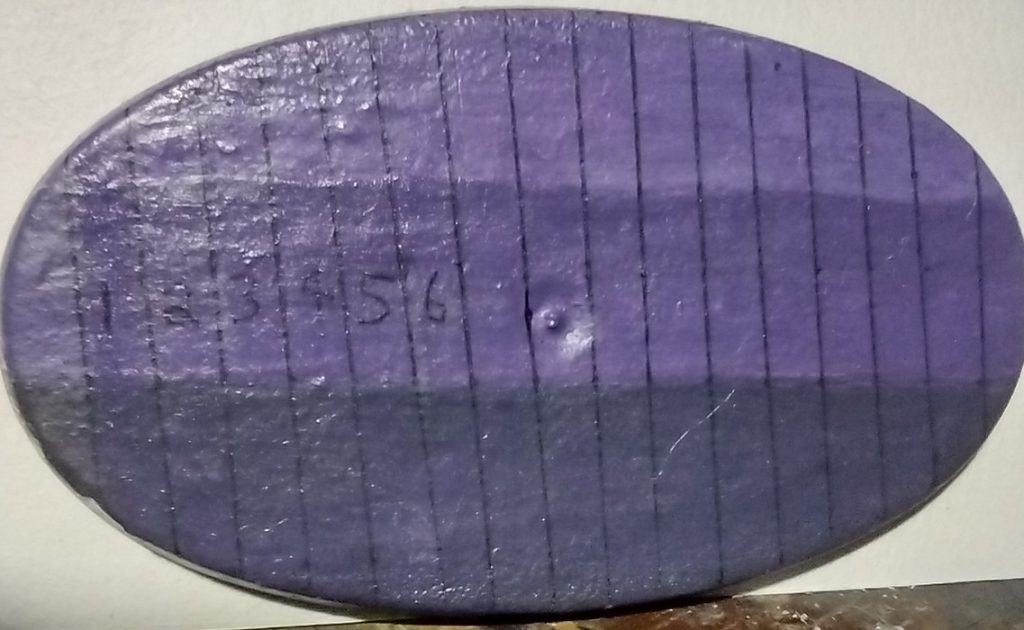
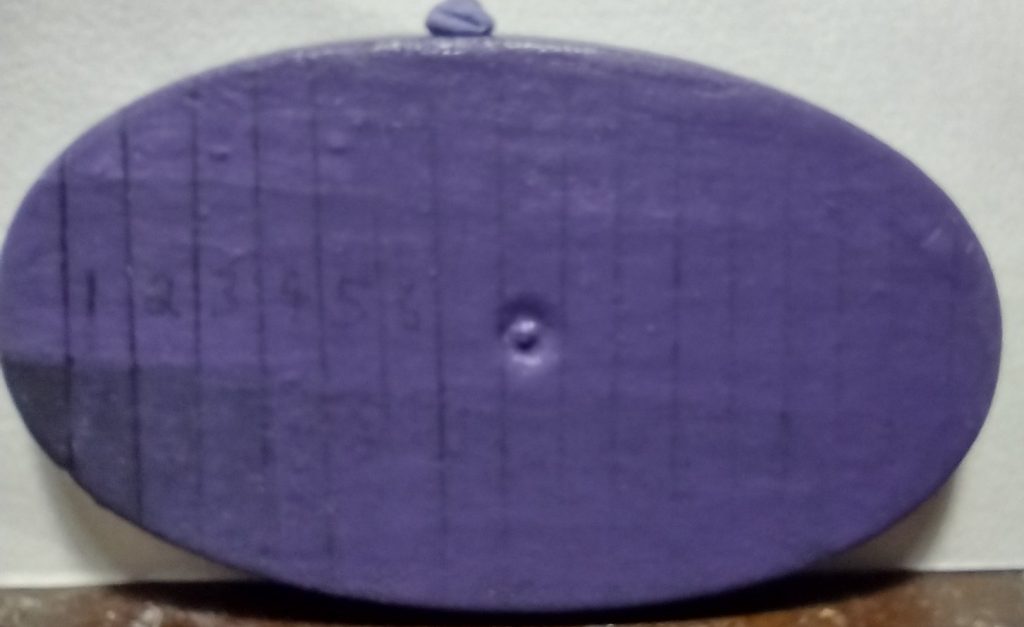
The above example is all well and good but what I’m aiming to achieve is a smoother transition. So I set up another spare miniature base with a shade tone (in this case the mid tone with a little black), a mid tone Army Painter Alien purple (because purple is the best colour and you can make all colours from purple*), a highlight (mid tone with a little white).

This was taken after one layer of glaze (Mid tone and glaze medium 50/50) had been added.

Bit of a blurry photo but I think you can see that it wasn’t a total success. All that I seemed to be achieving was making the whole strip the same colour as the mid tone, which is I suppose inevitable given the technique.

I went online and watched some more tutorials and I think where I was going wrong here was firstly, the shade to mid-tone, mid-tone to highlight jumps were too large. Also, and I don’t know where I saw the advice to use just one glaze of the mid-tone for both the transitions, you probably need to use a separate glaze for each transition.

Check back for part 2 of this series “Miniature painting: the awful truth of glazing”.

Some of good tutorials on glazing (there are hundreds though and you really are spoiled for choice).

Lyla Melv – The mini witch – Layering and Glazing made Easy

JuanHildago Miniatures – The GLAZING TRICK eBay pro-painters don’t want you to know about!

Vince Ventruella – Ultimate Guide to Glazing – HC 391

*Ok that isn’t true but I feel that purple is such a great colour that it should be true!